
Use and Care Guide
Push the button and hold it for at least five seconds. The LCD will illuminate and briefly show
the word “CAMERA” on the left and a battery icon on the right (both in green), superimposed on
video being captured in real time by the camera at the end of the probe.
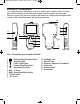
Use the thumbwheel on the left side of the console (Fig. 1, Callout 12) to adjust the intensity of
the camera’s lighting. In a brightly lit room, moving the thumbwheel has a big effect on the
brightness of the LEDs at the tip of the probe, but a much smaller effect on the brightness of
video on the screen. The on-screen impact of changing brightness is more pronounced in dark
environments.
To turn off the H16, push the button and hold it for at least five seconds.
It will take several hours to fully charge the H16’s Lithium-ion battery the first time. You cannot
replace the battery, which can only be replaced by General-authorized service personnel.
Do not open the case in an attempt to change the battery yourself. Doing so creates a
potentially fatal electrical hazard (and voids the warranty as well) with the AC adapter plugged in.
With proper care (charging the battery often, and never allowing it to completely discharge), you
can expect the H16’s battery to last four or five years. A fully charged battery should power at
least four hours of operation.
INSERT SD CARD
This step enables the H16 to store video clips and photos. Remove the supplied 2GB SD memory
card from its packaging. Discard the packaging, but save the plastic storage case.
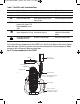
Push the SD card into the socket on the right side of the console (Fig. 1, Callout 8). Be sure the
card’s gold contacts are facing front and enter the socket first. Push in the card until you feel it
spring back and you hear a click.
To remove the card later, push it in gently until you hear a click and the card pops out far enough
for your fingers to grab.
OPERATING INSTRUCTIONS – H16
VIEWING LIVE VIDEO ON THE CONSOLE
While the battery charges, General recommends becoming familiar with the H16’s controls,
indicators and menu options before taking the unit out into the field. The H16 operates the same
way whether powered by its battery or the AC adapter.
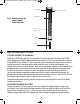
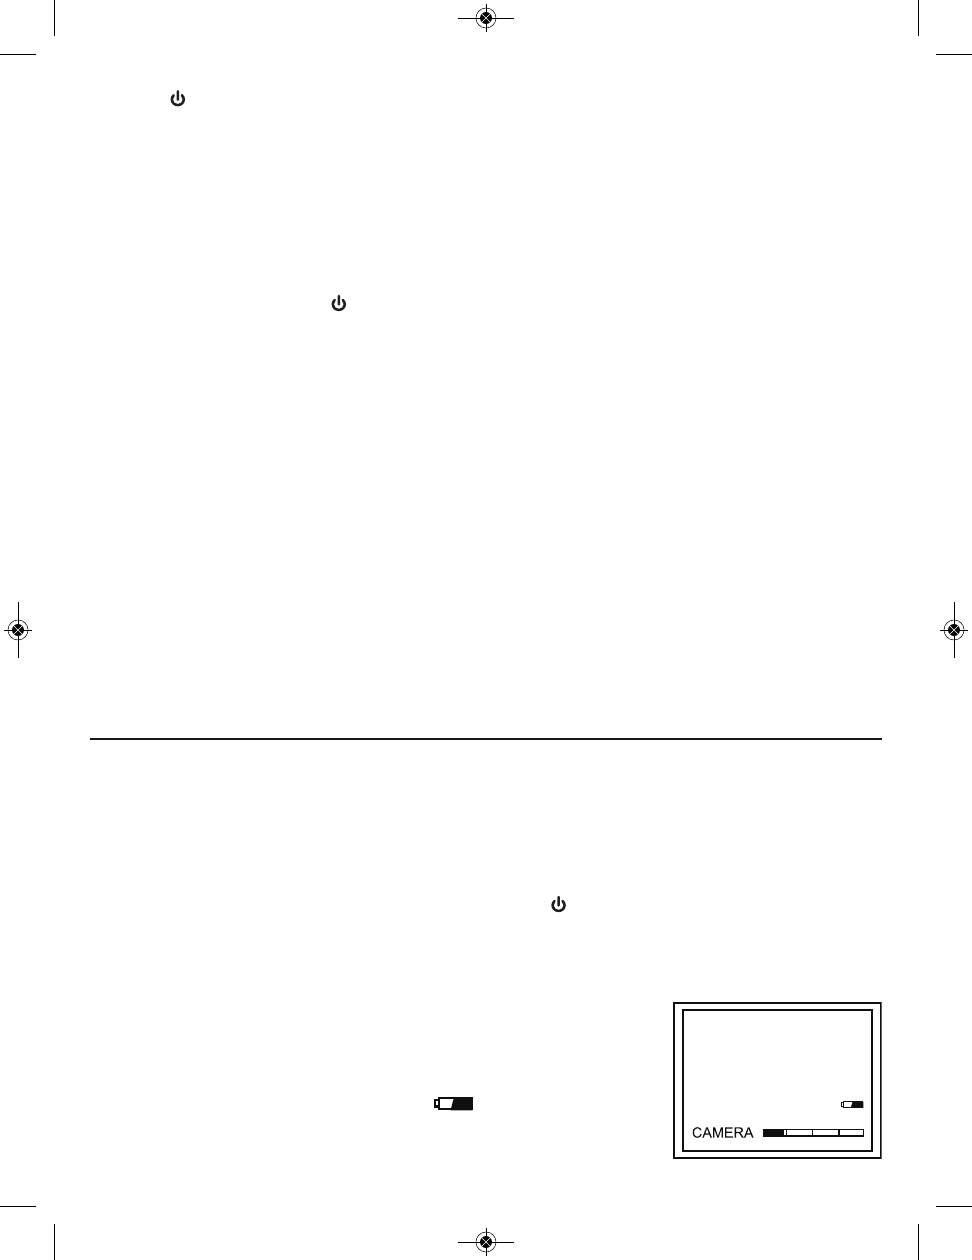
To begin, power off the unit by pressing and holding the button. Then press and hold the
button again to power the console back on. Each time the console is powered on, the screen
shown below will appear briefly. The text, bars and battery icon will appear in green,
superimposed on live video captured by the camera probe. Together, the number of bars and the
color of the icon represent the H16’s two “vital signs”—battery
charge and available memory capacity.
The number of filled-in bars at the bottom of the screen reflects the
amount of data currently stored on the SD card. A full card would
produce four green bars. The greener the icon above the bars,
the higher the current level of battery charge. A completely green
icon would indicate a fully charged battery.
9
DPS16-Manual-FINAL_040312_awb 4/3/12 11:41 AM Page 9