GE Appliances Room Air Conditioners Owner’s Manual & Installation Instructions AG_05 – 5,200 BTU models AG_06 – 6,000 BTU models www.geappliances.com 3828A30036N Pub. No.
Safety Instructions Operating Instructions Troubleshooting Tips Installation Instructions Safety Precautions . . . . . . . . . . . .3 How to Connect Electricity . . . . . .3 Use of Extension Cords . . . . . . . . .4 Use of Adapter Plugs . . . . . . . . . .4 Operating Instructions Safety Information IMPORTANT! Fill out the Consumer Product Registration Card. Two easy ways to register your appliance! ■ Through the internet at www.geappliances.
Safety Instructions IMPORTANT SAFETY INFORMATION. READ ALL INSTRUCTIONS BEFORE USING. WARNING! For your safety, the information in this manual must be followed to minimize the risk of fire, electric shock or personal injury. SAFETY PRECAUTIONS ■ This air conditioner must be properly installed in accordance with the Installation Instructions before it is used. ■ Never unplug your air conditioner by pulling on the power cord. Always grip plug firmly and pull straight out from the receptacle.
WARNING! USE OF EXTENSION CORDS – 115-Volt models only Because of potential safety hazards under certain conditions, we strongly recommend against the use of an extension cord. However, if you must use an extension cord, it is absolutely necessary that it be a UL-listed, 14 gauge, 3-wire grounding type appliance extension cord having a grounding type plug and outlet and that the electrical rating of the cord be 15 amperes (minimum) and 125 volts.
Safety Instructions About the controls on the air conditioner. Features and appearance will vary. OFF OFF HI FAN HI COOL LO FAN MED COOL HI FAN HI COOL LO FAN LO COOL Operating Instructions LO COOL MODE Your model will have one of the above type controls. 3 4 4 3 2 5 6 5 2 6 1 Installation Instructions 1 7 8 TEMP Your model will have one of the above type controls. Controls Temp Control HI COOL , MED COOL and LO COOL provide cooling with different fan speeds.
Safety Instructions Additional controls and important information. Air Direction Fingertip pressure on the louvers lets you control the air direction left, right, straight ahead or any combination of these directions. Care and cleaning of the air conditioner. Air Filter The air filter behind the front grille should be checked and cleaned at least every 30 days or more often if necessary. Installation Instructions Operating Instructions About the controls on the air conditioner.
Safety Instructions Front Grille and Case Turn the air conditioner off and remove the plug from the wall outlet before cleaning. C Lift the top of the grille up and off to release from the tabs. To clean, use water and a mild detergent. Do not use bleach or abrasives. To remove the front grille: Operating Instructions A Remove the knobs. Then remove the screw beneath the bottom knob. Press in on the lower left side of the case and pull the grille forward.
Read these instructions completely and carefully. Before You Begin NOTE TO INSTALLER: Leave these instructions with the air conditioner after installation is completed. NOTE TO CONSUMER: Keep this Owner’s Manual and Installation Instructions for future use. Operating Instructions Safety Instructions Preparing to install the air conditioner. CAUTION: Do not, under any circumstances, cut or remove the third (ground) prong from the power cord.
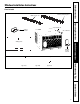
Safety Instructions Window Installation Instructions Parts Included Foam top window gasket Window sash seal Operating Instructions Top mounting rail Support bracket Air conditioner Sliding panels Installation Instructions Window locking bracket Type B (4) Troubleshooting Tips Type A (2) Type C (9) Customer Service 9
Safety Instructions Window Installation Instructions Read completely, then follow step-by-step. 1 Window Requirements ■ These instructions are for a standard doublehung window. You will need to modify them for other types of windows. ■ The air conditioner can be installed without the Installation Instructions Operating Instructions sliding panels if needed to fit in a narrow window. See the window opening dimensions to the right. 13″ min.
A Cut the window sash seal to the proper length. Peel off the backing and attach the seal to the underside of the window sash. B Insert the sliding panels into the guides of the air conditioner and attach them to the case with 8 type C screws, 4 on each side. Operating Instructions Sash Seal Use type C screws. Install the Support Bracket A Open the window and mark the center of the sill. B Center the support bracket, on the mark on the sill, against the stool.
5 Operating Instructions Safety Instructions Window Installation Instructions Install the Air Conditioner in the Window A Center the air conditioner in the window with the bottom mounting rail between the window stool and the bracket. Top mounting rail B Type B screws Window Close the window. Make sure the window sash is behind the top mounting rail of the air conditioner. A 1/4″ slant from the front of the case to the rear is necessary. Use a level to determine the slant.
Safety Instructions 6 Install the Window Gasket and the Locking Bracket B Stuff the foam between the glass and the window to prevent air and insects from getting into the room. C Seal any air leaks around the air conditioner and the window with gum-type sealer. D Attach the window locking bracket with a type C screw. Installation Instructions Cut the foam top window gasket to the window width.
Safety Instructions Operating Instructions Troubleshooting Tips Save time and money! Review the chart below first and you may not need to call for service. Problem Possible Causes What To Do Air conditioner does not start The air conditioner is unplugged. • Make sure the air conditioner plug is pushed completely into the outlet. The fuse is blown/circuit breaker is tripped. • Check the house fuse/circuit breaker box and replace the fuse or reset the breaker. Power failure.
Safety Instructions Notes.
Customer Service Troubleshooting Tips Installation Instructions Operating Instructions Safety Instructions Notes.
GE Service Protection Plus™ GE, a name recognized worldwide for quality and dependability, offers you Service Protection Plus ™—comprehensive protection on all your appliances— No Matter What Brand! Benefits Include: • Backed by GE • All brands covered • Unlimited service calls • All parts and labor costs included • No out-of-pocket expenses • No hidden deductibles • One 800 number to call We’ll Cover Any Appliance. Anywhere. Anytime.
Consumer Product Ownership Registration Dear Customer: Thank you for purchasing our product and thank you for placing your confidence in us. We are proud to have you as a customer! Follow these three steps to protect your new appliance investment: 1 2 3 Complete and mail your Consumer Product Ownership Registration today. Have the peace of mind of knowing we can contact you in the unlikely event of a safety modification. After mailing the registration below, store this document in a safe place.
Safety Instructions Air Conditioner Warranty All warranty service provided by our Factory Service Centers, or an authorized Customer Care® technician. For service, call 800-GE-CARES. GE Will Replace: One Year From the date of the original purchase Any part of the air conditioner which fails due to a defect in materials or workmanship. During this full one-year warranty, GE will also provide, free of charge, all labor and in-home service to replace the defective part.
Safety Instructions Service Telephone Numbers. GE Answer Center® 800.626.2000 The GE Answer Center® is open 24 hours a day, 7 days a week. In-Home Repair Service 800-GE-CARES (800-432-2737) Operating Instructions Expert GE repair service is only a phone call away. Special Needs Service 800.626.2000 800-TDD-GEAC (800-833-4322) Installation Instructions GE offers, free of charge, a brochure to assist in planning a barrier-free kitchen for persons with limited mobility.