
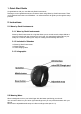
Quick Start Guide


2.7.2 Connecting with WaveFront
" With Wave turned on press the button on WaveFront. The light on WaveFront should stop "
" fading in and out and turn steady, indicating that Wave is connected to WaveFront.!
" To disconnect Wave either turn Wave off or press the button on WaveFront again.!
" If you do not press the button on WaveFront and only turn Wave off, Wave will " " "
" automatically connect to WaveFront when turned on again.!
2.7.3 Buttons
" The 'Up Button' enters and exits Edit Mode.!
" The 'Middle Button' activates and deactivates Wave.!
" The 'Down Button' acts as a gate for the movements.!
2.7.4 Movements
" Tilt - use vertical orientation to control CV outputs.!
" Pan - use horizontal orientation to control CV outputs.!
" Roll - use sideways orientation to control CV outputs.!
2.7.5 Gestures
" Vibrato - move Wave quickly from side to side to control CV outputs.!
2.7.6 Triggers
" Tap - tap on a surface to trigger sounds.!
" Click - press the 'Down Button' to gate the movements or sounds.!
2.7.8 Edit Mode
" When using WaveFront, Edit Mode allows you to adjust the range of movements (Tilt, Pan, "
" Roll) and their direction.!
" The first screen you see indicates the battery status of Wave.!
" Move between settings by using the 'Up and Down Button'.!
" To change the range of a movement hold down the middle button. When the icon starts ""
" blinking trace out the desired range of the movement in the air. When you are done, " "
" release the 'Middle Button'.!
" To change the direction of a movement press the 'Middle Button'. The arrow icon should "
" change.!
2.8 Charging
Wave comes with a USB cable. Simply plug the micro USB end into Wave and the other " "
end into a power source. Power source is not provided.!
2.9 FAQ
For answers to frequently asked questions or to get in contact with Genki Instruments ehf " "
go to www.genkiinstruments.com!