
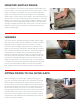
Installation Guide
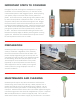

When using a circular or hand saw, it is best to
measure and mark on the at (back) side of the
panel. Use a level or straight edge, pencil or
marker, and a tape measure to mark the cut line.
If you plan to use a table saw, it would be beer
to mark a point on the panel surface and use the
at side down on the table. All exposed cut edges
should be sealed with GenStone Color Matched
Touch-Up Paint.
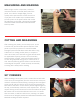
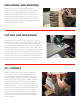
Aer marking your panels, you are ready to cut. To use
a circular saw, you will need to protect the face of the
panel as you hold it in place on a smooth at table.
Placing the panel at side down works best when using
a table saw. For cung smaller pieces, a compound
miter saw is best, but a hand saw or jigsaw will also work.
For applicaons requiring cut outs such as hose bibs,
electrical plates, or lights, mark from the back and then
cut out using a keyhole saw, jig saw, or a hole saw on a
drill. The manufacturing process leaves minor blemishes
at the edge of the panels. These are easily corrected by
trimming with a ulity knife or sanding.
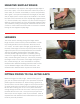
When installing a corner piece, mark a vercal line on both sides
of the corner far enough away from the actual corner so they are
visible for reference while test ng. Starng at the most logical
corner, test t and trim the rst corner for the best overall t on
both sides of the bend. Corners have a posive edge that goes to
the top, and will always need some minor adjustments. This may
require shaving minimal amounts from the back side of the panel.
Be cauous not to reduce the thickness too much. For corners
that are not 90°, as well as inside corners, mitering is an opon.
These areas can be lightly sanded and sealed with GenStone Color
Matched Caulking and Touch-Up Paint.
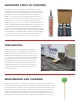
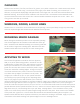
MEASURING AND MARKING
CUTTING AND MEASURING
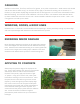
90° CORNERS