MH 7P Operating instructions psi bar 107140709 B (08.
1 2 3 psi bar 4 5 6 30 29 7 8 28 9 27 10 26 25 24 23 11 22 12 21 20 13 14 psi bar 15 16 17 18 19 2
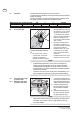
1 Symbols used to mark instructions WARNING & Safety instructions in these operating instructions which must be observed to prevent risks to persons are marked with this danger symbol. Before starting up your high- pressure washer for the first time, this safety instruction must be read through carefully. Save the instructions for later use. This symbol marks safety instructions related to connection of the machine to water mains. 2 Safety instructions.
dle, kickback forces are produced at the spraying device and when the spray lance is held at an angle, a torque is also created. The spray handle and spray lance must therefore be held firmly with both hands • Check that cleaning will not result in dangerous substances (e.g. asbestos, oil) being washed off the object to be cleaned and harming the environment • During use of high pressure cleaners, aerosols may be formed. Inhalation of aerosols can be hazardous to health.
restart after a few minutes when the thermal sensor has cooled. Unloader valve: Unacceptably high pressure is fed back without residual pressure via a bypass line into the intake line of the pump when the safety device is tripped. The unloader valve is set and sealed at the factory and must not be adjusted. Locking device on spray handle: The spray handle features a locking device. When the pawl is activated, the spray handle cannot be operated.
Contents EN 2 Description .......................................................................................................... 7 2.1 Purpose ....................................................................................................................... 7 2.2 Operating elements ..................................................................................................... 7 3 Before starting the cleaner .................................................................................
2 Description 2.1 Purpose EN This high-pressure cleaner has been designed for professional use. It can be used for cleaning agricultural and construction equipment, stables, vehicles, rusty surfaces, etc. The cleaner has not been approved for cleaning surfaces which comes into contact with food. Always use the cleaner as described in these operating instructions. Any other use may damage the cleaner or the surface to be cleaned or may result in severe injury to persons. 2.
EN 3 Before starting the cleaner 3.1 Transport and assembly 1. The safest way to lift the machine is to use a fork-lift truck The arrows in the illustration indicate the best places to position the fork. 2. It is also possible to lift the machine by hand from the pallet. Due to the weight this work should be done by at least three persons. CAUTION Do not hold the plastic tank to lift the machine as it could become detached from the frame.
EN 3.4 Install Crank handle for high pressure hose reel/cord reel 1. Pull cap of crank in arrow direction. 2. Align tabs on crank with slot in axle. 3. Put crank on axle of high pressure hose reel/cord reel. 4. Fix crank by pushing the cap. 3.5 Fill up detergent tanks Fill up detergent tanks (A) and (B) with concentrated detergent. A 3.6 B Fill up tank for AntiStone (Anti-Scale) AntiStone (Anti-Scale) prevents any deposits of scale and acts at the same time as a corrosion inhibitor.
EN 3.7 Machine flow L/h 1200 1200 3.8 The Antiscale dosing system is set by the factory. To adjust the water hardness we recommend that the inlet water is tested accordingly. Use the schematic to find the right dosage of No Scale/anti stone and water, and add the mixture to the antiscale tank.
EN 3.9.2 Machines without high pressure hose reel1) Connect the high pressure hose quick connector to the high pressure nipple located at right rear of machine above chemical tank. 3.10 Connecting the water supply 1. Attach quick connect adapter found with Owners Manual to the water supply hose. 2. Rinse the water supply hose briefly in order to prevent sand an other dirt particles entering into the machine. 3. Attach water supply hose with adapter to inlet quick connector. 4. Open water supply faucet.
EN 3.12 Electrical connection age to machines electrical components may occur. 23 0V 400V 400V 23 0V Some models have the ability to be used on either 230 Volt or a 440 Volt power supply. On these models confirm that the voltage selector switch is in the proper position to match the power supply. Otherwise dam• • 3.12.1 Extension cables Cable connections should be kept dry and off the ground. CAUTION Do not damage the mains power lead, e.g. by driving over it, pulling or crushing it.
4 Control / Operation 4.1 Operation EN Before starting up the cleaner each time, please check it carefully for any defects. Always check for sufficient levels of fuel, oil and AntiScale. Also check the high pressure hose and gun, the insulation of the electric cable should be faultless and without any cracks. NOTE To achieve a long life and avoid problems with dirt in the gun and lance, the coupling and nipple have to be kept clean. 4.2 4.2.
EN NOTE The cleaner switches off automatically twenty seconds after the spray gun has been closed. To start the cleaner again, squeeze the trigger and the machine will start automatically. 4.3.2 Steam operation over 100°C (212°F) safety control block all the way to the left (counterclockwise-direction). 3. Turn the main switch to position . 4. Select temperature (over 100°C (212°F)). 1. Open cabinet. 2.
EN 4.5 Using cleaning agents B A 2 1 1% 3% 5% ca. 40 3 1% 3% 5% ca. 1. Select desired detergent (A) or (B) and amount by turning the knob to desired percentage. 2. Spray the object to be • • • • 1) Options / model variants Original instructions cleaned. 3. Allow the cleaning agent to work. 4. Turn off the cleaning agent and spray until clean water is comming out of the lance. 5. Rinse off the object. The percentage shown in the illustration are only approximate data.
EN 5 Applications and methods 5.1 Techniques Efficient high pressure cleaning is achieved by following a few guidelines, combined with your own personal experience of specific cleaning tasks. Accessories and detergents, when correctly chosen, can increase the efficiency of your pressure washer. Here is some basic information about cleaning. 5.1.1 Soaking Encrusted or thick layers of dirt can be loosened or softened up by a period of soaking.
EN 5.2 5.2.1 Some typical cleaning tasks Agriculture Task Stables Pig Pens, Sties Cleaning of walls, floors and equipment Disinfectant Machinery Tractors ploughs etc. 5.2.2 Accessories Method Chemical Foam Injec- 1. Soaking – apply foam to all surfaces (bottom to tors top) and wait for approx. 30 minutes. Foam lance 2. Remove the dirt from surfaces with the high presPowerspeed lance sure lance or chosen accessory. Again, clean from Floor Cleaner bottom to top on vertical surfaces. 3.
EN 5.2.3 Buildings and Equipment Task General surfaces Accessories Foam injectors, foam lances, standard lances Metallic equipment Curved lances Tank cleaning head Detergents Intensive J25 Multi Combi Active Alkafoam Rusted or damages surfaces prior to treatment Method 1. Apply thick foam over the surfaces to be cleaned. Apply on dry surfaces. Apply from top to bottom on vertical surfaces. Let the foam act for up to 30 minutes for the optimal effect. 2.
6 Transport and storage 6.1 Transport EN For safe transport in and on vechicles we recommend to prevent the equipment from sliding and tilting by fixing it with belts. Transport: • Do not tilt the machine. • Run the machine to empty the break tank and de pressurise the high pressure hose by squeezing the trigger. For transport and storage at temperatures around or below 0°C, anti-freeze liquid should be drawn into the pump beforehand. 6.2 Switching off the cleaner 6.
EN 6.4 Rolling up the electrical cord and storing accessories Risk of tripping To prevent accidents, always carefully roll up the power cord. Machines with hose and cord reel: 1. Wind up the power cord as illustrated with the plug located in the center of the cord reel. 2. Wind up the high pressure hose as illustrated. 3. Place the spray lance into the spray lance storage. 6.
7 Maintenance 7.1 Maintenance guidelines EN To avoid hazards, damaged parts must be replaced either by your GERNI dealer, their customer service or a similarly qualified person. Ensure that the machine is regularly serviced by authorised GERNI dealers in accordance with the maintenance plan. Failure to do so will invalidate the warranty. The cleaner must be disconnected from its power source during cleaning of the machine, maintenance, when replacing parts or converting the machine to another function.
EN 7.3.3 Checking the pump oil quality 1. Check color of pump oil. If the oil has a grey or white shade, change the oil. 2. Top off oil level with fresh oil if necessary. Oil type see chapter 9.4 Technical Data. 7.3.4 Changing the pump oil 1. Unscrew the oil drain plug and drain oil into a suitable container. 2. Check that the drain plug gasket is in place and reinstall drain plug. 3. Fill pump with proper grade and amount of oil. Oil grade and capacity see chapter ‘9.4 Technical Data’. 7.3.
8 Troubleshooting 8.1 EN Indications on Display Indication on display Cause Remedy FLF > Flow sensor fault FLO > Water supply turned off or inadequate supply to machine • Required volume flow and pressure see chapter 9.
EN 8.2 Indication lights on control panel Indication light Remedy flashing see FLO • see FLO ON > Low fuel level • > • > Low AntiStone (Anti-Scale) level Service interval: Service due in 20 hours Service interval expired Fill fuel tank Cold water operation possible Fill AntiStone (Anti-Scale) tank > Pump oil low • > Power cord not properly con- • nected to power supply flashing ON ON 8.
9 Further information 9.1 Recycling the cleaner EN Make the old cleaner unusable. Unplug the cleaner and cut the power cord. Do not discard of electrical appliances with household waste. As specified in European Directive 2012/19/EU on old electrical and electronic appliances, used electrical goods must be collected separately and recycled ecologically. Contact your local authorities or your nearest dealer for further information. 9.
EN 9.4 Technical data MH 7P 7P-175/1260 Voltage 200 / 3~ / 50Hz Voltage 200 / 3~ / 60Hz Voltage 220V / 1~ / 60Hz Voltage 220/440V / 3~ / 60Hz Voltage 400V / 3~ / 50Hz AU Voltage 440/220 / 3~ / 60Hz Fuse (slow) A 16 Power rating kW 8.3 Working pressure bar/MPa 175/17.5 Permissible pressure bar/MPa 250/25 Volume flow max. l/h 1260 Volume flow QIEC l/h 1170 T max o C 90 T max steam o C 140 Permissable temperature o C 90-140 Max. water inlet temperature o C 40 Max.
AUSTRALIA: Nilfisk Pty LTd Unit 1/13 Bessemer Street Blacktown NSW 2148 Phone: 1300 556 710 E-mail: sales@gerni.com.