A140 USER MANUAL Rugged Mobile Computing Solutions
December 2016 TRADEMARKS The Bluetooth® word mark and logos are registered trademarks owned by Bluetooth SIG, Inc. All brand and product names are trademarks or registered trademarks of their respective companies. NOTE The information in this manual is subject to change without notice. For the latest version of the manual, please visit the Getac website at www.getac.com.
Table of Contents Chapter 1 Getting Started................................................................. 1 Getting the Tablet PC Running ................................................. 2 Unpacking .............................................................................. 2 Installing the Micro-SIM Card (Optional) and Battery Packs ....................................................................................... 2 Connecting to AC Power .......................................................
Chapter 3 Managing Power ............................................................ 33 AC Adapter ............................................................................... 34 Battery Pack .............................................................................. 35 Charging the Battery Pack .................................................. 35 Initializing the Battery Pack ................................................ 36 Checking the Battery Level ............................................
Chapter 7 Care and Maintenance ................................................... 63 Protecting the Tablet PC.......................................................... 64 Using an Anti-Virus Strategy............................................... 64 Using the Cable Lock ........................................................... 64 Taking Care of the Tablet PC .................................................. 65 Location Guidelines .............................................................
User Notification of Take-back Service................................... 94 ENERGY STAR 6.1 ..................................................................... 95 Battery Recycling ......................................................................
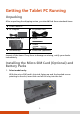
Chapter 1 Getting Started Congratulations on purchasing this rugged Tablet PC. This chapter first tells you step by step how to get the Tablet PC up and running. Then, you will find a section briefly introducing the external components of the Tablet PC.
Getting the Tablet PC Running Unpacking After unpacking the shipping carton, you should find these standard items: A140 Tablet PC AC adapter AC power cord Battery pack x 2 Stylus Tether Document(s) Driver disc (optional) Inspect all the items. If any item is damage or missing, notify your dealer immediately. Installing the Micro-SIM Card (Optional) and Battery Packs 1.
NOTE: To remove the SIM card, just push in the SIM card to pop-out and remove the card. 2. The Tablet PC has two battery compartments for two battery packs; each is installed in the same way. With the battery pack correctly oriented, attach its connector side to the battery compartment at an angle () and then press down the other side (). 3. Slide the battery latch toward the locked position ( ). CAUTION: Make sure the battery latch is correctly locked, not revealing the underneath red part.
Connecting to AC Power CAUTION: Use only the AC adapter included with your Tablet PC. Using other AC adapters may damage the Tablet PC. NOTE: The battery pack is shipped to you in power saving mode that protects it from charging/discharging. It will get out of the mode to be ready for use when you install the battery pack and connect AC power to the Tablet PC for the very first time. When the AC adapter is connected, it also charges the battery pack.
Using the Tether A tether is provided for attaching the stylus to your Tablet PC. 1. Insert one of the tether’s loop ends through the hole of the stylus (as indicated by below). Then, insert the other end through the first loop (as indicated by below) and pull it tight. 2. Insert the other loop end to the tether hole on the Tablet PC (as indicated by below). Then, insert the stylus end through the loop (as indicated by below) and pull it tight.
Turning On and Off the Tablet PC Turning On Press the power button ( ). The Windows operating system should start. NOTE: Tapping the screen during startup may invoke a pre-boot menu (unless the default settings have been changed). If the menu appears, simply select Continue. Turning Off When you finish a working session, you can stop the system by turning off the power or leaving it in Sleep or Hibernation mode: Do this... To... Windows 10 Power off Tap (Shutdown) down.
Taking a Look at the Tablet PC NOTE: Depending on the model you purchased, the appearance of your Tablet PC may not be exactly the same as those shown in this manual. CAUTION: You need to open the protective covers to access the connectors. When not using a connector, make sure to close the cover completely for water- , dust-, and fire-proof integrity. (Engage the locking mechanism if existing.
Ref Component Description - Kickstand: With the handle turned to one side, the Table PC can stand on the handle. Light sensor Senses the ambient light for automatic adjustments of the display backlight. Camera indicator (optional) Lights up when the camera lens beside it is in use. Camera lens (optional) Allows you to use the camera function. Slide the camera cover toward the right to use the camera; slide it toward the left for privacy protection.
Ref Component Description Power button Turns the power on or off. (The default “off” state is “Sleep mode.”) Plus button Increases the sound volume. Minus button Decreases the sound volume. Windows logo For Windows 10: button Opens or closes the Start menu. For Windows 7: Opens or closes the OSD Control Panel. ??? P1 button The default function is Camera or Trigger depending on your model. Camera For Windows 10: Starts the G-Camera application.
NOTE: The hardware buttons (except the power button) can be re-defined using G-Manager. The hardware buttons (except the power button) provide keyboard key functions on “POST/BIOS Setup/Non-ACPI” occasions. (See “Button Functions on Special Occasions” in Appendix A for information.) Rear Components Ref Component Description Hand grip (optional) Allows you to hold your Tablet PC securely while operating. Camera lens (optional) Allows you to use the camera function.
Ref Component Stylus holder Speaker Description Holds the stylus. NFC/RFID reader Reads data from NFC/RFID tags. (optional) Sends out sound and voice from your Tablet PC. Right-Side Components Slide up to open the protective cover. Ref Component Description USB 2.0 port Connects a USB device. RJ-45 connector (LAN2) Connects the LAN cable. Smart card Reader Accepts a smart card for additional security feature.
Ref Component Optional component Description Depending on the model, the component can be one of the following: None Rugged USB connector (x 1 or x 2) Connects a USB device that supports Fischer DBPU 7 pin connection. Fingerprint scanner Serves as the fingerprint verification, preventing unauthorized access to your Tablet PC. Left-Side Components Slide up to open the protective cover. Ref Component Description WLAN switch Switches the WLAN radio on or off.
Top Components Ref Component Description Stylus holder Holds the stylus. Barcode reader lens (optional) Scans and reads barcodes. Bottom Components Ref Component Description Kensington lock Locks the Tablet PC to a stationary object for security. Docking connector Connects to the docking station (available as an option). Antenna Passthrough (optional) Connects to the docking station for using external GPS /WWAN/WLAN antenna.
Chapter 2 Operating Your Tablet PC This chapter provides information about the use of the Tablet PC. If you are new to computers, reading this chapter will help you learn the operating basics. If you are already a computer user, you may choose to read only the parts containing information unique to your Tablet PC. CAUTION: Do not expose your skin to the Tablet PC when operating it in a very hot or cold environment. The Tablet PC can get uncomfortably warm when you use it in high temperatures.
Using the Touchscreen CAUTION: Do not use a sharp object such as a ballpoint pen or pencil on the touchscreen. Doing so may damage the touchscreen surface. Use the included stylus or your finger. NOTE: An optical film has been attached to the screen before shipment. The film is a consumable, which will be worn out by possible scratches. You can purchase a new one when replacement is required. Your Tablet PC has a capacitive touchscreen.
Equivalent Mouse Function Term/Action Tap and hold: Tap and hold until a popup menu appears. Right-click Drag: Hold the stylus (or finger) on the screen and drag across the screen until reaching your destination. Drag Using Multi-touch Gestures You can interact with your Tablet PC by placing two fingers on the screen. The movement of the fingers across the screen creates “gestures,” which send commands to the Tablet PC.
Gestures ( Actions = finger down; = finger up) Rotate or Move two fingers in opposing directions. -orUse one finger to pivot around another. Press and Tap Descriptions Use rotating to move a picture or other item on the screen in a circular direction (clockwise or counterclockwise). The gesture works in applications that support the specific gesture. Use press and tap to access the shortcut menu. Press on target and tap using a second finger.
Using the Handle as a Kickstand (Optional) For models having the handle, the handle can serve as a kickstand. Orient the Tablet PC in the reverse landscape manner and turn the handle to one side as shown below.
Using Network and Wireless Connections Using the LAN Your Tablet PC has two LAN modules so you can connect to two networks at the same time. To connect the network cable to the LAN module, connect one end of the LAN cable to the RJ-45 connector on the Tablet PC and the other end to the network hub. LAN1 LAN2 NOTE: LAN2 module implements DSM (Deep Slumber Mode) to save battery power. Power is supplied to the LAN module only when the LAN cable is connected.
Using the WLAN The WLAN (Wireless Local Area Network) module supports IEEE 802.11ac, compatible with 802.11a/b/g/n. NOTE: Do not block the antenna area. WLAN main antenna WLAN auxiliary antenna Turning On/Off the WLAN Radio Your Tablet PC has a physical switch for turning on/off the WLAN radio. To turn on the WLAN radio: 1. Make sure that the WLAN switch is at the ON (green) position. 2. If you have previously turned off the WLAN radio, use one of the below methods to turn it on.
To turn off the WLAN radio: You can turn off the WLAN radio the same way you turn it on. If you want to quickly turn off all wireless radio, simply switch on Airplane mode. You can control the Airplane mode using one of the below methods. Use the Airplane Mode button in the OSD Control Panel. For Windows 10: Tap mode. Settings Network & Internet Airplane Connecting to a WLAN Network 1. Make sure that the WLAN function is enabled (as described above). 2.
Using the Bluetooth Feature The Bluetooth technology allows short-range wireless communications between devices without requiring a cable connection. Data can be transmitted through walls, pockets and briefcases as long as two devices are within range. NOTE: Do not block the antenna area. Bluetooth main antenna Bluetooth auxiliary antenna Turning On/Off the Bluetooth Radio To turn on the Bluetooth radio: For Windows 10: Tap Settings Devices Bluetooth. Slide the Bluetooth switch to the On position.
To turn off the Bluetooth radio: You can turn off the Bluetooth radio the same way you turn it on. If you want to quickly turn off all wireless radio, simply switch on Airplane mode. You can control the Airplane mode using one of the below methods. Use the Airplane Mode button in the OSD Control Panel. For Windows 10: Tap mode. Settings Network & Internet Airplane Connecting to another Bluetooth Device 1. Make sure that the Bluetooth function is enabled (as described above). 2.
Using the WWAN Feature (Optional) A WWAN (Wireless Wide Area Network) uses mobile telecommunication cellular network technologies to transfer data. The WWAN module of your Tablet PC supports 3G and 4G LTE. NOTE: Your model only supports data transmission. Voice transmission is not supported. For instructions on installing the SIM card, see “Installing the SIM Card (Optional) and Battery Packs” in Chapter 1. Do not block the antenna area.
To turn off the WWAN radio: You can turn off the WWAN radio the same way you turn it on. If you want to quickly turn off all wireless radio, simply switch on Airplane mode. You can control the Airplane mode using one of the below methods. Use the Airplane Mode button in the OSD Control Panel. For Windows 10: Tap mode. Settings Network & Internet Airplane Setting up a WWAN Connection 1. Make sure that the SIM card is inserted and the WWAN function is enabled (as described above). 2.
4. Select Firmware and pull down the list of mobile network operators. 5. From the list, select the name that matches your operator and firmware. • For the US region: EM/MC7355 firmware is required. The supported operators include ATT, Bell, Roger, Sprint, Telus, and Verizon. If your operator is not one of them, select Generic_US_7355 in the list. • For the EMEA (Europe, the Middle East, and Africa) and APAC (Asia Pacific) regions: EM/MC7305 firmware is required.
Using the GPS Feature (Optional) GPS (Global Positioning System) technology allows you to pinpoint the geographic location of the computer and use the data for navigational and other purposes. NOTE: You need to install third-party software to take full advantage of the GPS feature. Do not block the antenna area. GPS antenna You can view GPS information by running the G-Manager program and selecting the GPS Status tab.
Using the Barcode Scanner (Optional) NOTE: For enhanced applications and customization of the module, you can use the Barcode Manager program. (For detailed information on the program, see the program’s online help.) The maximum operating temperature for the barcode scanner is 50 °C (122 °F). If your model has the barcode scanner module, you can scan and decode most common 1D and 2D symbologies. To read barcodes: 1. Start your processing software and open a new or existing file.
Using the Fingerprint Scanner (Optional) CAUTION: For optimal performance, both the scanning surface and the finger should be clean and dry. Clean the scanning surface when needed. You can use adhesive tape to remove dirt and oil from the scanner surface. It is not recommended that you use the fingerprint scanner in a belowfreezing temperature. The moisture on your finger can freeze to the scanner’s metal surface when you touch it, resulting in a failed operation.
4. You will be asked to enter the password of the selected user. Enter the password and click OK. 5. Place any finger of your choice on the scanner surface. Keep the finger still until you’re asked to lift your finger and repeat the action again. Several scans of the fingerprint are required. NOTE: Place your finger in a natural position that matches the way you normally hold your device. 6. When completed, click Finish. NOTE: For detailed information on the program, see the program’s online help.
Fingerprint Login NOTE: The fingerprint login process can take a while. This is because the system has to check hardware devices and security configuration before initiating the fingerprint scanner. The fingerprint scanner has 360-degree readability. You can place your finger in any orientation for the scanner to recognize an enrolled fingerprint. With an enrolled fingerprint, the user can log on by tapping the Fingerprint option in Windows login screen and then placing the finger on the scanner.
Using the NFC/RFID Reader (Optional) If your model has the NFC/RFID reader module, you can read data from NFC (Near Field Communication) and RFID (Radio Frequency Identification) tags. For optimal results when reading an NFC/RFID tag, have the tag face the antenna in the same orientation as indicated by the icon on the exterior of the Tablet PC. The icon indicates where the RFID antenna is located. The location depends on your model.
Chapter 3 Managing Power Your Tablet PC operates either on external AC power or on internal battery power. This chapter tells you how you can effectively manage power. To maintain optimal battery performance, it is important that you use the battery in the proper way.
AC Adapter CAUTION: The AC adapter is designed for use with your Tablet PC only. Connecting the AC adapter to another device can damage the adapter. The AC power cord supplied with your Tablet PC is for use in the country where you purchased your Tablet PC. If you plan to go overseas with the Tablet PC, consult your dealer for the appropriate power cord. When you disconnect the AC adapter, disconnect from the electrical outlet first and then from the Tablet PC.
Battery Pack Your Tablet PC has two battery packs. The battery pack is the internal power source for the Tablet PC. It is rechargeable using the AC adapter. NOTE: Care and maintenance information for the battery is provided in the “Battery Pack Guidelines” section in Chapter 7. Charging the Battery Pack NOTE: Charging will not start if the battery’s temperature is outside the allowed range, which is between 0 °C (32 °F) and 50 °C (122 °F).
Initializing the Battery Pack You need to initialize a new battery pack before using it for the first time or when the actual operating time of a battery pack is much less than expected. Initializing is the process of fully charging, discharging, and then charging. It can take several hours. A software tool called “Gauge Reset” is provided for the purpose. Use the G-Manager program and select the Battery tab to find the tool.
When the battery pack is not installed in the Tablet PC and you want to know the battery charge, you can press the push-button to see the number of LEDs that light up. Each LED represents 20% charge. Battery Low Signals and Actions The battery icon changes appearance to display the current state of the battery. Battery Icon Windows 10 Windows 7 Battery Level Description Discharging The icon shows the charge remaining in 10-percent increments until the charge reaches the low-battery level.
Replacing the Battery Pack CAUTION: There is danger of explosion if the battery is incorrectly replaced. Replace the battery only with the Tablet PC manufacturer’s battery packs. Discard used batteries according to the dealer’s instructions. Do not attempt to disassemble the battery pack. NOTE: You can hot swap one battery pack while the other one is supplying the power. To replace the battery pack, follow these steps: 1. Locate the battery pack you want to remove ( or ). 2.
5. Slide the battery latch toward the locked position ( ). CAUTION: Make sure the battery latch is correctly locked, not revealing the underneath red part.
Power-Saving Tips Aside from enabling your Tablet PC’s power saving mode, you can do your part to maximize the battery’s operating time by following these suggestions. Do not disable Power Management. Decrease the LCD brightness to the lowest comfortable level. Shorten the length of time before Windows turn off the display. When not using a connected device, disconnect it. Turn off the wireless radio if you are not using the wireless module (such as WLAN, Bluetooth, or WWAN).
Chapter 4 Expanding Your Tablet PC You can expand the capabilities of your Tablet PC by connecting other peripheral devices. When using a device, be sure to read the instructions accompanying the device together with the relevant section in this chapter.
Connecting Peripheral Devices Connecting a USB Device Your Tablet PC has two USB 3.0 ports and one USB 2.0 port for connecting USB devices, such as a digital camera, scanner, printer, modem, and mouse. USB 3.0 USB 2.0 NOTE: USB 3.0 port is backward compatible with USB 2.0 port. However, if necessary, you can set a USB 3.0 port to be a USB 2.0 port in the BIOS Setup Utility. Go to the utility, select Advanced Device Configuration, and then select Upper Left Port Setting or Lower Left Port Setting.
Connecting a USB Device with Fischer Connectors (Optional) Select models have one or two USB connectors of DBPU 7 pin type, which is a Fischer push-pull locking system. You can connect a USB device supporting this type of connection. Typical applications are military and security services. 1. Align the dot on the cable with the dot on the Tablet PC. 2. Push the outer sleeve and then plug the connector. Outer sleeve Once connected, a special locking mechanism will prevent accidental disconnection.
Connecting a Monitor If you want the benefits of a larger display screen with higher resolution, you can connect an external display monitor to your Tablet PC. Your Tablet PC has an HDMI connector. HDMI (High-Definition Multimedia Interface) is an audio/video interface that transmits uncompressed digital data and therefore delivers true HD quality. Select models have a VGA connector. To switch the display output, use Windows Control Panel or OSD Control Panel.
Using Storage and Expansion Cards Using MicroSD Cards Your computer has a storage card reader. The card reader is a small drive for reading from and writing to removable storage cards (or called memory cards). The reader supports microSD (Secure Digital) and microSDHC (Secure Digital High Capacity) cards. 1. Locate the microSD card reader. Open the cover. 2. Align the card with its connector pointing to the slot and the connector side facing back. Slide the card into the slot until it reaches the end. 3.
Using Smart Cards With an embedded microcontroller, smart cards have the unique ability to store large amounts of data, carry out their own on-card functions (e.g., encryption and mutual authentication), and interact intelligently with a smart card reader. 1. Locate the smart card reader. Open the cover. 2. With the embedded computer chip facing front and near the slot, slide the smart card into the slot. 3. Close the cover. To remove a smart card: 1.
Changing or Replacing Replacing the SSD 1. Turn off the Tablet PC and disconnect the AC adapter. 2. Carefully place the Tablet PC upside down. 3. Remove 9 screws to open the compartment cover. 4. Unfasten 3 screws and unplug the SDD (Solid-State Drive). 5. Plug the new SSD into place and secure with 3 screws. 6. Close the compartment cover and secure with 9 screws. 7. Replace the battery packs.
System Memory Upgrade You can upgrade your Tablet PC by expanding system memory. CAUTION: It is not recommended that you buy and install RAM modules by yourself. If you want to expand system memory, please ask Getac service center to install DRAM modules for you so that full compatibility can be guaranteed. RAM modules are extremely sensitive to static electricity. There are cases where static electricity generated by the human body has adversely affected such modules.
CAUTION: If the RAM module is difficult to insert or difficult to push down, do not force it. Check once more to ensure that the module is positioned correctly. 5. Close the compartment cover and secure with 9 screws. 6. Replace the battery packs.
Chapter 5 Using BIOS Setup BIOS Setup Utility is a program for configuring the BIOS (Basic Input/ Output System) settings of the computer. BIOS is a layer of software, called firmware, that translates instructions from other layers of software into instructions that the computer hardware can understand. The BIOS settings are needed by your computer to identify the types of installed devices and establish special features. This chapter tells you how to use the BIOS Setup Utility.
When and How to Use NOTE: The actual setting items on your model may differ from those described in this chapter. The availability of some setting items depends on the Windows version your computer is running. You need to run BIOS Setup Utility when: You see an error message on the screen requesting you to run BIOS Setup Utility. You want to restore the factory default BIOS settings. You want to modify some specific settings according to the hardware.
Method 2 (for Windows 7 models only): If a keyboard is connected, press the F2 key when the prompt (“Press F2 for System Utilities”) appears at the bottom left corner of the screen during system startup.
Menu Descriptions Information Menu The Information menu contains the basic configuration information of the system. There are no user-definable items in this menu. NOTE: The “Asset Tag” information appears when you have entered the asset number for this Tablet PC using the asset management program. The program is provided in the Asset tag folder of the Driver disc. Main Menu The Main menu contains the various system settings. System Date sets the system date. System Time sets the system time.
Advanced Menu The Advanced menu contains the advanced settings. Wake Up Capability USB Wake-Up From S3 allow a USB device activity to wake up the system from S3 (Sleep) state. System Policy allows you to choose between Performance and Balance. If battery life is your first priority, select Balance. If you need system performance more than battery life, select Performance. AC Initiation sets if connecting AC power will automatically start or resume the system.
Graphics Setup DVMT Pre-Allocated sets the amount of pre-allocated (fixed) graphics memory for use by the internal graphics device. Device Configuration enables or disables several hardware components. The items available for setting depend on your model. Security Menu The Security menu contains the security settings, which safeguard your system against unauthorized use. NOTE: You can set the user password only when the supervisor password has been set.
Boot Menu The Boot menu sets the sequence of the devices to be searched for the operating system. Boot Type Order determines the boot order. You can rearrange the order by dragging the boot device name up or down in the list. Each boot device can be individually set to On or Off. If you want to exclude a boot device from the boot order, set the device to Off. Exit Menu The Exit menu displays ways of exiting BIOS Setup Utility.
Chapter 6 Using Getac Software Getac software includes application programs for specific computer components and utility programs for overall management. This chapter briefly introduces the programs.
OSD Control Panel The OSD (On Screen Display) Control Panel provides a user-friendly interface for you to quickly activate or operate certain functions on your Tablet PC with a simple tap of the screen. To open the OSD Control Panel, start the program named OSDC. If you have a Windows 7 model, you can also press the Windows Logo button on your Tablet PC to open it. The following screen appears. Help For detailed information on the program, see the program’s online help.
G-Manager G-Manager is a unified user interface utility that allows you to view, manage, or configure your computer features. With G-Manager, you can perform all or some of the tasks listed below. View system information. Check the battery status and configure the battery. Configure ECO modes (or called power profiles). Set the touchscreen sensitivity mode. Set if a warning message will appear when a connected docking station is removed unexpectedly.
Help For detailed information on the program, see the program’s online help.
Camera (Optional) G-Camera (for Windows 10) G-Camera is a geo-tagging camera application. Geographical information can be embedded into JPEG files as EXIF 2.2 metadata. NOTE: G-Camera uses the standard location service of Windows. To start the G-Camera application, select All apps G-Camera. In the middle is the preview window with status display. At the two sides are various buttons. For detailed information on the program, see the program’s online help. Tap Help. (Internet connection is required.
Getac Camera (for Windows 7) Getac Camera is a geo-tagging camera program, which allows you to stamp geographical information on photos as watermarks and embed such information into JPEG files as EXIF 2.2 metadata. NOTE: Before starting Getac Camera, close any other program that uses the camera; otherwise, Getac Camera can only provide limited functions. Start Getac Camera. The Getac Camera window appears as shown below. The GPS positioning will be automatically activated.
Chapter 7 Care and Maintenance Taking good care of your Tablet PC will ensure a trouble-free operation and reduce the risk of damage to your Tablet PC. This chapter gives you guidelines covering areas such as protecting, storing, cleaning, and traveling.
Protecting the Tablet PC To safeguard the integrity of your Tablet PC data as well as the Tablet PC itself, you can protect the Tablet PC in several ways as described in this section. Using an Anti-Virus Strategy You can install a virus-detecting program to monitor potential viruses that could damage your files. Using the Cable Lock You can use a Kensington-type cable lock to protect your Tablet PC against theft. The cable lock is available in computer stores.
Taking Care of the Tablet PC Location Guidelines For optimal performance, use the Tablet PC where the recommended temperature is between 0 °C (32 °F) and 55 °C (131 °F). (Actual operating temperature depends on product specifications.) Avoid placing the Tablet PC in a location subject to high humidity, extreme temperatures, mechanical vibration, direct sunlight, or heavy dust. Using in extreme environments for long periods can result in product deterioration and a shortened product life.
LCD image sticking occurs when a fixed pattern is displayed on the screen for a prolonged period of time. You can avoid the problem by limiting the amount of static content on the display. It is recommended that you use a screen saver or turn off the display when it is not in use. To maximize the life of the backlight in the display, allow the backlight to automatically turn off as a result of power management. Cleaning Guidelines Never clean the Tablet PC with its power on.
vehicle and in hot weather condition. Also, charging will not start if the battery pack is not within the allowed temperature range. It is recommended that you do not charge the battery pack more than once a day. It is recommended that you charge the battery pack with the Tablet PC’s power off. To maintain the battery pack’s operating efficiency, store it in a cool dark place removed from the Tablet PC and with 30 % ~ 40 % charge remaining. Important guidelines when using the battery pack.
Use a soft cloth to remove dirt on the display. The touchscreen surface has a special protective coating that prevents dirt from sticking to it. Not using a soft cloth may cause damage to the special protective coating on the touchscreen surface. Turn off the Tablet PC power when cleaning the display. Cleaning the display with the power on may cause improper operation. Do not use excessive force on the display.
When Traveling Before traveling with your Tablet PC, make a backup of your hard disk data into flash disks or other storage devices. As an added precaution, bring along an extra copy of your important data. Make sure that the battery pack is fully charged. Make sure that the Tablet PC is turned off. Make sure that all the connector covers are closed completely to ensure the waterproof integrity. Disconnect the AC adapter from the Tablet PC and take it with you.
Chapter 8 Troubleshooting Computer problems can be caused by hardware, software, or both. When you encounter any problem, it might be a typical problem that can easily be solved. This chapter tells you what actions to take when solving common computer problems.
Preliminary Checklist Here are helpful hints to follow before you take further actions when you encounter any problem: Try to isolate which part of the Tablet PC is causing the problem. Make sure that you turn on all peripheral devices before turning on the Tablet PC. If an external device has a problem, make sure that the cable connections are correct and secure. Make sure that the configuration information is properly set in the BIOS Setup program.
Solving Common Problems Battery Problems The battery does not charge (Battery Charge indicator does not light amber). Make sure that the AC adapter is properly connected. Make sure that the battery is not too hot or cold. Allow time for the battery pack to return to room temperature. If the battery doesn't charge after it has been stored in very low temperatures, try disconnecting and reconnecting the AC adapter to solve the problem. Make sure that the battery pack is installed correctly.
Make sure that both devices are compatible. Display Problems Nothing appears on the screen. During operation, the screen may automatically turn off as a result of power management. Press any key to see if the screen comes back. The brightness level might be too low. Increase the brightness. The characters on the screen are dim. Adjust the brightness and/or contrast. The display brightness cannot be increased.
Check the cables or power cords for correct connections. For an external device that has its own power switch, make sure that the power is turned on. Power Management Problems The Tablet PC does not enter Sleep or Hibernation mode automatically. If you have a connection to another computer, the Tablet PC does not enter Sleep or Hibernation mode if the connection is actively in use. Make sure that the Sleep or Hibernation time-out is enabled.
Software Problems An application program does not work correctly. Make sure that the software is correctly installed. If an error message appears on the screen, consult the software program’s documentation for further information. If you are sure the operation has stop, reset the Tablet PC. Sound Problems No sound is produced. Make sure that the volume control is not set too low. Increase the volume.
Make sure that the sound is not muted. Make sure that the Tablet PC is not in Sleep mode. If using an external speaker, make sure that the speaker is properly connected. Distorted sound is produced. Make sure that the volume control is not set too high or too low. In most cases, a high setting can cause the audio electronics to distort the sound. Startup Problems When you turn on the Tablet PC, it does not respond and the Power Indicator does not light green.
Radio interference exists. Move your Tablet PC away from the device causing the radio interference such as microwave oven and large metal objects. Plug your Tablet PC into an outlet on a different branch circuit from that used by the affecting device. Consult your dealer or an experienced radio technician for help. I cannot connect to another WLAN device. Make sure that the WLAN feature is turned on. Make sure that the SSID setting is the same for every WLAN device in the network.
Turn off power management. Other Problems The date/time is incorrect. Correct the date and time via the operating system or BIOS Setup program. After you have performed everything as described above and still have the incorrect date and time every time you turn on the Tablet PC, the RTC (Real-Time Clock) battery is at the end of its life. Call an authorized dealer to replace the RTC battery.
Resetting the Tablet PC You may have to reset (reboot) your Tablet PC on some occasions when an error occurs and the program you are using hangs up. If you are sure the operation has stopped and you cannot use the “restart” function of the operating system, reset the Tablet PC. Reset the Tablet PC by any one of these methods: Press and hold the P1 button for more than 2 seconds. This opens the Ctrl-Alt-Del screen where you can select actions including Restart.
System Recovery System Restore, Recovery, or Reset (for Windows 10 Models) Tap Settings Update & security. You have several options. System Restore This option allows you to restore Windows to an earlier point in time if you have created a restore point. Recover from a drive If you have created a recovery drive on Windows 10, you can use the recovery drive to reinstall Windows Reset this PC This option allows you to reinstall Windows with or without keeping your files.
System Recovery (a Tool for Windows 7 Models) Use System Recovery when: The Windows 7 operating system does not start at all. You want to restore the system to the factory state. WARNING: Using this feature will reinstall Windows to your system and configure it to the system’s factory default settings. All data on the hard disk drive will be lost. Make sure that power is not interrupted during the recovery process. An unsuccessful recovery may result in Windows startup problems.
4. The progress bar shows the percentage completed. When it reaches 100%, the system turns off. 5. Turn on the Tablet PC. The Windows setup wizard starts. Follow the onscreen prompts to continue. 6. When the system restarts, the installer screen appears. The installer will perform system hardware detection and driver installation. 7. When completed, the system restarts and displays Windows desktop.
Using the Driver Disc (Optional) NOTE: You can download the latest drivers and utilities from Getac website at http://www.getac.com Support. The Driver disc contains drivers and utilities required for specific hardware in your Tablet PC. Since your Tablet PC comes with drivers and utilities pre-installed, you normally do not need to use the Driver disc. In case you want to manually install Windows, you will have to install the drivers and utilities one by one after installing Windows.
Appendix A Specifications NOTE: Specifications are subject to change without any prior notice. Parts Specifications CPU Skylake Platform - Intel® Core™ i5-6200U Processor, 2.3GHz, up to 2.8GHz 3M cache - Intel® Core™ i5-6300U vPro™ Processor, 2.4GHz, up to 3.0GHz 3M cache - Option: Intel® Core™ i7-6600U vPro™ Processor, 2.6GHz, up to 3.
Parts Specifications LAN Intel® i219-LM Gigabit Network Connection, 10/100/1000 Mbps Ethernet, LAN1 and LAN2 Wireless LAN + Bluetooth Intel 8260NGW 2x2 802.11 AC + BT combo Bluetooth 4.
Appendix B Regulatory Information This appendix provides regulatory statements and safety notices on your Tablet PC. NOTE: Marking labels located on the exterior of your Tablet PC indicate the regulations that your model complies with. Please check the marking labels and refer to the corresponding statements in this appendix. Some notices apply to specific models only.
On the Use of the System Class B Regulations USA Federal Communications Commission Radio Frequency Interference Statement NOTE: This equipment has been tested and found to comply with the limits for a Class B digital device pursuant to Part 15 of the FCC Rules. These limits are designed to provide reasonable protection against harmful interference in a residential installation.
Canada Canadian Department of Communications Radio Interference Regulations Class B Compliance Notice This Class B digital apparatus meets all requirements of the Canada Interference-Causing equipment regulations. Cet appareil numérique de Classe B respecte toutes les exigences du Règlement Canadien sur le matériel brouileur.
Safety Notices About the Battery Caution Texts Concerning Lithium Batteries DANISH ADVARSEL! Lithiumbatteri – Eksplosionsfare ved fejlagtig håndtering. Udskiftning må kun ske med batteri af samme fabrikat og type. Levér det brugte batteri tilbage til leverandøren. NORWEGIAN ADVARSEL: Eksplosjonsfare ved feilaktig skifte av batteri. Benytt samme batteritype eller en tilsvarende type anbefalt av apparatfabrikanten. Brukte batterier kasseres i henhold til fabrikantens instruksjoner.
Attention (for USA Users) The product that you have purchased contains a rechargeable battery. The battery is recyclable. At the end of its useful life, under various state and local laws, it may be illegal to dispose of this battery into the municipal waste stream. Check with your local solid waste officials for details in your area for recycling options or proper disposal. About the AC Adapter Use only the AC adapter supplied with your computer.
On the Use of the RF Device USA and Canada Safety Requirements and Notices IMPORTANT NOTE: To comply with FCC RF exposure compliance requirements, the antenna used for this transmitter must not be co-located or operating in conjunction with any other antenna or transmitter. Radio Frequency Interference Requirements and SAR This device meets the government’s requirements for exposure to radio waves.
expense. The user is encouraged to try one or more of the following corrective measures: Reorient or relocate the receiving antenna. Increase the separation between the equipment and receiver. Connect the equipment into an outlet on a circuit different from that to which the receiver is connected. Consult the dealer or an experienced radio/TV technician for help. CAUTION: The Part 15 radio device operates on a non-interference basis with other devices operating at this frequency.
Dutch Dit product is in navolging van de bepalingen van Europees Directief 1999/5/EC. Finnish Tämä tuote noudattaa EU-direktiivin 1999/5/EC määräyksiä. French Ce produit est conforme aux exigences de la Directive Européenne 1999/5/EC. German Dieses Produkt entspricht den Bestimmungen der Europäischen Richtlinie 1999/5/EC. Greek To προϊόν αυτό πληροί τις προβλέψεις της Ευρωπαϊκής Οδηγίας 1999/5/EC. Icelandic Þessi vara stenst reglugerð Evrópska Efnahags Bandalagsins númer 1999/5/EC.
User Notification of Take-back Service To Institutional (B2B) Users in United States: Getac believes in providing our institutional customers with easy-to-use solutions to recycle your Getac-brand products for free. Getac understands the institutional customers will likely be recycling multiple items at once and as such. Getac wants to make the recycling process for these larger shipments as streamlined as possible.
ENERGY STAR 6.1 ENERGY STAR® is a government program that offers businesses and consumers energy-efficient solutions, making it easy to save money while protecting the environment for future generations. Please reference ENERGY STAR® related information from http://www.energystar.gov. As an ENERGY STAR® Partner, Getac Technology Corporation has determined that this product meets the ENERGY STAR® guidelines for energy efficiency.
Over its lifetime, ENERGY STAR® qualified equipment in a single home office (e.g., computer, monitor, printer, and fax) can save enough electricity to light an entire home for more than 4 years. Power management (“sleep settings”) on computers and monitors can result in much savings annually. Remember, saving energy prevents pollution Because most computer equipment is left on 24 hours a day, power management features are important for saving energy and are an easy way to reduce air pollution.
Battery Recycling For the U.S. and Canada only: To recycle the battery, please go to the RBRC Call2Recycle website or use the Call2Recycle Helpline at 800-822-8837. Call2Recycle® is a product stewardship program providing no-cost battery and cellphone recycling solutions across the U.S. and Canada. Operated by Call2Recycle, Inc., a 501(c)4 nonprofit public service organization, the program is funded by battery and product manufacturers committed to responsible recycling. See more at: http://www.