
Installation instructions


GFI MailSecurity for Exchange/SMTP Installing GFI MailSecurity 19
2. Save any pending work and close all open applications on the
machine.
3. Check that the machine you are installing GFI MailSecurity on
meets the system and hardware requirements specified earlier in this
chapter.
To install GFI MailSecurity follow these steps:
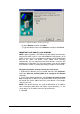
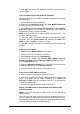
1. Run the GFI MailSecurity setup program by double-clicking on the
MailSecurity10.exe file. The installation wizard will perform some
unpacking operations and then display the Welcome page. Click Next
to continue.
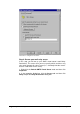
2. Read the license agreement displayed in the License agreement
page and click I accept the terms in the license agreement if you
accept the terms of the license agreement. Click Next to continue the
installation.
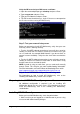
NOTE: If upgrading from a previous version than GFI MailSecurity 10
SR8, you will be asked to upgrade to the Firebird database. Selecting
import will prompt GFI MailSecurity to automatically launch the
quarantine upgrade tool after the installation. If you select not to
import the quarantine database, any previous quarantine data will not
be used by the upgraded version. For information on the quarantine
upgrade tool, refer to the Quarantine Upgrade tool section in this
manual.
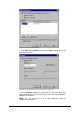
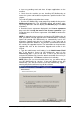
3. Type the administrator email address in the Administrator Email
box. If you bought a license for GFI MailSecurity, type it in the
License Key box. If you do not have a license yet and want to
evaluate GFI MailSecurity, leave the default evaluation license key in
the License Key box. Click Next to continue the installation.
NOTE: When you use the evaluation license key, you will be able to
use GFI MailSecurity for 10 days. If later you decide to buy GFI
MailSecurity, you will not need to install GFI MailSecurity again –
entering the purchased license key will be sufficient.
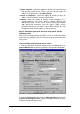
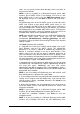
Screenshot 9 - Define if the server has access to all email users in the Active Directory