GN-WS30N-RH AriCruiser N300 Mini Card User’s Manual http://www.gigabyte.com.tw Revised 1.
Administrative Regulations on Low Power Radio Waves Radiated Devices Article 14 Without permission granted, the frequency change, transmitting power enhance or alter of original design characteristic as well as function by companies, enterprises, or users for approved Low-power radio frequency devices is not allowed.
รԼԲයʳ ীڤᎁᢞٽհפ܅୴᙮ሽᖲΔॺᆖױΔֆΕᇆࢨࠌ݁ृش լᖐ۞᧢ޓ᙮ΕףՕפࢨ᧢ޓૠհࢤ֗פ౨Ζ รԼයʳ פ܅୴᙮ሽᖲհࠌشլᐙଆڜ٤֗եឫٽऄຏॾΙᆖ࿇ڶ եឫွழΔᚨܛمೖشΔࠀޏ۟ྤեឫழֱᤉᥛࠌشΖ ছႈٽऄຏॾΔਐࠉሽॾऄࡳ܂ᄐհྤᒵሽຏॾΖ פ܅୴᙮ሽᖲႊٽ࠹ݴऄຏॾࢨՠᄐΕઝᖂ֗᠔᛭شሽंᘿ୴ࢤሽ ᖲໂհեឫΖ ءشࠌ࣠ڕᑓิհؓྤऄڇ؆ຝߠᐉ᧭ٽᑑ᧘ ழ, ᚨڇᇠؓ ऱ؆ຝࣔ᧩ᑑقփܶ୴᙮ᑓิ CCXXxxYYyyyZzW
Content CHAPTER 1 PRODUCT OVERVIEW .............................. 1 1-1. INTRODUCTION .............................................................................................................1 1-2. FEATURES ...................................................................................................................1 1-3. PHYSICAL DIMENSIONS/PACKAGING ...............................................................................1 1-4. SYSTEM REQUIREMENTS ...........................................
Chapter 1 Product Overview 1-1.Introduction This 802.11b/g/n Wireless Local Area Network (WLAN) card is composed of Media Access Controller (MAC), baseband, radio components, MINI-PCI interface, and one external antenna. It operates within the 2.4GHz spectrum, providing high speed (up to 54Mbps) and secure (supporting AES, 802.1x & WEP and WPA) WLAN connections. 1-2.Features Conforms to 802.11b/802.11g/802.
1-4. System Requirements 1-4-1. Supported Platform: IBM PC/AT compatible computer 1-4-2.
Chapter 2 Installing the WLAN Card The following sections will assist you to install this WLAN card. 2-1: Hardware Installation, 2-2~2-5: Software Installation, which provides users more convenient installation methods and automatically installs drivers and utilities. Please refer to different section (2-2: Windows 98SE, 2-3: Windows ME, 2-4: Windows 2000, and 2-5: Windows XP) for software installation in accordance with your operation system. 2-1.
2-2. Installing The Driver & Utility (Win 98SE) Step 1: Click “Cancel” for automatic installation. Step 2: Insert the installation CD into the CD-ROM drive. The following window will pop up. Step 3: Click “Install Wireless LAN Utility”.
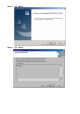
Step 4: Click “Next”. Step 5: Click “Next”.
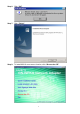
Step 6: Click “OK”. Step 7: Click “Finish”. Step 8: To install 802.1X authentication function, click “Browse the CD”.
Step 9: Run “CD-ROM:\\Utility \AegisI2.exe” of the installation CD. Step 10: Click “Install”. Step 11: Click “Cancel”. Windows may reboot after the installation.
2-3. Installing The Driver & Utility (Win ME) Step 1: Click “Cancel” for automatic installation. Step 2: Insert the installation CD into the CD-ROM drive. The following window will pop up. Step 3: Click “Install Wireless LAN Utility”.
Step 4: Click “Next”. Step 5: Click “Next”.
Step 6: Click “OK”. Step 7: Click “Finish”. Step 8: To install 802.1X authentication function, click “Browse the CD”.
Step 9: Run “CD-ROM:\\Utility \AegisI2.exe” of the installation CD. Step 10: Click “Install”. Step 11: Click “Cancel”. Windows may reboot after the installation.
2-4. Installing The Driver & Utility (Win2000) Step 1: Click “Cancel” for automatic installation. Step 2: Insert the installation CD into the CD-ROM drive. The following window will pop up. Step 3: Click “Install Wireless LAN Utility”.
Step 4: Click “Next”. Step 5: Click “Next”.
Step 6: Click “OK”. Step 7: Click “Finish”.
Step 8: Click “Yes”. Step 9: To install 802.1X authentication function, click “Browse the CD”.
Step 10: Run “CD-ROM:\\Utility \AegisI2.exe” of the installation CD. Step 11: Click “Install”. Step 12: Click “Close”. Windows may reboot after the installation.
2-5. Installing The Driver & Utility (Win XP) Step 1: Click “Cancel” for automatic installation. Step 2: Insert the installation CD into the CD-ROM drive. The following window will pop up. Step 3: Click “Install Wireless LAN Utility”.
Step 4: Click “Next”. Step 5: Click “Next”.
Step 6: Click “Finish”. Step 7: To install 802.1X authentication function, click “Browse the CD”.
Step 8: Run “CD-ROM:\\Utility \AegisI5.exe” of the installation CD. Step 9: Click “Install”. Step 10: Click “Close”. Windows may reboot after the installation.
Chapter 3 Using the Utility The Configuration & Monitor Utility is a powerful application that helps you to configure the network card and monitor the statistics of the communication link. This application permits the configuration for parameters while the card is operating. It also offers more configuration options and supports Windows 98SE/Me/2000/XP. It appears as an icon in the task bar at the bottom right corner of screen whenever the card is operating (see Figure 3-1).
Description of items in Figure 3-2 is as follows: Profile Name: You can save various wireless settings for different environments. : In use. SSID: Displays the SSID of the WLAN card or Access Point. Channel: Shows which channel is current in use. Authentication: Authentication types currently in use include “OPEN”, “WPA”, “WPA-PSK” and “Shared”. Encryption: Four encryption types currently used in the profile include “None”, “WEP”, “AES” and “TKIP”.
Description of items in Figure 3-3 is as follows: Profile Name: Users can save different profiles names for different configurations. SSID: Select the AP detected by the system from the drop-down list or input a SSID. Power Saving mode: Transceivers consume a lot of power in WLAN. Select “Power Saving Mode” (PSM) to turn off transceivers when no data is transmitted or select CAM to continuously turn on transceivers. Network Type: “Infrastructure” and “802.11 Ad Hoc”.
Figure 3-5. Authentication Security None Shared WPA WPA-PSK None WEP None WEP TKIP AES TKIP AES Authentication and Security Table 3-1 Secure Key Setting None Key Setting None Key None None WPA-PSK Key WPA-PSK Key Use 802.1X YES YES YES NO 3-1-2-1. 802.11 Authentication and Security Authentication: Before a station connects to a SSID, the authentication type used by the SSID must be known. Authentication types include OPEN SYSTEM, WAP, WAP-PSK and SHARED.
WPA-PSK encryption: Use WPA-PSK (Preshared Key) for WPA-PSK encryption (TKIP and AES). The system will read the Key with different types of encryption according to the length of Preshared Key. 1. Enter Preshared Key. Please enter 64 hexadecimal digits or 8~63 ASCII digits. 2. Click “OK to save these settings. 3-1-2-2. 802.1X Authentication Click “Use 802.1X Authentication” and then “Enter 802.1X configuration”.
authentication type in the Tunnel. Data needed for authentication includes Tunnel ID, Tunnel Password, Client Certificate or Server Authentication. Protocol: Use assigned authentication type in the safe tunnel. Tunnel ID: Users’ accounts. Password: Passwords for users’ accounts. Figure 3-7. Client Certificate List Figure 3-8.
Description of items in Figure 3-8 is as follows: CA Server is used when TLS, TTLS or PEAP is in use. The Client can verify if such server is reliable and then transmit Client Certificate after the verification is confirmed. (if “Use Client Certificate” is checked) Verify CA server: 1. Confirm if the Server Certificate is issued by assigned certificate issuer. If “Allow Intermediate Authentication” is checked, the server certificate can be issued by one intermediate certificate issuer. 2.
3-2.“Link Status” Setting “Link Status” tab shows you the current association information about the card’s connection with a wireless network. (see Figure 3-9) Figure 3-9. Link Status Description of items in Figure 3-9 is as follows: Status: Shows current link status. “No Link” will appear on the screen when no connection is available. Otherwise, SSID and BSSID of a link will appear. Current Channel: The current channel number used by the WLAN card.
3-3.“Site Survey” Setting “Site Survey” tab shows you the list of reachable access points and/or peer-to-peer Stations. You can double click SSID that you want to connect or click “Connect”. (see Figure 3-9) Figure 3-10. Site Survey Description of items in Figure 3-10 is as follows: AP Account: Access Points’ accounts. BSSID: Displays the MAC address of the Access Point or center station. Signal Strength: Displays the strength of the signal from a station to the AP.
3-4.“Statistics” Setting “Statistics” tab shows you the number of packets sent and received by the card (see Figure 3-11) Figure 3-11. Statistics Description of items in Figure 3-11 is as follows: Frames Transmitted Successfully: Number of frames transmitted successfully. Frames Transmitted Successfully Without Retry: Number of frames transmitted successfully, excluding packets transmitted successfully with more than one retry.
3-5.“Advance” Setting “Advance” tab includes fields of various parameters to review or change drivers. Just click “Apply” button to apply any parameter change to the driver in the tab. A reboot is not needed for the WLAN card (see Figure 3-12) Figure 3-12. Advance Description of items in Figure 3-12 is as follows: Wireless Mode: Sets infrastructure Protocols, including 802.11 B/G mix and 802.11 B Only. Ad Hoc Wireless Mode: Sets Ad Hoc Wireless Protocols, including 802.11 B/G mix, 802.11 B Only and 802.
3-6.“About” Setting “About” tab displays information about current drivers and physical MAC address (see Figure 3-13). Figure 3-13.
Chapter 4 Troubleshooting This troubleshooting guide provides answers to some common problems which you may encounter while installing or using GIGABYTE WLAN card products. Contact the WLAN Technical Support if you encounter problems not mentioned in this section. “802.1x”, “WPA” and “WPA-PSK” can not work z Windows XP / 2000: 1. Run \Utility\AegisI5.exe. on the installation CD. 2. Click “Install”. z Windows 98SE / ME: 1. Run \\Utility \AegisI2.exe on the installation CD. 2. Click “Install”.
Chapter 5 Specification System Host Interface PCI Express v1.0 Chipset Ralink MAC RT2890, Transceiver RT2820 Operating Voltages 3.3V+/-5% Transmitting (Legacy mode): 690mA @ 11b, 760mA @ 11g; Transmitting (HT20 mode): 760mA; Transmitting (HT40 mode): 770mA; Receiving (Legacy mode): 360mA @ 11b, 385mA @ 11g; Receiving (HT20 mode): 385mA; Receiving (HT40 mode): 440mA. Typical Power RF – 802.11n (backward compatible to 802.
FCC Statements: 1. This device complies with Part 15 of the FCC rules. Operation is subject to the following two conditions: (1) This device may not cause harmful interference, and (2) This device must accept any interference received, including interference that may cause undesired operation. 2. This device and its antenna(s) must not be co-located or operating in conjunction with any other antenna or transmitter. 3.
˜́˹̂̅̀˴̇˼̂́ʳ˹̂̅ʳˢ˘ˠʳ˼́̇˸˺̅˴̇̂̅ˍʳ ʳ ˧˻˸ʳˢ˘ˠʳ˼́̇˸˺̅˴̇̂̅ʳ˻˴̆ʳ̇̂ʳ˵˸ʳ˴̊˴̅˸ʳ́̂̇ʳ̇̂ʳ̃̅̂̉˼˷˸ʳ˼́˹̂̅̀˴̇˼̂́ʳ̇̂ʳ̇˻˸ʳ˸́˷ʳ̈̆˸̅ʳ̅˸˺˴̅˷˼́˺ʳ˻̂̊ʳ̇̂ʳ˼́̆̇˴˿˿ʳ̂̅ʳ ̅˸̀̂̉˸ʳ̇˻˼̆ʳ˥˙ʳ̀̂˷̈˿˸ʳ˼́ʳ̇˻˸ʳ̈̆˸̅̆ʳ̀˴́̈˴˿ʳ̂˹ʳ̇˻˸ʳ˸́˷ʳ̃̅̂˷̈˶̇ʳ̊˻˼˶˻ʳ˼́̇˸˺̅˴̇˸ʳ̇˻˼̆ʳ̀̂˷̈˿˸ˁʳ ˧˻˸ʳ̈̆˸̅̆ʳ̀˴́̈˴˿ʳ˹̂̅ʳˢ˘ˠʳ˼́̇˸˺̅˴̇̂̅̆ʳ˸́˷ʳ̈̆˸̅̆ʳ̀̈̆̇ʳ˼́˶˿̈˷˸ʳ̇˻˸ʳ˹̂˿˿̂̊˼́˺ʳ˼́˹̂̅̀˴̇˼̂́ʳ˼́ʳ˴ʳ̃̅̂̀˼́˸́̇ʳ ˿̂˶˴̇˼̂́ʳ ʳ ˜ˠˣˢ˥˧˔ˡ˧ʳˡˢ˧˘ˍʳ˧̂ʳ˶̂̀̃˿̌ʳ̊˼̇˻ʳ˙˖˖ʳ˥˙ʳ˸̋̃̂̆̈̅˸ʳ˶̂̀̃˿˼˴́˶˸ʳ̅˸̄̈˼̅˸̀˸́̇̆ʿʳ̇˻˸ʳ˴́̇˸́́˴ʳ̈̆˸˷ʳ˹̂̅ʳ ̇˻˼̆ʳ̇̅˴́̆̀˼̇̇˸̅ʳ̀̈̆̇ʳ˵˸ʳ˼́̆̇˴˿˿˸˷ʳ̇̂ʳ̃̅̂̉˼˷˸ʳ˴ʳ̆˸̃˴̅˴̇˼̂́ʳ˷˼̆̇˴́˶˸ʳ̂˹