When you installing AGP card, please make sure the following notice is fully understood and practiced. If your AGP card has "AGP 4X notch"(show below), please make sure your AGP card is AGP 4X (1.5V). Do not use AGP 2X card (3.3V) in this motherboard. It will burn and damage the motherboard due to Intel® 845 chipset can't support AGP 2X(3.3V). Example 1: Diamond Vipper V770 golden finger is compatible with 2X/ 4X mode AGP slot. It can be switched between AGP 2X(3.3V) or 4X (1.
? The author assumes no responsibility for any errors or omissions that may appear in this document nor does the author make a commitment to update the information containedherein. ? Third-party brands and names are the property of their respective owners. ? Please do not remove any labels on motherboard, this may void the warranty of this motherboard. ? Due to rapid change in technology, some of the specifications might be out of date before publication of this booklet.
DECLARATION OF CONFORMITY Per FCC Part 2 Section 2.1077(a) Responsibl e Party Name: G.B.T. INC. (U.S .A.) Address: 17358 Railroad S treet City of Industr y, CA 91748 Phone/Fax No: (818) 854-9338/ (818) 854-9339 hereby declares that the product Pr oduct Name: Mother boar d Model Number : GA-8IDML Conforms to the following specifications: FCC Part 15, Subpart B, Section 15.107(a) and Section 15.109(a), Class B Digital Device Supplementar y Infor mation: This device complies with part 15 of the FCC Rules.
Declaration of Conformity We, Manufacturer/Importer (full address) G.B.T.
GA-8IDML Series P4 Titan-SDRAM Motherboard USER’S MANUAL Pentium® 4 Processor Motherboard Rev. 2.
GA-8IDML Series Motherboard Table of Content Revision History ..............................................................................4 Item Checklist ..................................................................................4 WARNING! .......................................................................................5 Chapter 1 Introduction .......................................................................6 Summary of Features ........................................................
Table of Content Integrated Peripherals ....................................................................................... 33 Power Management Setup ................................................................................ 40 PnP/PCI Configurations ...................................................................................... 44 PC Health Status .................................................................................................. 46 Frequency/Voltage Control ...............
GA-8IDML Series Motherboard Revision History Revision 2.0 2.0 2.0 2.0 2.0 2.0 Revision Note Initial release of the GA-8IDML Series motherboard user's manual. Second release of the GA-8IDML Series motherboard user's manual. Third release of the GA-8IDML Series motherboard user's manual. Fourth release of the GA-8IDML Series motherboard user's manual. Fifth release of the GA-8IDML Series motherboard user's manual. Sixth release of the GA-8IDML Series motherboard user's manual.
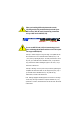
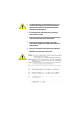
WARNING! WARNING! Computer motherboards and expansion cards contain very delicate Integrated Circuit (IC) chips. To protect them against damage from static electricity, you should follow some precautions whenever you work on your computer. 1. Unplug your computer when working on the inside. 2. Use a grounded wrist strap before handling computer components. If you do not have one, touch both of your hands to a safely grounded object or to a metal object, such as the power supply case. 3.
GA-8IDML Series Motherboard Chapter 1 Introduction Summary of Features Form Factor Motherboard CPU Chipset Memory I/O Control Slots On-Board IDE On-Board Peripherals Hardware Monitor ? 24.4cm x 22.4cm Micro ATX size form factor, 4 layers PCB. ? GA-8IDML Series Motherboard: GA-8IDML and GA-8IDML-C ? Socket 478 for Intel® Micro FC-PGA2 Pentium® 4 processor ??Support Intel ® Pentium ® 4 (Northwood, 0.
Introduction On-Board LAN On-Board Sound PS/2 Connector BIOS Additional Features Special Features ? ? ? ? ? ? ? ? ? ? ? ? ? ? Build in RTL8100(B)L Chipset * Creative CT5880 Sound Chipset * Line In/Line Out/Mic In/CD In/Game Port PS/2 Keyboard interface and PS/2 Mouse interace Licensed AWARD BIOS, 2M bit FWH PS/2 Keyboard power on by password PS/2 Mouse power on STR(Suspend-To-RAM) Wake on LAN AC Recovery USB KB/Mouse wake up from S3 Supports @BIOS Supports Easy TuneIII Over Clock (CPU/PCI/AGP) ? Please
GA-8IDML Series Motherboard GA-8IDML Series Motherboard Layout CPU_FAN FLOPPY Brookdale DIMM1 DIMM2 AGP CT5880* IDE1 AC97 IDE2 AUX_12V IR PWR_FAN SOCKET478 LAN* USB MIC_IN LINE_OUT LINE_IN GAME F_AUDIO GA-8IDML(-C) COMB LPT1 W83627HF COMA ATX KB_MS USB_VS SYS FAN PCI1 FWH ICH2 PCI2 CD_IN PCI3 RTL8100* CNR F_PANEL BATTERY FRONT USB WOL "*" Only for GA-8IDML.
Hardware Installation Process GA-8IDML-LE Motherboard Layout USB_VS CPU_FAN SOCKET478 DIMM1 DIMM2 AGP IDE1 Brookdale IDE2 AC97 FLOPPY GA-8IDML-LE GAME AUX_12V USB MIC_IN LINE_OUT LINE_IN F_AUDIO SYS FAN PCI1 CD_IN1 ICH2 FWH PCI2 BATTERY PCI3 F_PANEL FRONT USB CNR WOL 9 IR PWR_FAN COMB ATX LPT1 W83627HF COMA KB_MS
GA-8IDML Series Motherboard Chapter 2 Hardware Installation Process To set up your computer, you must complete the following setps: Step 1- Install the Central Processing Unit (CPU) Step 2- Install memory modules Step 3- Install expansion cards Step 4- Connect ribbon cables, cabinet wires, and power supply Step 5- Setup BIOS software Step 6- Install supporting software tools Step1 Step1 Step 2 Step 4 Step 4 Step 4 Step3 10
Hardw are Installation Process Step 1: Install the Central Processing Unit (CPU) Step 1-1:CPU Installation Pin1 indicator Pin1indicator CPU Top View CPU Bottom View Socket Actuation Lever Pin1 indicator 1. Pull up the CPU socket level and up to 90-degree angle. 2. Locate Pin 1 in the socket and look for a (golden) cut edge on the CPU upper corner. Then insert the CPU into the socket. 3. Press down the CPU socket lever and finish CPU installation.
GA-8IDML Series Motherboard Step 1-2: CPU Heat Sink Installation 2. Hook the other end of the cooler bracket to the CPU socket. 1. Hook one end of the cooler bracket to the CPU socket first. ? Please use Intel approved cooling fan. ? Make sure the CPU fan power cable is plugged in to the CPU fan connector, this completes the installation. ? Please refer to CPU heat sink user’s manual for more detail installation procedure.
Hardw are Installation Process Step 2: Install memory modules The motherboard has 2 dual in-line memory module (DIMM) sockets support 4 banks. The BIOS will automatically detects memory type and size. To install the memory module, justpush it vertically into the DIMM Slot .The DIMM module can only fit in one direction due to the two notch. Memory size can vary between sockets. SDRAM 2. Insert the DIMM memory module vertically into the DIMM slot. Then push it down. 1.
GA-8IDML Series Motherboard Step 3: Install expansion cards 1. Read the related expansion card’s instruction document before install the expansion card into the computer. 2. Remove your computer’s chassis cover, necessary screws and slot bracket from the computer. 3. Press the expansion card firmly into expansion slot in motherboard. 4. Be sure the metal contacts on the card are indeed seated in the slot. 5. Replace the screw to secure the slot bracket of the expansion card. 6.
Hardw are Installation Process Step 4: Connect ribbon cables, cabinet wires, and power supply Step 4-1: I/O Back Panel Introduction ? ? ? ? ? ? PS/2 Keyboard and PS/2 Mouse Connector PS/2 Mouse Connector (6 pin Female) ?This connector supports standard PS/2 keyboard and PS/2 mouse. PS/2 Keyboard Connector (6 pin Female) ? Parallel Port and Serial Ports (COMA/COMB) Parallel Port (25 pin Female) ?This connector supports 2 standard COM ports and 1 Parallel port.
GA-8IDML Series Motherboard ? Game /MIDI Ports ?This connector supports joystick, MIDI keyboard and other relate audio devices. Joystick/ MIDI (15 pin Female) ? Audio Connectors ? After install onboard audio driver, you may connect speaker to Line Out jack, micro phone to MIC In jack. Device like CD-ROM , walkman etc can be connected to Line-In jack.
Hardw are Installation Process Step 4-2: Connectors Introduction A O N B C D M E F G L K J I H A CPU_FAN I FRONT_USB B ATX J BATTERY C IR K WOL D PWR_FAN L CD_IN E FLOPPY M AUX_12V F IDE1/IDE2 N F_AUDIO G SYS_FAN O USB_VS H F_PANEL 17
GA-8IDML Series Motherboard A / D / G : CPU_FAN / PWR_FAN / SYS FAN Connector CPU_FAN 1 GND +12V/Control Sense 1 PWR_FAN Sense +12V/Control GND SYS_FAN GND 1 +12V/Control Sense B : ATX Power 20 +12V 5V SB (Stand by +5V) Power Good GND VCC GND VCC GND 3.3V 3.3V 1 ATX Power VCC VCC -5V GND GND GND PS-ON(SoftOn/Off) GND -12V 3.3V ? AC power cord should only be connected to your power supply unit after ATX power cable and other related devices are firmly connected to the mainboard.
Hardw are Installation Process E / F : Floppy / IDE1 / IDE2 Connector 1 IDE2 IDE1 Floppy 1 1 L : CD_IN K :WOL 1 1 CD-L GND CD-R +5V SB GND Signal N: F_AUDIO Connector There are two types of Front Audio connector, please refer to the tables below before you install.
GA-8IDML Series Motherboard C:IR H :F_PANEL IRTX GND IRRX NC VCC 1 RSTRST+ SPK+ NC NC SPKHD- ? Be careful with the polarity of the IR connector while you connect the IR. Please contact you nearest dealer for optional IR device. PW+ PWPD+ PDPDHD+ GND NC USB D3+ USB D3Power I :Front USB J:Battery Power USB D2USB D2+ NC GND ? Be careful with the polarity of the front panel USB connector. Check the pin assignment while you connect the front panel USB cable.
BIOS Setup Chapter 3 BIOS Setup BIOS Setup is an overview of the BIOS Setup Program. The program that allows users to modify the basic system configuration. This type of information is stored in battery-backed CMOS RAM so that it retains the Setup information when the power is turned off. ENTERING SETUP Power ON the computer and press immediately will allow you to enter Setup.
GA-8IDML Series Motherboard GETTING HELP Main Menu The on-line description of the highlighted setup function is displayed at the bottom of the screen. Status Page Setup Menu / Option Page Setup Menu Press F1 to pop up a small help window that describes the appropriate keys to use and the possible selections for the highlighted item. To exit the H elp Window press . The Main Menu (For example: BIOS Ver.
BIOS Setup ? Integrated Peripherals This setup page includes all onboard peripherals. ? Power Management Setup This setup page includes all the items of Green function features. ? PnP/PCI Configurations This setup page includes all the configurations of PCI & PnP ISA resources. ? PC Health Status This setup page is the System auto detect Temperature, voltage, fan, speed. ? Frequency/Voltage Control This setup page is control CPU’s clock and frequency ratio.
GA-8IDML Series Motherboard Standard CMOS Features CMOS Setup Utility-Copyright (C) 1984-2001 Award Software Standard CMOS Features Date (mm:dd:yy) Mon, Feb 21 2000 Item Help Time (hh:mm:ss) 22:31:24 Menu Level ?IDE Primary Master Press Enter None ?IDE Primary Slave Press Enter None ?IDE Secondary Master Press Enter None ?IDE Secondary Slave Press Enter None Drive A 1.44M, 3.5 in.
BIOS Setup Time The times format in . The time is calculated base on the 24-hour militarytime clock. For example, 1 p.m. is 13:00:00. IDE Primary Master, Slave / Secondary Master, Slave The category identifies the types of hard disk from drive C to F that has been installed in the computer. There are two types: auto type, and manual type. Manual type is user-definable; Auto type which will automatically detect H DD type.
GA-8IDML Series Motherboard Floppy 3 Mode Support (for Japan Area) Disabled Normal Floppy Drive. (Default value) Drive A Drive A is 3 mode Floppy Drive. Drive B Drive B is 3 mode Floppy Drive. Both Drive A & B are 3 mode Floppy Drives. Video The category detects the type of adapter used for the primary system monitor that must match your video display card and monitor. Although secondary monitors are supported, you do not have to select the type in setup.
BIOS Setup Memory The category is display-only which is determined by POST (Power On Self Test) of the BIOS. Base Memory The POST of the BIOS will determine the amount of base (or conventional) memory installed in the system. The value of the base memory is typically 512 K for systems with 512 K memory installed on the motherboard, or 640 K for systems with 640 K or more memory installed on the motherboard. Extended Memory The BIOS determines how much extended memory is present during the POST.
GA-8IDML Series Motherboard Advanced BIOS Features CMOS Setup Utility-Copyright (C) 1984-2001 Award Software Advanced BIOS Features First Boot Device Floppy Item Help Second Boot Device HDD-0 Menu Level Third Boot Device CDROM Boot Up Floppy Seek Disabled Boot Up Num-Lock On Password Check Setup MPS Version Control For OS 1.4 HDD S.M.A.R.T.
BIOS Setup Boot Up Fl oppy Seek During POST, BIOS will determine the floppy disk drive installed is 40 or 80 tracks. 360 K type is 40 tracks 720 K, 1.2 M and 1.44 M are all 80 tracks. Enabled BIOS searches for floppy disk drive to determine it is 40 or 80 tracks. Note that BIOS can not tell from 720 K, 1.2 M or 1.44 M drive type as they are all 80tracks. (Default value) Disabled BIOS will not search for the type of floppy disk drive by track number.
GA-8IDML Series Motherboard Advanced Chipset Features CMOS Setup Utility-Copyright (C) 1984-2001 Award Software Advanced Chipset Features Configure DRAM Timing SPD Item Help ?CAS Latency Time 2 Menu Level ?Active to Precharge Delay 5 ?DRAM RAS# to CAS# Delay 2 ?DRAM RAS# Precharge 2 ?Refresh Mode Select 15.
BIOS Setup SDRAM RAS# to CAS# delay 3 Set SDRAM RAS# to CAS# delay 3 SCLKs. 2 Set SDRAM RAS# to CAS# delay 2 SCLKs.(Default value) SDRAM RAS# Precharge 3 Set SDRAM RAS# Precharge Time to 3. (Default value) 2 Set SDRAM RAS# Precharge Time to 2. Refresh Mode Select 7.8 usec Set active to Refresh mode timing is 7.8 usec. 15.6 usec Set active to Refresh mode timing is 15.6 usec. 64 usec Set active to Refresh mode timing is 64 usec.
GA-8IDML Series Motherboard AGP Graphics Aperture Size 4 AGP Graphics Aperture Size is 4MB. 8 AGP Graphics Aperture Size is 8MB. 16 AGP Graphics Aperture Siz e is 16MB 32 AGP Graphics Aperture Siz e is 32MB. 64 AGP Graphics Aperture Siz e is 64MB.(Def ault Value) 128 AGP Graphics Aperture Siz e is 128MB. 256 AGP Graphics Aperture Siz e is 256MB. Delay Prior to Thermal 16Min Set active CPU Thermal function after booting 16 Min.
BIOS Setup Integrated Peripherals CMOS Setup Utility-Copyright (C) 1984-2001 Award Software Integrated Peripherals On-Chip Primary PCI IDE Enabled On-Chip Secondary PCI IDE Enabled IDE Primary Master PIO Auto IDE Primary Slave PIO Auto IDE Secondary Master PIO Auto IDE Secondary Slave PIO Auto IDE Primary Master UDMA Auto IDE Primary Slave UDMA Auto IDE Secondary Master UDMA Auto IDE Secondary Slave UDMA Auto USB Controller Enabled USB Keyboard Support Disabled USB Mouse Support Di
GA-8IDML Series Motherboard Parallel Port Mode SPP ?EPP Mode Select EPP 1.7 ?ECP Mode Use DMA 3 AC BACK Function Soft-Off ????: Move Enter:Select +/-/PU/PD:Value F10:Save ESC:Exit F1:General Help F5:Previous Values F6:Fail-Safe Defaults F7:Optimized Defaults Figure 5: Integrated Peripherals On-Chip Primary PCI IDE Enabled Enable onboard 1st channel IDE port. (Default value) Disabled Disable onboard 1st channel IDE port. On-Chip Secondary PCI IDE Enabled Enable onboard 2nd channel IDE port.
BIOS Setup IDE Secondary Slave PIO (for onboard IDE 2nd channel) Auto BIOS will automatically detect the IDE HDD Accessing mode. (Default value) Mode0~4 Manually set the IDE Accessing mode. IDE Primary Master UDMA Auto BIOS will automatically detect the IDE HDD Accessing mode. (Default value) Disabled Disable UDMA function. IDE Primary Slave UDMA Auto BIOS will automatically detect the IDE HDD Accessing mode. (Default value) Disabled Disable UDMA function.
GA-8IDML Series Motherboard USB Keyboard Support Enabled Enabled USB Keyboard Support. Disabled Disabled USB Keyboard Support. (Default value) USB Mouse Support Enabled Enabled USB Mouse Support. Disabled Disabled USB Mouse Support. (Default value) Init Display First PCI Set Init Display First to PCI Slot. AGP Set Init Display First to AGP. (Default value) AC97 Audio Auto BIOS will automatically detect onboard AC97 Audio or Creative CT5880 audio. (Default value) Disabled Disabled AC97 Audio.
BIOS Setup Mouse Power On Disabled Disabled this function. (Default value) Mouse Click Power On by Mouse click. Keyboard Power On Password Enter from 1 to 5 characters to set the Keyboard Power On Password. Disabled Disabled this function. (Default value) Keyboard 98 If your keyboard have “POWER Key” button, you can press the key to power on your system. KB Power ON Password Enter Input password (from 1 to 5 characters) and press Enter to set the Key board Power On Password.
GA-8IDML Series Motherboard Onboard Ser ial Port 2 Auto BIOS will automatically setup the port 2 address. 3F8/IRQ4 Enable onboard Serial port 2 and address is 3F8. 2F8/IRQ3 Enable onboard Serial port 2 and address is 2F8. (Default Value) 3E8/IRQ4 Enable onboard Serial port 2 and address is 3E8. 2E8/IRQ3 Enable onboard Serial port 2 and address is 2E8. Disabled Disable onboard Serial port 2.
BIOS Setup Use IR Pins IR-Rx2Tx2 Enable On Board LPT port and address is 378.(Default Value) RxD2,TxD2 Enable On Board LPT port and address is 278. OnBoard Par allel port 378/IRQ7 Enable On Board LPT port and address is 378.(Default Value) 278/IRQ5 Enable On Board LPT port and address is 278. 3BC/IRQ7 Enable On Board LPT port and address is 3BC. Parallel Port Mode SPP Using Parallel port as Standard Parallel Port. (Default Value) EPP Using Parallel port as Enhanced Parallel Port.
GA-8IDML Series Motherboard Power Management Setup CMOS Setup Utility-Copyright (C) 1984-2001 Award Software Power Management Setup ACPI Suspend Type S1(POS) ?USB Device Wake-Up From S3 Disabled Power Management User Define Video Off Method DPMS Video Of f In Suspend Yes Suspend Type Stop Grant MODEM Use IRQ 3 Suspend Mode Disabled HDD Power Down Disabled Soft-Off by PWR-BTTN Instant-off PME Event Wake Up Enabled ModemRingOn/WakeOnLan Enabled Resume by Alarm Disabled ? Date(of Mon
BIOS Setup ACPI Sleep Type S1/POS Set ACPI Sleep Type to S1/POS (Power On Suspend). (Default value) S3/STR Set ACPI Sleep Type to S3/STR (Suspend To RAM). USB Dev Wakeup From S3 Enabled Enable USB Device Wakeup From S3. Disabled Disable USB Device Wakeup From S3. (Default value) Power Management User Define For configuring our own power management features (Default Value) Min Saving Disabled Green & software APM function. Max Sav ing Enabled Green & sof tw are APM f unction.
GA-8IDML Series Motherboard MODEM Use IRQ N/A Set MODEM Use IRQ to NA. 3 Set MODEM Use IRQ to 3.(Default value) 4 Set MODEM Use IRQ to 4. 5 Set MODEM Use IRQ to 5. 7 Set MODEM Use IRQ to 7. 9 Set MODEM Use IRQ to 9. 10 Set MODEM Use IRQ to 10. 11 Set MODEM Use IRQ to 11. Suspend Mode Disabled Disabled Suspend Mode. (Default value) 1 min - 1 H our Setup the timer to enter Suspend Mode. HDD Power Down Disabled Disabled H DD Power Down mode function. (Default value) 1-15 mins.
BIOS Setup Modem Ring On/ Wak eOnLAN Disabled Disabled Modem Ring On / Wake On LAN function. Enabled Enabled Modem Ring On / Wake On LAN function. (Default Value) RTC Alarm Power On You can set “RTC Alarm Power On” item to enabled and key in Data/time to power on system. Disabled Disable this function. (Default Value) Enabled Enable alarm function to POWER ON system. If RTC Alarm Lead To Power On is Enabled.
GA-8IDML Series Motherboard PnP/PCI Configurations CMOS Setup Utility-Copyright (C) 1984-2001 Award Software PnP/PCI Configurations Resources Controlled By Auto Item Help ?IRQ Resources Press Enter Menu Level PCI1 IRQ Assignment Auto PCI2 IRQ Assignment Auto PCI3 IRQ Assignment Auto ????: Move Enter:Select +/-/PU/PD:Value F10:Save ESC:Exit F1:General Help F5:Previous Values F6:Fail-Safe Defaults F7:Optimized Defaults Figure 7: PnP/PCI Configurations Resources Controlled by Manual User can set
BIOS Setup PCI3 IRQ Assignment Auto Auto assign IRQ to PCI 3. (Default value) 3,4,5,7,9.,10,11,12,14,15 Set 3,4,5,7,9,10,11,12,14,15 to PCI3.
GA-8IDML Series Motherboard PC Health Status CMOS Setup Utility-Copyright (C) 1984-2001 Award Software PC Health Status VCORE 1.792 V Item Help +3.3V 3.360V Menu Level + 5V 5.053 V +12V 12.096V - 12V -12.
BIOS Setup CPU Warning Temperature 60° C / 140° F Monitor CPU Temp. at 60° C / 140° F. 70° C / 158° F Monitor CPU Temp. at 70° C / 158° F. 80° C / 176° F Monitor CPU Temp. at 80° C / 176° F. 90° C / 194° F Monitor CPU Temp. at 90° C / 194° F. Disabled Disabled this function.(Default value) Fan Fai l Warning ( CPU / POWER/ SYSTEM) Disabled Fan Fail Alarm Function Disabled. (Default value) Enabled Fan Fail Alarm Function Enabled.
GA-8IDML Series Motherboard Frequency/Voltage Control CMOS Setup Utility-Copyright (C) 1984-2001 Award Software Frequency/Voltage Control CPU Clock Ratio x 15 Item Help CPU Host Clock Control Disable Menu Level CPU Host Frequency(MHz) 100 Host/DRAM Clock ratio Auto Memory Frequency(MHz) 133 PCI/AGP Frequency(MHz) 33/66 ????: Move Enter:Select +/-/PU/PD:Value F10:Save ESC:Exit F1:General Help F5:Previous Values F6:Fail-Safe Defaults F7:Optimized Defaults Figure 9: Frequency/Voltage Control CP
BIOS Setup Load Fail-Safe Defaults CMOS Setup Utility-Copyright (C) 1984-2001 Award Software ?Standard CMOS Features ?Frequency/Voltage Control ?Advanced BIOS Features Load Fail-Safe Defaults ?Advanced Chipset Features Load Optimized Defaults ?Integrated Peripherals Set Supervisor Password ?Power Management Setup Set User Password ?PnP/PCI Configurations Load Fail-Safe Defaults? (Y/N)?Y Save & Exit Setup ?PC Health Status Exit Without Saving ????:SelectItect ESC:Quit F10:Save & Exit Setup Load
GA-8IDML Series Motherboard Load Optimized Defaults CMOS Setup Utility-Copyright (C) 1984-2001 Award Software ?Standard CMOS Features ?Frequency/Voltage Control ?Advanced BIOS Features Load Fail-Safe Defaults ?Advanced Chipset Features Load Optimized Defaults ?Integrated Peripherals Set Supervisor Password ?Power Management Setup Set User Password ?PnP/PCI Configurations ?PC Health Status Save & Exit Setup Load Optimized Defaults? (Y/N)?Y Exit Without Saving ????:SelectItect ESC:Quit F10:Save
BIOS Setup Set Supervisor/User Password CMOS Setup Utility-Copyright (C) 1984-2001 Award Software ?Standard CMOS Features ?Frequency/Voltage Control ?Advanced BIOS Features Load Fail-Safe Defaults ?Advanced Chipset Features Load Optimized Defaults ?Integrated Peripherals Set Supervisor Password ?Power Management Setup Set User Password ?PnP/PCI Configurations Enter Password: ?PC Health Status Save & Exit Setup Exit Without Saving ????:SelectItect ESC:Quit F10:Save & Exit Setup Change/Set/Disa
GA-8IDML Series Motherboard Save & Exit Setup CMOS Setup Utility-Copyright (C) 1984-2001 Award Software ?Standard CMOS Features ?Frequency/Voltage Control ?Advanced BIOS Features Load Fail-Safe Defaults ?Advanced Chipset Features Load Optimized Defaults ?Integrated Peripherals Set Supervisor Password ?Power Management Setup Set User Password ?PnP/PCI Configurations Save to CMOS and EXIT Save & Exit (Y/N)? Y Setup ?PC Health Status Exit Without Saving ????:SelectItect ESC:Quit F10:Save & Exit Se
BIOS Setup Exit Without Saving CMOS Setup Utility-Copyright (C) 1984-2001 Award Software ?Standard CMOS Features ?Frequency/Voltage Control ?Advanced BIOS Features Load Fail-Safe Defaults ?Advanced Chipset Features Load Optimized Defaults ?Integrated Peripherals Set Supervisor Password ?Power Management Setup Set User Password ?PnP/PCI Configurations Quit Without Saving ( Y/N)?Save N & Exit Setup ?PC Health Status Exit Without Saving ????:SelectItect ESC:Quit F10:Save & Exit Setup Abandon all D
GA-8IDML Series Motherboard Revision History Chapter 4 Technical Reference Performance List The following performance data list is the testing results of some popular benchmark testing programs. These data are just referred by users, and there is no responsibility for different testing data values gotten by users. (The different H ardware & Software configuration will result in different benchmark testing results.) CPU DRAM CACHE SIZE DISPLAY STORAGE O.S DRIVER Processor WCPUID 2.
Technical Reference Block Diagram Pentium 4 CPU CPUCLK+/- (100MHz) AGP 4X System Bus 100MHz AGPCLK (66MHz) 100/133 MHz Intel 82845 RJ45 HCLK+/- (100MHz) MCHCLK (66MHz) 66 MHz 33 MHz 14.318 MHz 48 MHz FWH SST49LF002 3 PCI RTL8100(B)L Intel ICH 2 Game Port LPC BUS AC97 Link Creative CT5880 PCICLK (33MHz) SDRAM Winbond W83627HF 24 MHz 4 USB Ports ATA33/66/100 IDE Channels LINE-OUT LINE-IN MIC PCICLK (33MHz) USBCLK (48MHz) 14.
GA-8IDML Series Motherboard Four Speaker & SPDIF Introduction Four Speaker Introduction A. What is Four Speaker? The Creative CT5880 audio chip can support up to 4 speaker output. If you select “Four speaker out”, Line In will be reconfigured as another line out to support a second pair of speakers. B.
Technical Reference Microsoft Windows Me setup procedure: Go to “Control Panel” and double click “Sounds and Multimedia”. Select “Audio” Page, and click “Advanced” button. Select “Quadraphonic Speakers” and click ok. C. Four Speaker Application The four speaker function will only be supported in application softwares that use Microsoft DirectX and Creative EAX, for example, the game titles, software DVD player and MP3 player.
GA-8IDML Series Motherboard SPDIF Introduction A. What is SPDIF? The SPDIF output is capable of providing digital signal to AC3 decoder which can support upto 5.1 speakers. B. How to use SPDIF? Click your mouse right button in “My Computer” and select the “Properties” item. Click “Device Manager” item. Click “Sound, vidio and game controllers” item and select the “Creative Sound Blaster PCI128” item.
Technical Reference Click “Settings” item and select the “Output Mode” item. Click “Digital” item, Line Out will be reconfigure to SPDIF Out. Recommend you to select “Autosense”, It will automatically detect the type (mono or stereo) of the audio connector that you plug into Line Out audio jack, then configure Line Out to either SPDIF or Speaker accordingly.
GA-8IDML Series Motherboard @ BIOS Introduction Gigabyte announces @ BIOS Windows BIOS live update utility H ave you ever updated BIOS by yourself? Or like many other people, you just know what BIOS is, but always hesitate to update it? Because you think updating newest BIOS is unnecessary and actually you don’t know how to update it. Maybe not like others, you are very experienced in BIOS updating and spend quite a lot of time to do it. But of course you don’t like to do it too much.
Technical Reference Easy TuneIIITM Introduction Gigabyte announces EasyTuneIII Windows overdrive utility “Overdrive” might be one of the most common issues in computer field. But have many users ever tried it? The answer is probably “no”. Because “overdrive” is thought to be very difficult and includes a lot of technical know-how, sometimes “overdrive” is even considered as special skills found only in some enthusiasts.
GA-8IDML Series Motherboard Revision History Chapter 5 Appendix Picture below are shown in Windows ME (VUCD driver version 1.8) Appendix A: Intel 845 Chipset Driver Installation A. Windows 9x/ME/2000/XP INF Update Utility: Insert the support CD that came with your motherboard into your CD-ROM driver or double – click the CD driver icon in My Computer to bring up the screen. 1.Click "Windows 9x/ME/2000/XP INF Update Utility" item. (2) (1) 3.Click "Next". 2.Click "Yes". (3) (4) 4.
Appendix Appendix B: Creative CT5880 Chipset Driver Installation Revision History Insert the support CD that came with your motherboard into your CD-ROM driver or double click the CD driver icon in My Computer to bring up the screen. 1.Click "Creative CT5880 Sound Driver" item. 2.Click "OK". (2) (1) 4.Click "next". 3.Click "Yes". (4) (3) 6.Click "Finish" to restart computer. 5.Click here.