BIOS Setting Guide Schnellstartanleitung / Guide de démarrage rapide / Руководство по быстрой сборке Przewodnik użytkownika / Hızlı Başlangıç Kılavuzu
BIOS Setup BIOS (Basic Input and Output System) is a UEFI interface that allows you to setup and configure your system for optimum use. Using your mouse and keyboard, users can change BIOS settings, monitor CPU temperature, select the boot device priority and view system information such as the CPU name, DRAM capacity, and the BIOS version. To access the BIOS setup program, press the key during the POST (Power-On Self-Test) when the power is turned on.
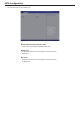
The Main Menu Once you enter the BIOS Setup program, the Main Menu (as shown below) appears on the screen. Use arrow keys to move among the items and press to accept or enter other sub-menu. ■ ■ Main Menu Help The on-screen description of a highlighted setup option is displayed on the bottom line of the Main Menu. Submenu Help While in a submenu, press to display a help screen (General Help) of function keys available for the menu. Press to exit the help screen.
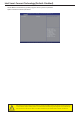
Advanced Menu The Advanced menu display submenu options for configuring the function of various hardware components. Select a submenu item, then press to access the related submenu screen. ■ ■ ■ ■ ■ ■ CPU Configuration Configures the CPU features in this entry. SATA Configuration Configures the SATA settings in this entry. H/W Monitor Displays a real-time record of the CPU / system temperature and fan speed.
CPU Configuration Your CPU features / instructions are displayed and can be individually enabled / disabled in the CPU features list showed below. CPU Configuration ■ CPU Model Name Displays the processor type information. ■ ■ ■ ■ ■ ■ ■ ■ ■ ■ CPU Signature Displays the processor ID information. Microcode Patch Displays the information of the processor microcode patch. CPU Speed Displays the information of the processor speed. Processor Cores Displays the information of the processor core.
CPU Configuration ■ ■ ■ ■ ■ ■ ■ Intel Virtualization Technology (Default: Enabled) Select whether to enable the Intel Virtualization Technology function. Intel VT allows a single platform to run multiple systems in independent partitions. Option available: Enabled / Disabled.
SATA Configuration Let you select the on chip SATA type. ■ ■ ■ SATA Mode Selection (Default: AHCI) SATA controller enable its AHCI functionality. SATA Port Displays the hard drive information connected to your SATA port. m-SATA Displays the hard drive information connected to your m-SATA slot.
H/W Monitor Enter to view the Hardware Monitor screen which displays a real-time record of the CPU / system temperature and fan speed. ■ ■ ■ ■ ■ FAN 1 / 2 Fail Detect (Default: Enabled) Enable FAN 1 / 2 stop warming function. Option available: Enabled / Disabled. FAN 1 / 2 SMART FAN Control (Default: Enabled) Enable FAN 1 / 2 SMART FAN function. Option available: Enabled / Disabled. GPU Temperature Displays current GPU temperature. CPU Temperature Displays current CPU temperature.
Intel Rapid Start Technology (Default: Disabled) Enable / Disable the Intel Rapid Start Technology function. The Intel Rapid Start Technology (Intel RSTe) enables BRIX to get up and running faster from even the deepest sleep, saving time and power consumption. Option available: Enabled / Disabled. ■ ■ ■ Entry on S3 RTC Wake (Default: Enabled) Enable / Disable entry on S3 RTC wake function. Option available: Enabled / Disabled.
Intel Smart Connect Technology (Default: Disabled) Allows BRIX to automatically update programs while system suspended. Option available: Enabled / Disabled. Intel Smart Connect Technology is for S3 mode only. During the updating process, the monitor will not light up and no sound will be output from the speaker. This feature works best with programs designed to work automatically with the internet to obtain their data such as Microsoft Outlook, Microsoft Windows Live Mail, and Seesmic.
Intel Anti-Theft Technology Configuration (Default: Enabled) Intel Anti-Theft Technology makes your BRIX useless to thieves with immediate shutdown. Option available: Enabled / Disabled. ■ Enter Intel AT Suspend Mode (Default: Disabled) Suspends Intel AT support. Option available: Enabled / Disabled.
Chipset Allows users to view and configure the BRIX chipset features. ■ ■ ■ Onboard LAN Device (Default: Enabled) Enabled / Disabled onboard LAN controller. Option available: Enabled / Disabled. ■ Onboard Audio Device (Default: Enabled) Enabled / Disabled onboard audio controller. Option available: Enabled / Disabled. ERP Support (Default: Disabled) Enabled / Disabled ERP support function. Option available: Enabled / Disabled.
Chipset Allows users to view and configure the BRIX chipset features. ■ ■ System Performance Mode (Default: Operation Mode) GIGABYTE provides several methods to users to overclock the BRIX in a convenient way. Operation Mode: Lower power limitation to decrease the system temperature. Turbo Mode: Lift CPU power limition. CPU works normally. Option available: Operation Mode / Turbo Mode.
Boot Allows you to set the device priority during system boot-up. Boot Option Priorities Boot Option (Default: #1) Press to configure the boot priority. Option may vary depends on your connected HDD numbers: #1 / (#2).
Boot Allows you to set the device priority during system boot-up. BIOS setup will display an error message if the drive specified is not bootable. CSM parameters ■ Launch CSM (Default: Disabled) Enabled / Disabled UEFI CSM (Compatibility Support Module) to support a legacy PC boot process. Option available: Enabled / Disabled. The configurations will be showed below after enabled Launch CSM. ■ ■ Boot option filter Allows users to select the OS type to boot.
Security Allows you to safeguard an protect the BRIX from unauthorized use by setting up access passwords. Administrator Password ■ Press to configure the administrator password. User Password ■ Press to configure the user password. ■ ■ System Mode Display the system mode state. Secure Boot Display the Secure Boot Mode State.
Security Allows you to safeguard an protect the BRIX from unauthorized use by setting up access passwords. ■ Secure Boot Mode (Default: Standard) Define the Secure Boot Mode. Option available: Standard / Custom. The Key Management below can be selected if Secure Boot Mode is Custom. Factory Default Key Provisioning (Default: Disabled) Install factory default secure boot keys when system is in setup mode. Option available: Enabled / Disabled.
Save & Exit The Save & Exit menu displays the various options to quit from the BIOS setup. Highlight any of the exit options then press . ■ ■ ■ ■ Save Changes and Reset Active this option to reset system after saving the changes. Option available: Yes / No. Discard Changes and Reset Discards changes made and close the BIOS setup and exit. Option available: Yes / No. Restore Defaults Press on this item and then press key to load the default BIOS settings. Option available: Yes / No.