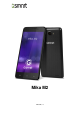
Mika M2 Mika M2|0
Copyright All mobile products by GIGA-BYTE COMMUNICATIONS INC. mentioned in this document, including the device, accessories, software, text, music, and pictures, are owned by, or authorized by original manufacturers to GIGA-BYTE COMMUNICATIONS INC. Reproduction, transfer, distribution, or storage of part or all of the contents in this document in any form without the prior written permission of GIGA-BYTE COMMUNICATIONS INC. is prohibited. GIGA-BYTE COMMUNICATIONS INC.
General Information This section contains important information on safe and efficient operation. Please read this information before using the device. Ignorance of the following notices may lead to violations of the law. Before using the device, please make sure you have fully charged the battery. Do NOT remove the battery from the device during charging. Before inserting SIM card into the device, make sure that the device is switched off.
Table of Contents Copyright General Information 1 2 1. Getting Started 4 1.1 Your Phone 1.2 Installing or uninstalling the SIM Card, Battery, and Memory Card 1.3 Charging the Battery 1.4 Turning the Phone On or Off 1.5 Lock/Unlock 1.6 Contacts 1.7 The Home Screen 4 4 5 6 6 6 7 2. Phone Functions & Messages 10 2.1 Voice Calls 2.2 Video Calls 2.3 Creating and sending a text message 2.4 Multimedia Message 10 10 10 11 3. Wi-Fi & Bluetooth 12 3.1 Wi-Fi 3.2 Bluetooth 12 12 4.
1. Getting Stared 1.1 Your Phone This section introduces you to the hardware of the device. 3 4 13 5 14 1 6 7 8 15 9 10 2 11 16 12 No items No Items 1 2 3 4 5 6 7 8 Micro-USB Port Earphone Jack Receiver Front Camera P Sensor/ Light Sensor Volume Power Touch Screen 9 10 11 12 13 14 15 16 Menu Home Return MIC 13MP Camera Flash LED Battery Cover Speaker 1.
To remove the SIM card Please turn off your phone first, and use your finger to slide the SIM card out of card slot. Battery Your phone comes with a rechargeable battery. Battery life varies depending on the network, used applications, and the type of connections attached to your phone. To install the battery Make sure the contact of the battery is close to connectors in the battery slot. To remove the battery Use your fingertip to lift the battery, and then remove it.
NOTE: To ensure safety, do not remove the battery from the phone while the AC adapter is connected or while it is being charged. 1.4 Turning the Phone on or off To turn on your phone Press and hold the power button until the phone shortly vibrates. To turn off your phone (1) Press and hold the power button for several seconds. (2) A pop-up window appears, then tap “Power off”. (3) Select “OK” to confirm. To set your phone to the sleep mode To set your phone to the sleep mode, press the power button briefly.
1.7 The Home Screen On Home Screen, you can quickly access common features and view notifications of missed calls, received messages, battery, and the status of the connection. Default Home Screen: Main functions. Icons Descriptions Favorites Tray can keep your most important shortcuts and folders. Tap to launch Application Drawer. You can slide the Home Screen from the left side to the right side or from the right side to the left side to switch it.
Status Icons The icons of the status bar indicate different types of information. Tap the status bar and scroll down to view notifications or view system information. Types Descriptions Icons Call is in progress. Your call is on hold. Phone call Mute the call. Speaker is on. Vibration is on. Volume Wired headset connected. Wired microphone headset connected. Battery is full. Battery is low. Battery Battery is very low. Battery is charging. Maximum signal strength.
Types Descriptions Icons Missed call. General notification. Notification FM radio is on. Playing a song. Downloading an application.
2. Phone Functions & Messages 2.1 Voice Calls To make a call from the Phone screen (1) Go to the Phone screen. (2) Use the keypad to input phone numbers. (3) Tap to make the phone call. NOTE: 1. Tap to delete a number. Tap and hold to erase entire numbers. 2. If you insert SIM1 and SIM2 at the same time, the Voice service will be set as default. You can set the default from the status bar on Phone screen. To make a call from Contacts (1) Tap Applications tab > . (2) Tap .
(3) Tap the icon to send the message. (4) Compose your message. to send your message. (5) Tap NOTE: If you exit Messages before sending, unsent message will be saved as a draft automatically. Google keyboard Icons Function Tap to active Capital letter mode. Tap to activate the symbols and numerical keyboard. Tap to input something by voice. Tap to delete words. 2.4 Multimedia Message A Multimedia message or MMS can contain letters, an image, an audio, or a video file.
3. Wi-Fi & Bluetooth 3.1 Wi-Fi Your device can connect to the detected network through Wi-Fi. (1) Tap Applications tab > > Wi-Fi. (2) Switch to turn “Wi-Fi” on or off. To connect to a Wi-Fi network (1) Tap “WI-FI”, check Wi-Fi function and turn it on. Begin to search the available Wi-Fi networks. (2) Detected networks are displayed below. Tap one network then tap “Connect”. (3) If you select an open network, the connection is established automatically.
4. Multimedia Applications 4.1 Camera Your phone is equipped with an 13MP camera to take photos and videos. Camera Function Icon Function Tap to take a photo. Tap to record a video. Normal mode. HDR mode. Face beauty mode. Icon Function Panorama mode. Display the flash mode. Switch between rear and front camera. Configure camera settings. Displays the last image. Taking a photo (1) Tap Applications tab > (2) Tap . The screen switches to landscape view automatically. to take a picture.
4.2 Music You have to copy your audio files to the storage card before playing music, because the music player only plays audio files saved in the storage card of your phone. Tap Applications tab > Music. Playback screen: Displays the playback area with the playback controls.
5. Pre-Installed Programs Introduction Icons Programs Best Choice Calculator Description Icons Recommended the best software and functionality. Performs arithmetic functions, such as addition, subtraction, multiplication, and division, etc. Programs Description Browser Browses the web and download files from Internet. Calendar Creates and tracks schedule or appointments. Google’s browser service. Stores names, numbers, e-mail, and other information.
Icons Programs Description Icons Programs Description Video Player Playing videos. NoteBook Writing down and save the words on the phone. Google Google Zhuyin Zhuyin Input keyboard service. To Do To save all the tasks and daily planning. Kingsoft Office Office Software. Battery Doctor To save juice and extend battery life significantly. Voice Search Clean Master Photo Grid Quickly to search your phone, the web, and nearby locations by speaking.
6. Managing Your Phone 6.1 Protecting Your Phone You can protect your phone from unauthorized users in a few different ways. Set up PIN Protection (1) Tap Applications tab > > Security > Screen lock > PIN. (2) Enter your PIN, and then, tap “Continue”. Confirm your password, then, tap “OK”. (3) If you want to disable screen lock security, please tap Application Drawer > > APPS tab > Security > Screen lock. Confirm your PIN, and then, tap “Continue”. Tap “None” to disable it.
6.2 Backup or Reset Your Phone With Clean Boot, you can reset your phone to its factory defaults. When you reset your phone, the data stored in your phone may be erased. (1) Tap Applications tab > > Backup & reset. (2) Tap Factory data reset > Reset phone > Erase everything to reset the phone. NOTE: Before resetting your device, please remember to back up all your data and information.
7. Specifications System Information Platform Processor Memory Display Android 4.4 1.3GHz Quad Core ROM 8GB/ RAM 1GB Size Resolutions Size 5” 1280 x 720 pixels Dimensions 145 x 72.8 x 8.5 mm (L x W x H) Weight 150 grams with battery Power Battery Li-ion pack 2000 mAh Power Adapter AC input 100-240V, 50/60Hz, 0.15A max. DC output 5V, 1A Standby time Up to 300 hours (It may vary depending on the availability of local networks and the individual usage.
If this document is modified, please download the latest version on GSmart official website. www.gigabytecm.
Android 4.4 Introduction Android 4.
Table of Contents Chapter 1 Phone Functions & Input 1.1 Phone Calls 1.2 Video Calls 1.3 Using On-Screen Keyboard Chapter 2 Email & Messages 2.1 Creating and sending a text message 2.2 E-mail Accounts Chapter 3 Using the Internet 3.1 Connecting to the Internet 3.2 Bluetooth modes Chapter 4 Multimedia Applications 4.1 Viewing Photos and Videos 4.2 Music Chapter 5 Programs 5.1 Browser 5.2 Calculator 5.3 Calendar 5.4 Sound Recorder 5.5 Gmail 5.6 Maps 5.7 Clock 5.8 Play Store 5.9 YouTube 5.
1. Phone Functions & Input Phone Functions Tap Application Drawer > APPS tab > Phone. 1.1 Voice Calls To make a call from the Phone screen 1. Go to the Phone screen. 2. Use the keypad to input phone number. 3. Tap NOTE: Tap to delete a number. Tap and hold to erase entire numbers. To make a call from People 1. Tap Application Drawer > APPS tab > . 2. Tap a contact into the information screen. 3. Tap a phone number you want to call. 4. If SIM2 inserted, there is a menu will pop up.
To put a call on hold If you are having a call conversation, you can tap to put the call on hold. To switch between calls If you are having a call conversation, and there is another incoming call, slide to first call on hold and answer the second call. Tap to put the to switch between calls. To set up conference calls 1. When you are already having a call conversation, tap to enter another phone number. 2. When someone answer your phone call, tap . Merge calls to set up the conference call. 3.
1.2 Video Calls To make a video call from Phone screen 1. Go to the Phone screen. 2. Use the keypad to input phone number. 3. Then tap > Video Call to make the video call. To make a video call from People 1. Tap Application Drawer > APPS tab > 2. On 3. Tap . tab, tap a contact into information screen. to make the video call. Ending a video call Tap End icon to end a video call.
1.3 Using On-Screen Keyboard On-screen keyboard appears in portrait mode when an application requires text input, such as messaging and writing e-mails. The keyboard input method is activated by the default settings. Using on-screen keyboard Use the keys on the on-screen keyboard. Tap the keys to enter the characters. Setting the Input Method from Settings Screen 1. Tap Application Drawer > APPS tab > > Language & input. 2. Tap ”Default” .There is a pop-up window will show. 3.
2. Email & Messages 2.1 Creating and sending a message Create and send messages 1. Text messages could be included text and emotional icons. 2. Multimedia messages/ MMS contain letters, an image, an audio, or a video file. 3. Support to send voice messages and attach files with ringtone and audio. NOTE: 1. If you insert both of SIM1 and SIM2, the messages service will be set as default. 2. Tap Application Drawer > APPS tab > > SIM management > Messaging to change the default setting.
3. Type your message and tap to send your message. To forward a text message 1. Tap Application Drawer > APPS tab > . 2. Tap a message to view the whole thread. 3. Tap and hold a message to show Message option list. 4. Tap “Forward”. 5. Tap to select recipient. 6. Tap to send your message. To delete all messages 1. Tap Application Drawer > APPS tab > . 2. Tap Menu > Delete all threads. 3. Tap “Delete” to delete all messages in this message box. To delete a message thread 1.
Android 4.
2.2 Email Accounts All your received email messages are delivered to your phone. Set up an Internet Email account 1. Tap Application Drawer > APPS tab > . 2. Enter your e-mail address and Password. Tap “Next”. 3. Select the e-mail account of types. 4. The phone will retrieve the e-mail settings automatically. If the e-mail settings are pre-configured, the e-mail setup wizard displays a successful message. If the e-mail settings are not found, manual setup is in process automatically.
want to attach. To reply or forward an Email 1. Open an e-mail. 2. Refer the following instructions: Reply: Tap Reply all: Tap > to reply all recipients and sender. Forward: Tap > to forward the e-mail to other people. to reply the email. 3. Enter the recipient and compose your e-mail. 4. Tap to send your email. To delete an Email 1. Tap Application Drawer > APPS tab > 2. In your mail Inbox, select the email you would like to delete. 3. Tap to delete the email. Android 4.
3. Using the Internet 3.1 Connecting to the Internet Your phone connects to the Internet via: Wi-Fi GPRS/ EDGE/ 3G/ 3.5G/ HSPA+ NOTE: If you connect to the Internet, you may be charged. If you want to stop the connection, you need to tap Application Drawer > APPS tab > > SIM management > Data connection to unmark data enabled. Wi-Fi 1. Tap Application Drawer > APPS tab > > Wi-Fi. 2. Switch to turn “Wi-Fi” on or off. To connect to a Wi-Fi network 1. Tap “Wi-Fi”, check Wi-Fi function and turn it on.
4. Tap ”Add VPN network” to edit VPN network. 5. After filling in all necessary information, tap “Save” to finish the settings. To start a data connection If you set up multiple data connections, select the connection you want to use. 1. Tap Application Drawer > APPS tab > > SIM management > Data connection. 2. Choose a SIM card you want to enable data access over Mobile network. Enabling data roaming Please set up your data connection first, and then follow the steps as below: 1.
3.2 Bluetooth modes Bluetooth on your phone operates in three different modes: On: Bluetooth is turned on. Your phone detects other Bluetooth devices, but your phone is not visible to others. Discoverable: Bluetooth is turned on, but your phone is not visible to other Bluetooth devices. Off: Bluetooth is turned off. To turn on/off Bluetooth 1. Tap Application Drawer > APPS tab > > Bluetooth. 2. Switch or tap to turn it on. 3. Tap “Bluetooth” to view the menu options. 4.
4. Multimedia Applications 4.1 Viewing Photos and Videos To view photos in the album 1. Tap Application Drawer > APPS tab > . 2. Tap one of picture folders to view the images in thumbnails. 3. Tap an image to view. 4. Slide the screen from left side to right side or from right side to left side to view all the photos in this album. To play slideshow 1. While viewing an image, tap Menu > Slideshow. 2. Tap screen to stop the slide show. To set the image as Wallpaper 1.
4.2 Music To play music 1. Tap Application Drawer > APPS tab > . 2. Tap Songs, and all songs on the phone will be displayed. 3. Tap to select a song, and then it will play automatically.
Tap “Library” to see all playlists. To edit music You could set up effects, tap Menu > Sound effects. 1. Drag or tap Equalizer to turn it on. 2. Tap arrow to show different effect list 3. Tap to select an effect you want. Items will be adjusted automatically. 4. Tap arrow to show different preset reverb list. 5. Tap to select an effect you want. Creating a new playlist Add songs to a specific playlist or create a playlist. 1. Tap Application Drawer > APPS tab > . 2.
5. Programs 5.1 Browser Open the Browser to view web pages. 1. Tap Application Drawer > APPS tab > . 2. An address bar appears at the upper side of screen, and you can type the URL there. 3. You can open several web pages at the same time. Tap to view all of web pages that are opening. Tap to open a new web page. Tap to close a web page. Tap to view BOOKMARKS. To set the Home page 1. While viewing a web page, tap Menu > Setting > General > Set homepage. 2.
5.3 Calendar 1. Calendar helps you schedule and sound alarms for appointments, meetings, and events. 2. Tap Application Drawer > APPS tab > . 3. If you do not log in your Google Account, tap Menu > Settings > ADD ACCOUNT to create an account, or tap “Existing” to sign in the Google account. Please follow the on-screen instruction to log in. 4. Tap Calendar arrow > Day, Week, Month, or Agenda to change the displays of your events. 5. Tap to go back to today. 6. Tap Menu > Settings to see more settings.
5.5 Gmail Gmail is Google's web-based email service. Gmail can be configured when you set up your phone for the first time. Depending on your settings of the synchronization, Gmail on your phone may be synchronized with your Gmail account on the web automatically. 1. Tap Application Drawer > APPS tab > . 2. If you do not log in your Google Account, tap “NEW” to create an account, or tap “Existing” to sign in the Google account. Please follow the on-screen instruction to log in. 3.
5.6 Maps Google's mapping service help you search for the places you want. To open Maps 1. Tap Application Drawer > APPS tab > . Icons Function Display your current location Select different layers, such as Traffic, Satellite, Transit Lines, etc. Type in a keyword and search for a place you want Input the start point and end point to get the direction Find places, such as restaurants, cafes, bars, attractions, etc. 2.
5.9 YouTube YouTube is an online video streaming service that allows you to view, search, and upload videos. To Play YouTube 1. Tap Application Drawer > APPS tab > . 2. Videos are grouped into categories. Tap a category to watch the available videos. 3. Tap a video to play. To upload your video 1. Tap Application Drawer > APPS tab > . 2. Tap Menu > Sing in. Then select one of your accounts to sign in. 3. Tap the YouTube icon on the top left of the screen. 4.
5.13 FM Radio Tap Application Drawer > APPS tab > . Please plug in your earphone before listening. Icons Function Open the channel list Close FM Radio More functions Add to favorites Previous radio frequency/ Next radio frequency Previous channel/ Next channel 5.14 Google+ You can check your friends’ updates, post updates of your own and chat with your friends in Google+. 1. Tap Application Drawer > APPS tab > . 2.
5.15 Connecting your phone to a computer Tap and drag down Status Bar and tap “Connected as USB Storage” on your device. Please choose one of modes to connect with your computer 5.16 Screenshots Please press the and hold “Volume Down Key” and “Power Key” at the same time to capture any screen from the device. Tap > view screenshots. Please refer the screenshots link :/Pictures/Screenshots Android 4.
6. Managing Your Phone 6.1 Managing Basic Settings Date and Time You can set up the date and the time on your phone. To set up the date and time 1. Tap Application Drawer > APPS tab > > Date & time. 2. If you turn on “Automatic data & time”, the system will get the information of the current date and time automatically from network or GPS. You can set up the date and the time manually also. 3. If you check “Automatic time zone”, the system will get the information of time zone automatically.
2. Check “Auto-rotate screen” to adjust the screen automatically. To display the screen never sleep while charging 1. Tap Application Drawer > APPS tab > > About phone. 2. Tap five times on “Build number”. 3. “Develop options” will be show up. 4. Select “Stay awake” to display the screen never sleep while charging. To create a new ringtone mode You can create several audio profiles to use.
6.2 Managing your SIM cards Setting SIM card’ background color You can change the SIM1 and SIM2 background colors. It helps you identify SIM1 and SIM2 quickly. 1. Tap Application Drawer > APPS tab > > SIM management. 2. Tap a SIM card from “SIM INFORMATION” list. 3. Tap “Set background color” to select one of colors. Setting the default SIM for Voice call/ Messaging If you insert SIM1 and SIM2 at the same time, please follow the step as below: 1. Tap Application Drawer > APPS tab > > SIM management. 2.
6.4 Protecting Your Phone You can protect your phone from unauthorized users by requiring the PIN or entering a password. Enable the PIN of the SIM card When the PIN is enabled, you are required to enter the PIN before making a call. 1. Tap Application Drawer > APPS tab > > Security > Set up SIM card lock. 2. Tap “SIM1” or “SIM2”. (If SIM2 inserted). 3. Select “Lock SIM card”. Input the PIN, and then, tap “OK”. Change the PIN of the SIM card 1. Tap Application Drawer > APPS tab > 2. 3. 4. 5.
6.5 Resetting Your Phone With Clean Boot, you can reset your phone to its factory defaults. When you reset your phone, the data stored in your phone may be erased. 1. Tap Application Drawer > APPS tab > > Backup & reset. 2. Tap Factory data reset > Reset phone > Erase everything to reset the phone. NOTE: Before reset your device, please remember to back up all your data and information.