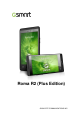
Roma R2 (Plus Edition) GIGA-BYTE COMMUNICATIONS INC.
Copyright All mobile products by GIGA-BYTE COMMUNICATIONS INC. mentioned in this document, including the device, accessories, software, text, music, and pictures, are owned by, or authorized by original manufacturers to GIGA-BYTE COMMUNICATIONS INC. Reproduction, transfer, distribution, or storage of part or all of the contents in this document in any form without the prior written permission of GIGA-BYTE COMMUNICATIONS INC. is prohibited. GIGA-BYTE COMMUNICATIONS INC.
Safety Information This section contains important information on safe and efficient operation. Please read this information before using the device. • Use only the batteries and power adapter provided by the manufacturer. Use of unauthorized accessories may void your warranty. • Do not remove the battery while the phone is charging. • Avoid using the phone near electromagnetic sources such as TVs, radios, and microwave ovens.
The maximum SAR value for each frequency band is listed below: SAR10g Band Position (W/kg) GSM900 Head 0.071 GSM1800 Head 0.273 WCDMA Band VIII Head 0.156 WCDMA Band I Head 0.731 WEEE Notice The WEEE logo on the product or on its box indicates that this product must not be disposed of or dumped with your other household waste. You are liable to dispose of all your electronic or electrical waste equipment by relocating over to the specified collection point for recycling of such hazardous waste.
Prevention of Hearing Loss Warning statement requirement under EN 60950-1:A12. To prevent possible hearing damage, do not listen at high volume levels for long periods. Note: For France, headphones/earphones for this device are compliant with the sound pressure level requirement laid down in the applicable EN 50332-1: 2000 and/or EN50332-2: 2003 standard as required by French Article L.5232-1. Notice: This device is in accordance with ETSI TS 123.038 V8.0.
General Information This section contains important information on safe and efficient operation. Please read this information before using the device. Ignorance of the following notices may lead to violations of the law. • • • • • • • • • • • • • • • Before using the device, please make sure you have fully charged the battery. Do NOT remove the battery from the device during charging. Before inserting SIM card into the device, make sure that the device is switched off.
Table of Contents Copyright Safety Information General Information 0-1 0-2 0-5 Chapter 1 Getting Started 1-1 1.1 Your Phone 1.2 Installing or uninstalling the SIM Card, Battery, and Memory Card 1.3 Charging the Battery 1.4 Turning the Phone On or Off 1.5 Lock / Unlock 1.6 Initial Settings 1.7 Adjusting the Volume 1.8 Contact 1.9 The Home Screen 1-1 1-2 1-3 1-3 1-4 1-4 1-4 1-5 1-6 Chapter 2 Phone Functions & Input 2-1 2.1 Voice Calls 2.
Getting Started 1. Getting Started 1.1 Your Phone This section introduces you to the hardware of the device. 4 5 6 2 3 13 14 7 8 15 9 10 11 1 No. 1 2 3 4 5 6 7 8 9 10 11 12 13 14 15 16 16 12 Items Functions Earphone Use a headset for hands-free conversation or listening to music. jack •Connect USB cable and the AC adapter to charge the battery mildly. Micro-USB • USB tethering: Share your phone’s mobile data connection via USB port cable. Press upward or downward to turn louder or down volume.
Getting Started 1.2 Installing or uninstalling the SIM Card, Battery, and Memory Card To remove the back cover 1. Please turn over your phone with the back cover facing up. 2. Please move your fingertip into the slot. 3. Pull the back cover with your fingertip and remove it. SIM card The SIM card contains your phone number, memory storage, and details of network service. To install the SIM card There are two slots for SIM cards. Left slot is for SIM2(GSM) and right slot is for SIM1(WCDMA+GSM).
Getting Started NOTE: •To ensure battery performance and avoid risk from fire. • Use only the original battery designated for the phone. • Do not store the battery in temperature lower than -10ºC or higher than 45ºC. To replace the back cover 1. Please insert the cover into the slot from the bottom. 2. Then, press two point on the left and right of back cover fully until hearing clicks. Memory card You may need a microSD card to store photos, music, videos and other data. To install the memory card 1.
Getting Started To turn off your phone 1. Press and hold the power button for several seconds. 2. A pop-up window appears, then tap “Power off”. 3. Select “OK” to confirm. To set your phone to the sleep mode To set your phone to the sleep mode, press the power button briefly. It will turn the display off. To turn the display on, press the power button briefly again. 1.5 Lock/Unlock Unlock the device Drag lock icon on screen and slide to unlock icon for unlocking the device. 1.
Getting Started NOTE: When the phone is set to the silent mode, all sounds are turned off except media and alarm. 1.8 Contacts “Contacts” is your phonebook that lets you store friends’ names, phone numbers, e-mail addresses and other information.”Contact” can connect to your Google, Corporate accounts, and integrate your contacts information. Adding a Contact 1. Tap Application Drawer > APPS tab > Contacts. 2. Tap tab > tap to add a new contact. 3.
Getting Started 2. Tap Menu > Import/export. 3. You can select SIM1 or SIM2 (If SIM2 card inserted). Then tap “OK”. 4. You can select an account to save the import contacts. 5. Select contacts you want, or check “All”. Then tap “Ok”. 6. You can check the import situation in the status bar. Import Contacts from storage 1. Tap Application Drawer > APPS tab > Contacts. 2. Tap Menu > Import/export > Import from Phone storage. 3. You can select an account to save the import contacts. 4. Select the Card files.
Getting Started Icons Descriptions Favorites Tray can keep your most important shortcuts and folders. Tap to launch Application Drawer. Self-defined Home Screen: You can add the shortcuts and widgets. Icons Functions Tethering or hotspot active Tap to turn on/ off network. Enable/disable Wi-Fi. Enable/disable Bluetooth. Enable/disable GPS. Enable/disable Data Synchronization. Tap to adjust the brightness. How to Navigate Tap: You can tap the icon on the screen to activate the application.
Getting Started Maximum signal strength. Fewer bars indicate lower signal strength. Left icon is SIM1 signal (WCDMA+GSM). Right icon is SIM2 signal (GSM). G E 3G H Network and Connection GPRS\ EDGE\ 3G\ HSDPA is in progress.SIM1 supports GPRS\ EDGE\ 3G\ HSDPA networks.SIM2 supports GPRS\ EDGE networks. Wi-Fi is connected. Wi-Fi is in progress. Notification FM Wi-Fi Network is activated. Airplane mode. Portable Wi-Fi hotspot is activated. Both USB tethering and Portable Wi-Fi hotspot are activated.
Getting Started Using Widgets You may add and customize widgets on the Home Screen as you like. To add widgets 1. Tap Application Drawer > WIDGETS tab. 2. Select a widget you want. Then, tap and hold the widget icon to any Home Screen thumbnail you want to add it. 3. Tap and hold the widget icon, drag to move it among the Home Screens. To delete widgets 1. Tap and hold a widget icon which you want to delete on the screen. The widget will enlarge and “Remove” will appear on the top of Home Screen. 2.
Getting Started To delete folders 1. Tap and hold a folder of Home Screen. The folder will enlarge and “Remove” will appear on the top of Home Screen. 2. Drag the folder to the “Remove” to delete it. Setting the wallpaper Customize the wallpaper of your Home Screen with default wallpapers or with pictures in your phone. Set wallpaper from Video Wallpaper, Live wallpapers or Wallpapers 1. Long press any place on the Home Screens. There is a menu that will pop up. 2.
Phone Functions & Input 2. Phone Functions & Input Phone Functions Tap Application Drawer > APPS tab > Phone. 2.1 Voice Calls Making a call To make a call from the Phone screen 1. Go to the Phone screen. 2. Use the keypad to input phone number. 3. Tap then choose SIM1 or SIM2 to make the phone call. NOTE: Tap to delete a number. Tap and hold to erase entire numbers. To make a call from Contacts 1. Tap Application Drawer > APPS tab > Phone. 2. Tap . 3. Tap a contact you want to call. 4.
Phone Functions & Input To put a call on hold If you are having a call conversation, you can tap to put the call on hold. To manage other voice call features When you are having a call conversation • Tap to activate speakerphone, or tap again to cancel it. • Tap to mute microphone, or tap again to un-mute it. Ending a call Tap End icon to end a call. 2.2 Using On-Screen Keyboard On-screen keyboard appears in portrait mode when an application requires text input, such as messaging and writing e-mails.
Phone Functions & Input TouchPal Input Method General settings • Keypress sound: You can adjust keypress sound here. • Keypress vibration: You can adjust keypress vibration here. • Keyboard Size: You could adjust keyboard height here. • Candidate Size: You could adjust candidate size here. • Keypress popup: Enable or disable popup effect for keypress. • Plug-ins: Add plug-ins toolbar. • Skin: Customize your own skin. Smart input: Keyboard intelligence for western languages.
Phone Functions & Input TouchPal Curve Input Using Curve let you type faster than normal IME. Input a word by drawing through letters. Put your finger on the first letter of the word and draw a path from letter to letter, then lifting up your finger after the last letter. And the predicted words will show on the screen. Android keyboard • Input languages: You can change input language. • Auto-capitalization: Capitalize the first word of each sentence.
Email & Messages 3. Email & Messages Use Messaging to access text and MMS messages. Use Email to send and receive e-mail messages via your Internet e-mail accounts. 3.1 Creating and sending a text message Your phone offers several ways to create and send a new text message. From Message screen 1. Tap Application Drawer > APPS tab > Messages. 2. Tap to create a new message. 3. In the “To” field, enter the recipient’s phone number or tap to add from your contacts. 4.
Email & Messages To delete a message thread 1. Tap Application Drawer > APPS tab > Messages. 2. Tap and hold a message thread you want to delete. 3. Tap to delete the message thread. To delete a message within a thread 1. Tap Application Drawer > APPS tab > Messages. 2. Choose a message you want to delete. 3. Tap and hold it until a Message options list shows. 4. Tap “Delete” to delete the message. 3.2 Multimedia Message A Multimedia message or MMS can contain letters, an image, an audio, or a video file.
Email & Messages 8. Enter your message with the on-screen keyboard in “Type text message” 9. Tap to send your message. 3.4 Email Accounts All your received email messages are delivered to your phone. Setting up an Internet e-mail account 1. Tap Application Drawer > APPS tab > Email. 2. Enter your e-mail address and Password. Tap “Next”. 3. Select the e-mail account of types. 4. The phone will retrieve the e-mail settings automatically.
Email & Messages To set up the e-mail check frequency 1. Tap Application Drawer > APPS tab > Email. 2. Tap Menu > Settings. 3. Tap one of your accounts (If you have two more e-mail accounts). 4. Tap “Inbox check frequency”. You can set how often to check for new e-mail automatically. To set up default account 1. Tap Application Drawer > APPS tab > Email. 2. Tap Menu > Settings. 3. Tap one of your accounts. (If you have two more e-mail accounts) 4.
Email & Messages Receiving e-mails E-mails will be received automatically when your phone connects to wireless networks. Reading e-mails The Inbox displays the e-mail headers. When you open the e-mail, it shows the message of text, unless the attachments. Please download the e-mail attachments to view it. To reply or forward an e-mail 1. Open an e-mail. 2. Do any of the following: • Reply: Tap to reply the e-mail. • Reply all: Tap Menu > to reply all recipients and sender.
Using the Internet 4. Using the Internet 4.1 Connecting to the Internet Your phone connects to the Internet via: Wi-Fi 3.5G / 3G/ EDGE / GPRS NOTE: If you connect to the Internet, you may be charged. If you want to stop the connection, you need to tap Application Drawer > APPS tab > Settings > WIRELESS & NETWORKS section > More > Mobile networks > to unmark Data enabled. Wi-Fi Your device can connect to the detected network through Wi-Fi. 1. Tap Application Drawer > APPS tab > Settings > Wi-Fi. 2.
Using the Internet 2. You must set lock screen PIN or password before using credential storage. Please tap OK go to Unlock selection, then choose which way you want to lock the screen. 3. After you set it up. It will go back to VPN screen. 4. Tap ”Add VPN network” to edit VPN network. 5. After filling in all necessary information, tap “Save” to finish the settings. To start a data connection If you set up multiple data connections, select the connection you want to use. 1.
Multimedia Applications 5. Multimedia Applications 5.1 Photos and Videos Your phone is equipped with a 5.0 megapixels camera to take photos and videos. Taking a photo/ Recording Video Icon Function Icon Function Switch to smile shot mode Tap to record a video Switch to Panorama mode Tap to take a photo Switch to Normal mode Display the flash mode Tap to configure camera settings Tap to switch between rear and front camera 1. Tap Application Drawer > APPS tab > Camera.
Multimedia Applications To edit an image While viewing the image, to edit an image: To crop, tap Menu > Crop. 1. Drag your finger to select the area you want to keep. 2. Tap “CROP” to save the image. To add effects, tap Menu > Edit. 1. Using effects on the bottom to apply to the image. 2. Tap “Save” to save the image. To view file properties 1. While viewing the image, tap Menu > Details. 2. The file information is displayed. 3. Tap “Close” to return to the image. Play video from the video file 1.
Multimedia Applications Playlists Tap to go to play list. You may see “Recently added” and “My recordings” files in this page. Now playing list Tap when you are listening to music, you could tap and hold the icons on the left of each recording files to arrange its sequence. To play music 1. Tap Application Drawer > APPS tab > Music. 2. Tap Songs, and all songs on the phone will be displayed. 3. Tap to select a song, and then it will play automatically.
Multimedia Applications 4. Tap arrow to show different preset reverb list. 5. Tap to select an effect you want. Creating a new playlist Add songs to a specific playlist or create a playlist. 1. Tap Application Drawer > APPS tab > Music. 2. In Songs tab, tap and hold a song you want to add, then tap “Add to playlist” in the pop-up submenu. 3. Tap “New” to create a new playlist. Input a name for the created playlist, and then tap “Save”. The song will be added to the new playlist automatically. 4.
Programs 6. Programs 6.1 Pre-installed programs introduction Icons Programs Best Choice Calculator Camera Clock Downloads Earth Description Allows you to use the phone easily, we recommend and provide you the best software and functionality. Performs arithmetic functions, such as addition subtraction, multiplication, and division, etc. Captures still images. Sets up alarm clock. To view files and items you've downloaded from mail or any other sources, like Play Store.
Programs Managing a Web Page The following table lists the Menu options. Depending on the function, some options may be unavailable. On an open web page, tap Menu: Refresh Tap to refresh web page. Stop Tap to stop opening another web page. Home Tap to go back homepage. Save to Add the web page to Bookmarks. bookmarks Close Tap to Minimize or Quit. Save for offline Tap to save the web page to view in offline mode. reading Share page Tap to share the web page.
Programs Bandwidth management Labs Enable plug-ins: Always on, On demand, and Off. Website settings: Advanced settings for individual websites. Default zoom: Set up zooming functions. Open pages in overview: Show overview of newlyopened pages. Auto-fit pages: Enable/disable the webpage to fit the screen. Block pop-ups: Blocks the pop-up windows when browsing web page. Text encoding: Sets up text encoding. Rest to default: Restore default settings.
Programs NOTE: The added and scheduled events will be showed in the status bar. 6.5 Gmail Gmail is Google's web-based email service. Gmail can be configured when you set up your phone for the first time. Depending on your settings of the synchronization, Gmail on your phone may be synchronized with your Gmail account on the web automatically. 1. Tap Application Drawer > APPS tab > Gmail. 2.
Programs 6.9 Google Search Search for the information in the Internet and on the phone. Tap Application Drawer > APPS tab > Search. You can also see the search bar on the Home screen. 6.10 Hangouts Talk is Google's instant messaging program. To sign in Hangouts 1. Tap Application Drawer > APPS tab > Hangouts. 2. If you do not log in your Google Account, tap “NEW” to create an account, or tap “Existing” to sign in the Google account. Please follow the on-screen instruction to log in. 3.
Programs 6.14 Best Choice For easy to use, we recommend you the best software and functionality. With this function, you can find the web links to the services you need easily. 1. Tap Application Drawer > APPS tab > Best Choice. 2. Tap a desired function, and then, download it online. 6.15 FM Radio You can listen to music/news on the FM Radio. Before use, please insert the headset. 1. Tap Application Drawer > APPS tab > FM Radio. 2. Tap to switch voice source between your headset and speaker. 3.
Programs To play a voice note After recording, the file will be stored in the memory card. Please use Music to play it. 1. Tap Application Drawer > APPS tab > Music > Playlists > My recordings. 2. Displays the list of the voice note, and then, tap the voice note you want to play it. 6.17 Connecting your phone to a computer If you want to copy files between your computer and your phone storage. Please have your device connect to PC with the USB cable first.
Managing Your Phone 7. Managing Your Phone 7.1 Phone Settings Tap Application Drawer > APPS tab > Settings to view and adjust the settings of your phone. WIRELESS & NETWORK Application Description SIM Set SIM name, turn on/off SIM card, mobile network setting and call Management settings, etc. Wi-Fi Enable/disable Wi-Fi. And set up and manage wireless access points. Enable/disable Bluetooth. And manage connections, set up the name of Bluetooth the device and the discoverability of the device.
Managing Your Phone you power it on. Set up SIM Lock SIM card and change the PIN of your SIM card. card lock Make Enable/disable to show the password as you type. passwords visible Device View or deactivate device administrators. administrators Unknown Allow installation of non-Market apps. sources Verify apps. Disallow or warn before installation of apps that may cause harm. Trusted Display trusted CA certificates. credentials Install from SD Install certificates form SD card.
Managing Your Phone Select date Set up the preferred date format. format Scheduled power on & off: Allow you to scheduled power on & off time. Accessibility: TalkBack Provides spoken feedback to help blind and low-vision users. Magnification You can zoom in and out by triple-tapping the screen. gestures Large text Adjusts the text size. Power button During a call, pressing Power ends the call instead of turning off the ends call screen. Auto-rotate Set up the screen direction automatically.
Managing Your Phone 7.2 Managing Basic Settings Date and Time You can set up the date and the time on your phone. To set up the date and time 1. Tap Application Drawer > APPS tab > Settings > Date & time. 2. If you check “Automatic data & time”, the system will get the information of the current date and time automatically. You can set up the date and the time manually also. 3. If you check “Automatic time zone”, the system will get the information of time zone automatically.
Managing Your Phone 7.3 Protecting Your Phone You can protect your phone from unauthorized users by requiring the PIN or entering a password. Set up Password Protection 1. Tap Application Drawer > APPS tab > Settings > Security > Screen lock > Password. 2. Enter your password, and then, tap “Continue”. Confirm your password, then, tap “OK”. 3. If you want to disable screen lock security, please tap Application Drawer > Settings > APPS tab > Security > Screen lock.
Managing Your Phone 7.4 Resetting Your Phone With Clean Boot, you can reset your phone to its factory defaults. When you reset your phone, the data stored in your phone may be erased. 1. Tap Application Drawer > APPS tab > Settings > Backup & reset. 2. Tap Factory data reset > Reset phone > Erase everything to reset the phone. NOTE: Before reset your device, please remember to back up all your data and information. 7.5 Specifications System Information Platform Android 4.4 Processor 1.
Managing Your Phone Front Camera External Memory Memory Card Temperature Operating SIM Card Slot Dual SIM card slot. 0.3MP microSD supports up to 32GB 0°C to 40°C NOTE: 1. Specifications are subject to change without the prior notice. They may vary in some regions also. 2. Mobile data interruption, unexpected error in CPU and high power consumption could be caused by in-app AD in Android phone.