
Instructions / Assembly


ASSEMBLY INSTRUCTIONS
Carefully pull frame apart
IMPORTANT
We strongly suggest setting up your new
canopy before initial use to insure that all parts
are present and to familiarize yourself with the
canopy’s assembly. This will have a great effect
on how well enjoy your product.
Warning
Trying to force the frame open will result in broken cross pieces. NEVER force
the frame to open.
Attach Velcro
Attach Velcro
C D
E
F
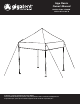
Step 1
1) Carefully remove the frame from the carry bag and stand upright.
2) With a partner on the oppositeside of the frame, hold onto the two outer legs and lift frame off the ground slightly
for clearance, taking a few steps backward until you have extended the frame a full arms length-approx. 4’ (Figure A).
To improve the opening and closing action of your frame, place the canopy top over the top of the frame (Figure B).
Step 2
3) Use the Velcro strips to secure each corner of
the top to the frame on corresponding Velcro
already attached to frame (Figure C and D).
4) Your top is now attached to frame.
Step 3
5) Grab the bottom of the middle frame section
where it forms a “V” shape (Figure E) and lift
frame off the ground slightly and walk
backward until frame is fully extended.
6) With both people holding the “X” truss on the
opposite sides, expand it until it touches the
eaves of the top, (Figure F) taking care not to
pinch your hands or fingers.