
Installation Instructions


Determine Your Needs
After you have carefully measured the installation area,
count each 6' wide fence section,
you may want to allow
for extra fence sections to compensate for
measurements not divisible by 6 ft.
Next count the number of Line Posts, Corner Posts, End
Posts and the Gate Posts. Remember to allow an
opening for Gate width.
You are now ready to prepare for installation.
Planning:
•Measure carefully, then draw your fence plan on a planning grid.
•Check the following:
MEASURING TIPS
When planning, remember that each installed 6' fence section
measures 6' from the
center
of the first post to the
center
of the
second post. An installed fence section measures 6'2" from outer
edge of the first post to the outer edge of the
next post.
(Therefore, one installed fence section would
measure 6'2", two sections measure 12'2", three
sections measure 18'2", etc. (If the fence goes up or
down a slope, these dimensions may vary slightly.)
STEP-by-STEP
1. Layout the area to be fenced
2. Measure & plan area
3. Determine materials needed
4. Order necessary items
5. You are ready for installation!
Local building codes
Home Owner Assoc.
Zoning requirements
Utility lines
•Select a fencing style that is practical and complementary to the landscape.
•Order the materials.
The opening left for gates should be the width of the gate
ordered. For example: a 36" opening should be left for a
36" gate.
The gate is actually 35" and is made to fit a 36"
opening.
A Quick Reference Guide to Planning an Installation
6'0"
6'2"
PLEASE NOTE: It is the Responsibility of the Installer to
Comply with Relevant Local Building Codes. Most styles
can be customized to meet specific building codes. Be
sure to specify codes when ordering. IMPORTANT!
CALL BEFORE YOU DIG! Electric, gas, water and many
other lines crisscross most urban areas. Even rural ar-
eas have heavy concentrations of underground utility
lines. To avoid hitting any of these lines (some of which
are only inches below the ground) call your local utility
companies 2-3 days before you dig. (Most states have
a one-call number.)
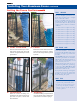
CORNER POST LINE POST
END POST
TRANSITION
POST
24'2"
36'2"
18'2"
12'2"
18'2"
12'2"
12'2"
CORNER POST
LINE POSTS
END
POST
HOUSE
GATE POSTS
3 WAY POST
TOOLS & MATERIALS YOU WILL NEED
1. Post-hole digger
2. Shovel
3. Carpenters level
4. Saw
5. Tape measure
6. Screwdriver (electric) &
hexhead bit
7. Sledge hammer
8. Mason’s trowel
9. Hammer
10. String or chalk line
11. Wheelbarrow for cement
12. Cement
13. Wooden Stakes
14. Gravel
Plan and Measure Your Aluminum Fence Layout
Before installing your fence, draw a plan to scale on a piece of graph paper
as shown in the example. This drawing will help you estimate materials
and plan the location of corners and gates. Show the location of the house,
garage, driveway, trees, property lines, sidewalks and other elements of
your landscape. Measure accurately with a hundred foot tape measure.
PAGE 1PAGE 1
PAGE 1PAGE 1
PAGE 1