
Use and Care Manual


Setting Each Tile
1. When setting the tiles, butt them up to the adjacent tiles, and then press and twist the tile into the thin-set away
from the already set tiles. This prevents thin-set from squeezing up into the grout lines. The less thin-set that dries
in the grout lines, the less clean up will be required before grouting.
2. Place tile spacers where tiles butt up next to one another. You
should place at least two along each edge to ensure straight,
uniform grout lines.
Cutting Tile
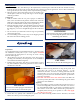
1. Make an outline of the cut on a piece of paper or cardboard.
Then, cut it out and trace the pattern onto the back of the tile.
Make sure to flip the pattern 180° when translating the pattern
to the tile so that it installs correctly when right side up.
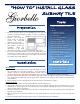
2. Push tile through your tile saw face down. This prevents the
inevitable chipping from removing the painted back. When
this happens, you can see straight through the tile to the thin-
set.
3. For curved cuts you will need a band or ring saw specifically
designed for glass tile.
4. Use a smoothing stone to remove any excess chipping or burrs
left on the tile from the cutting process.
Grouting
Preparation
We recommend using our unsanded Keracolor U Grout for glass
tile installation. Grout joints of 1/8” or less require unsanded
grout because the sand grains are too large to create a strong
bond in sanded grouts.
1. Allow thin-set to cure for 48 to 96 hours (2 to 4 days) prior to
grouting. The humidity and temperature of the installation
environment will affect curing time.
2. Examine the grout lines, and using a Grout Scraper remove
any thin-set that has dried in the grout line in excess of 40% of
the thickness of the tile.
Mixing
1. Be sure to follow mixing directions on bag on all points. You
need allow the grout to sit between mixings – as the
instructions describe - because it is during that time that the
cement slakes. If you do not do this, the bonds will be weak
and the grout will not reach maximum adhesive performance
and color consistency.
2. DO NOT add extra water once mixed. This will dilute the
grout and possibly bleed the color. Remixing the grout should
return some of its fluidness.
Applying
1. Use a Grout Bag to spread grout directly into the joint or use a
Grout Float diagonally across the face of the tiles. You can use
an old toothbrush handle or your finger to spread the grout in
those hard to reach areas. Make sure that all grout joints are
completely filled, leaving no air pockets or voids. Only apply
up to 25 sq. ft. at a time.
2. Grout dries very quickly and is difficult to squeeze out of the Grout Bag within an hour. Therefore, mix small
batches at a time to prevent wasting the grout.
Cleaning
Do not over wet the sponge. It will discolor
the grout and remove it from the joint.
CUTTING
Make sure to cut with the backing face up
Outlining
After tracing your paper/cardboard to the
size of your cut, flip the pattern 180° when
translating onto the tile.