
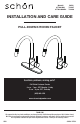
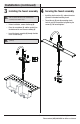
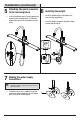
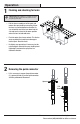
Installation Guide


8
Care and Cleaning
□ To clean, wipe down with a damp cloth and dry with a towel.
Troubleshooting
Problem Possible Cause Solution
There are leaks
underneath the handle.
The bonnet nut has come loose and the
o-ring on the cartridge is dirty or damaged.
□ Tighten the bonnet nut. Clean
or replace the o-ring.
The aerator leaks or has
an inconsistent water
ow pattern.
The aerator is dirty or mistted.
The cartridge may be clogged.
□ Remove the aerator and check
for debris in the aerator screens.
□ Remove the cartridge and check
for debris.
□ Do not use abrasive cleaners, steel wool, or harsh chemicals when cleaning this faucet, or the warranty will
be voided.
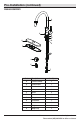
NOTE: Refer to the service parts section in this manual for
a detailed drawing showing the location of the parts listed
below.
□ Ensure the aerator is properly
installed.
There are leaks from the
hose underneath the deck.
The hose and discharge tube connection
may be loose.
□ Tighten the connection between
the discharge tube and hose.
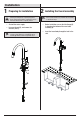
The hose does not retract. The weight is not installed in the
appropriate position.
□ Reinstall or readjust the weight.
The water pressure is low. The connector underneath the deck is
clogged with debris.
The aerator is clogged.
□ Turn off the water supply and
disconnect the connector
/ aerator.
□ Unscrew the connector / aerator
and clean under running water.
□ Screw the connector / aerator
back.
□ Test water ow. If water
pressure is still low then replace
the connnector / aerator.
There is no hot or cold
water.
The water inlet hose was acccidentally
kinked during installation and is limiting
the water ow through.
□ Reinstall the water inlet hose.