Model# HD67110W-6001 HD67110W-6004 HD67110W-6010H HD67110W-604405 SKU# 1005537925 313824361 313824365 313824367 INSTALLATION AND CARE GUIDE DORIND 4 IN. CENTERSET 2-HANDLE HIGH-ARC BATHROOM FAUCET Questions, problems, missing parts? Before returning to the store, call Glacier Bay Customer Service 8 a.m. - 7 p.m., EST, Monday - Friday 9 a.m. - 6 p.m., EST, Saturday 1-855-HD-GLACIER (1-855-434-5224) HOMEDEPOT.
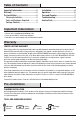
Table of Contents Important Information ..............................2 Warranty ...................................................2 Pre-Installation .........................................2 Planning Installation ..............................2 Tools and Hardware Required ...............2 Package Contents ..................................3 Installation ................................................4 Operation...................................................6 Care and Cleaning ......................
Pre-Installation (continued) PACKAGE CONTENTS Faucet Assembly Press Pop-Up Assembly D A E B F C G Part Description Quantity A Faucet 1 B Gasket 1 C Mounting nut 2 D Top gasket 1 E Pop-up body 1 F Bottom gasket 1 G Nut 1 3 HOMEDEPOT.COM/GLACIERBAY Please contact 1-855-HD-GLACIER for further assistance.
Installation 1 Installing the faucet assembly 2 Preparing the pop-up assembly CAUTION: Always shut off the water supply before removing an existing faucet or replacing any part of a faucet. Open the faucet handle to relieve water pressure and ensure that the water is completely shut off. □ Remove the bottom gasket (F) and nut (G) from the top gasket (D) and pop-up body (E). □ Attach these pieces together by pushing the bottom gasket (F) down into the top of the nut (G) and twisting together.
Installation (continued) 3 Installing the pop-up body □ 4 Securing the pop-up body Insert the pop-up body (E) into the sink. Ensure that the top gasket (D) rests securely between the top of the sink and the top of the pop-up body (E). □ From underneath the sink, screw the bottom gasket (F) and nut (G) assembly onto the pop-up body (E) by twisting clockwise until secure. D E E F G 5 HOMEDEPOT.COM/GLACIERBAY Please contact 1-855-HD-GLACIER for further assistance.
Installation (continued) the water supply 5 Making connections □ □ Use 1/2 in. I.P.S. faucet connections (2), or use supply line coupling nuts (3) (not included) with a 3/8 in. O.D. ball-nose riser (1). Use wrenches to tighten the connections. Do not overtighten. 1 2 3 Operation 1 Flushing and checking for leaks A IMPORTANT: After installation is complete, remove the aerator from the faucet (A) to flush the water lines. Do not lose the gasket (1) in the aerator.
Care and Cleaning □ To clean, wipe down with a damp cloth and dry with a towel. □ Do not use abrasive cleaners, steel wool, or harsh chemicals when cleaning this faucet, or the warranty will be voided. Troubleshooting NOTE: Refer to the service parts section in this manual for a detailed drawing showing the location of the parts listed below. Problem Possible Cause There are leaks from the handle. The bonnet nut has come loose and/or the washer is dirty or damaged. □ □ Clean or replace the washer.
Service Parts 1 2 3 5 4 6 7 8 Faucet ID tags can be found by removing the hot water handle 9 12 10 11 Part Part Number Part Description Part Number 1 Description Aerator RP30298* 8 Cartridge C RP20080 2 Wearable ring RP70077 9 Washer RP64123 3 Clip RP70023 10 Gasket RP80738 4 O-ring RP60008 11 Mounting nut RP56001 5 Handle assembly RP13724* 6 Bonnet nut RP70742 12 Press pop-up assembly RP40269* 7 Cartridge H RP20079 *Specify Finish Many replacement cartridg
Questions, problems, missing parts? Before returning to the store, call Glacier Bay Customer Service 8 a.m. - 7 p.m., EST, Monday - Friday 9 a.m. - 6 p.m., EST, Saturday 1-855-HD-GLACIER (1-855-434-5224) HOMEDEPOT.COM/GLACIERBAY Retain this manual for future use.
Modelo núm. HD67110W-6001 HD67110W-6004 HD67110W-6010H HD67110W-604405 SKU núm. 1005537925 313824361 313824365 313824367 GUÍA DE USO Y MANTENIMIENTO DORIND-MEZCLADORA PARA BAÑO, DE ARCO ALTO, CON 2 MANERALES Y PIEZA CENTRAL DE 4" ¿Problemas, preguntas o piezas faltantes? Antes de regresar a la tienda, llama al servicio al cliente de Glacier Bay de lunes a viernes entre 8 a.m. y 7 p.m. y los sábados entre 9 a.m. y 6 p.m.(hora estándar del Este) 1-855-HD-GLACIER (1-855-434-5224) HOMEDEPOT.
Tabla de contenido Información importante .........................11 Garantía...................................................11 Pre-instalación .......................................11 Planificación de la instalación .............11 Herramientas y herrajes necesarios ....11 Contenido del paquete .........................12 Instalación ..............................................13 Funcionamiento ......................................15 Cuidado y limpieza ................................
Pre-instalación (continuación) CONTENIDO DEL PAQUETE Ensamblaje de la mezcladora Presiona el ensamblaje emergente D A E B F C G Pieza Descripción Cantidad A Mezcladora 1 B Junta 1 C Tuerca de montaje 2 D Junta superior 1 E Cuerpo emergente 1 F Junta inferior 1 G Tuerca 1 12 HOMEDEPOT.COM/GLACIERBAY Para obtener asistencia, llama al 1-855-HD-GLACIER.
Instalación instalar el ensamblaje preparar el ensamblaje 1 Cómo 2 Cómo del grifo emergente PRECAUCIÓN: Cierra siempre el suministro de agua antes de retirar un grifo existente o reemplazar alguna parte del mismo. Abre la llave del grifo para liberar la presión de agua y asegúrate de que el suministro de agua esté completamente cerrado. □ Retira la junta inferior (F) y la tuerca (G) de la junta superior (D) y del cuerpo emergente (E).
Instalación (continuación) instalar el cuerpo 3 Cómo emergente □ asegurar el cuerpo 4 Cómo emergente Inserta el cuerpo emergente (E) en el lavamanos. Asegúrate de que la junta superior (D) descansa de manera segura entre la parte superior del lavamanos y la parte superior del cuerpo emergente (E). □ Desde la parte inferior del lavamanos, enrosca la junta inferior (F) y el ensamblaje de la tuerca (G) en el cuerpo emergente (E) en el sentido de las manecillas del reloj hasta que quede seguro.
Instalación (continuación) hacer las conexiones 5 Cómo del suministro de agua □ Usa conexiones de grifos de 1/2" IPS (2) o tuercas de acoplamiento de líneas de suministro (3) (no incluidas) con un tubo montante de bola de diámetro exterior de 3/8" (1). □ Usa llaves para apretar las conexiones. No aprietes demasiado.
Cuidado y limpieza □ Para limpiar, usa un paño húmedo y seca con una toalla. □ No uses limpiadores abrasivos, esponjas de alambre o productos químicos fuertes para limpiar esta mezcladora, pues ello anulará la garantía. Solución de problemas NOTA: Consulta la sección de piezas de repuesto de este manual para ver un dibujo detallado que muestra la ubicación de las piezas enumeradas a continuación. Problema Posible causa Hay filtración por el maneral.
Piezas de repuesto 1 2 3 5 4 6 7 Las etiquetas de identificación de la mezcladora pueden verse al quitar el maneral del agua caliente.
¿Problemas, preguntas o piezas faltantes? Antes de regresar a la tienda, llama al servicio al cliente de Glacier Bay de lunes a viernes entre 8 a.m. y 7 p.m. y los sábados entre 9 a.m. y 6 p.m.(hora estándar del Este) 1-855-HD-GLACIER (1-855-434-5224) HOMEDEPOT.COM/GLACIERBAY Conserva este manual para uso futuro.