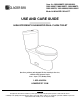
Item #'s:1002300055,1002300062, 1002300067,1002300071,1002300075, 1002300079, 1002300084,1002300091 Model #:N2441EB*/N2441T* USE AND CARE GUIDE HIGH EFFICIENCY ELONGATED DUAL FLUSH TOILET Questions, problems, missing parts? Before returning to the store, call Glacier Bay Customer Service 8 a.m. - 6 p.m., EST, Monday-Friday 1-855-434-5224 HOMEDEPOT.COM THANK YOU We appreciate the trust and confidence you have placed in Glacier Bay through the purchase of this toilet.
Table of Contents Table of Contents ......................................................... 2 Safety Information ........................................................ 2 Warranty ........................................................................ 2 Pre-Installation ............................................................. 3 Planning Installation ................................................................ 3 Tools required .....................................................................
Pre-Installation PLANNING INSTALLATION Before beginning installation of this product, make sure all parts are present. Compare parts with the Hardware Included and Package Contents lists. If any part is missing or damaged, do not attempt to assemble, install, or operate the product. Contact customer service for replacement parts. Estimated Assembly Time: 60 minutes TOOLS REQUIRED Putty knife Carpenters level Toilet water supply line HARDWARE INCLUDED NOTE: Hardware not shown to actual size.
Pre-Installation (continued) PACKAGE CONTENTS (Optional purchase) Part Description Quantity A Tank with cover 1 B Toilet bowl 1 C Seat with lid (Optional purchase) 1 D Side Plate 2 4
Installation 1 Removing the old toilet □ □ □ □ □ 2 Installing the floor bolts □ Turn off the water supply and flush the tank completely. Towel or sponge remaining water from the tank and bowl. Disconnect and remove the old water supply line. Remove the bowl from the floor by removing the bolt caps and the floor bolt nuts. Remove the floor bolts from the toilet flange and clean old wax, putty, and sealant from the base area.
Installation (continued) 3 □ 4 Installing the wax ring □ Turn the toilet bowl (B) upside down onto a towel or cushioned surface. With the rounded (tapered) end of the wax ring (CC) facing the toilet, place the wax ring (CC) around the raised outlet ring of the bowl (B), and press firmly enough so the wax ring (CC) adheres to the bowl (B).
Installation (continued) 7 □ □ □ □ Installing and adjusting the flush button 8 □ Position the flush button mechanism (QQ) in tank lid so the single drop button will align with blue button (half flush) on top of the flush valve and double drop button aligns with the grey button (full flush). Secure the flush button mechanism (QQ) in the tank lid by hand tightening the lock nut (1).
Installation (continued) 9 □ □ □ □ □ 10 Installing the side plate Installing the seat with lid ( optional purchase) 1. Turn the toilet seat with lid (C) upside-down. Insert the lock-bolt (NN) in the bolt trough (1), then adjust the lock-bolt (NN) to make the hole distance match with the toilet. Turn the toilet seat with lid (C) over so that the lock-bolts (NN) protrude downward.
Troubleshooting Problem Solution If fill valve does not turn on, will not turn off, or will not refill the tank after the flush. □ □ The flush quality of the toilet is poor. □ □ Water continues to run. □ Remove top cap and check for debris. If you find debris or flow is week; Inspect lower section of fill valve for partial blockage. Partial blockage may be at shut off valve or in water supply line.
Replacement Parts List Part Name Fill Valve Replacement Seal Flush Valve Model Number □ □ □ 400ARHR 83SGB 830VBGB 10
Questions, problems, missing parts? Before returning to the store, call Glacier Bay Customer Service 8 a.m. - 6 p.m., EST, Monday-Friday 1-855-434-5224 HOMEDEPOT.COM Retain this manual for future use.
Artículo núm.: 1002300055,1002300062, 1002300067,1002300071,1002300075, 1002300079, 1002300084,1002300091 Modelo Núm. N2441EB*/N2441T* GUÍA DE USO Y MANTENIMIENTO INODORO ALARGADO CON DESCARGA DUAL Y ALTA EFICIENCIA ¿Preguntas, problemas o piezas faltantes? Antes de devolver a la tienda, llamar al Servicio al Cliente de Glacier Bay de lunes a viernes, de 8:00 a.m. a 6:00 p.m. (hora del Este) 1-855-434-5224 HOMEDEPOT.
Tabla de contenido Tabla de contenido ....................................................... 13 Información de seguridad ........................................... 13 Garantía ......................................................................... 13 GARANTÍA limitada de por vida ................................................13 Preinstalación ............................................................... 14 Cómo planificar la instalación ..................................................
Preinstalación CÓMO PLANIFICAR LA INSTALACIÓN Antes de instalar el producto, asegúrate de tener todas las piezas. Coteja las partes con las listas de los contenidos del paquete y de los herrajes incluidos. Si alguna pieza está dañada o falta, no intentes ensamblar, instalar u operar el producto. Comunícate con el servicio al cliente para piezas de repuesto.
Preinstalación (continuación) CONTENIDO DEL PAQUETE (Compra Opcional) Pieza Descripción Cantidad A Tanque con tapa 1 B Taza de Inodoro 1 C Asiento con tapa (Compra Opcional) 1 D Placa lateral 2 15
Instalación 1 □ □ □ □ □ CÓMO DESMONTAR EL INODORO VIEJO 2 □ Cierra el suministro de agua y descarga completamente el tanque. Limpia con toalla o esponja cualquier resto de agua en el tanque y la taza. Desconecta y retira las viejas líneas de suministro de agua. Retira el tanque de piso, sacando las tapas de pernos y las tuercas de los pernos de piso. Retira los pernos de piso de la brida del inodoro y limpia la cera, la masilla y el sellador viejos del área de la base.
Instalación (continuación) 3 □ 4 Cómo instalar el anillo de cera □ Coloca boca abajo la taza del inodoro (B) sobre una toalla o superficie acolchada. Con el extremo redondeado (contorneado) del anillo de cera (CC) apuntando hacia el inodoro, coloca ese anillo (CC) alrededor del aro elevado de salida de la taza (B) y presiónalo con firmeza suficiente para que aquel (CC) se adhiera a esta (B).
Instalación (continuación) 7 □ □ □ □ Cómo instalar y ajustar el botón de descarga 8 Coloca el mecanismo del botón de descarga (QQ) en la tapa del tanque de manera que el botón de descarga sencilla quede alineado con el botón azul (media descarga) en la parte superior de la válvula de descarga y el botón de doble descarga quede alineado con el botón gris (descarga completa). Asegura el mecanismo del botón de descarga (QQ) en la tapa del tanque apretando la contratuerca (1) con la mano.
Instalación (continuación) 9 □ □ □ □ □ Cómo instalar el asiento con tapa (Compra Opcional) 10 Cómo instalar la placa lateral 1. Vira boca abajo el asiente del inodoro con tapa (C). Inserta el perno de seguridad (NN) en el orificio correspondiente (1) y ajústalo enseguida para que la distancia del orificio coincida con el inodoro. Vira boca abajo el asiente del inodoro con tapa (C) de manera que los pernos de seguridad (NN) sobresalgan hacia abajo.
Solución de problemas Problema Si la válvula de llenado no se abre, no cierra o no rellena el tanque después de descargar. Solución □ □ La descarga del inodoro es deficiente. □ □ El agua continúa corriendo. □ Retira la tapa superior y comprueba si hay residuos. Si encuentras residuos o el flujo es débil; inspecciona la sección más baja de la válvula de llenado para ver si hay bloqueo parcial. El bloqueo parcial pudiera estar en la válvula de cierre o en la línea de suministro de agua.
CÓMO RETIRAR EL CONJUNTO DE LA TAPA DE LA VÁLVULA Cierra el suministro de agua y descarga el tanque. Empuja el flotante hacia arriba con la mano derecha (Ver la imagen). Agarra y sostén con la mano derecha el eje debajo del flotante. Con la mano izquierda, da 1/8 de giro a la tapa y la palanca en sentido contrario a las manecillas del reloj para desbloquear la tapa superior. Presionar hacia abajo sobre la parte superior pudiera ayudar con las válvulas viejas.
¿Preguntas, problemas o piezas faltantes? Antes de devolver a la tienda, llamar al Servicio al Cliente de Glacier Bay de lunes a viernes, de 8:00 a.m. a 6:00 p.m. (Este) 1-855-434-5224 HOMEDEPOT.COM Conserva este manual para uso en el futuro.