Belling FSG 60 DO/DOP
If you smell gas: Do not try to light any appliance. Do not touch any electrical switch. Call the Gas Emergency Helpline at TRANSCO on: 0800 111999 IMPORTANT NOTICE Please note the cooling fan fitted to this appliance is an integral part of its safety and functionality. When the appliance is installed care must be taken that the cooling fans performance is not impeded by any objects coming into contact with it.
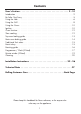
Contents User’s Section . . . . . . . . . . Introduction . . . . . . . . . . . . . . . Be Safe - Not Sorry. . . . . . . . . . Using the Hob . . . . . . . . . . . . . Using the Grill . . . . . . . . . . . . . Using the Ovens . . . . . . . . . . . . Ignition . . . . . . . . . . . . . . . . . . Oven furniture . . . . . . . . . . . . . Slow cooking . . . . . . . . . . . . . . Top oven baking guide . . . . . . . Main oven baking guide . . . . . . Traditional fruit cakes . . . . . . . . Roast turkey . . . . . . .
Introduction Thank you for choosing a British built appliance by Belling Gas & Electrical connection Please refer to installation instructions for the Gas & Electrical Safety Regulations and the Ventilation Requirements. We hope that the following information will help you to familiarise yourself with the features of the appliance, and to use it successfully and safely.
Introduction Glass door panels holes open or install a mechanical ventilation device (mechanical extractor hood). Prolonged intensive use of the appliance may call for additional ventilation, for example, opening of a window, or more effective ventilation, for example increasing the level of mechanical ventilation where present. To meet the relevant Standards of Domestic cooking appliances, all the glass panels on this appliance are toughened to meet the fragmentation requirements of BS3193.
Introduction Environmental Protection To replace an oven light bulb We are committed to protecting the environment and operate an Environmental Management System which complies with BS EN ISO 14001. WARNING - switch off the electricity supply to the appliance at the socket, to avoid the risk of electric shock. Disposal of packaging The oven light is at the rear of the oven cavity. • • • Wait until the oven is cool, then remove the oven shelves.
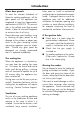
Be Safe - Not Sorry I Do not use aluminium foil to cover the grill pan, or put items wrapped in foil under the grill as this creates a fire hazard. When you are cooking, keep children away from the vicinity of the appliance. This product is designed as a domestic cooking appliance for the preparation and cooking of domestic food products, and should not be used for any other purpose. I Do not use the oven with the door inner glass panel removed.
Using the Hob Burner Ignition To simmer - all burners Push in and turn the selected control knob anticlockwise to the ‘full on’ position and press the ignition switch, or hold a lighted match or taper to the burner, until the burner lights.Hold the control knob in for 15 seconds. Do not hold the control knob in for longer that 15 seconds. If the burner fails to light within this time, release the control knob and wait one minute before attempting further ignition.
Using the Hob Pans To save gas For optimum safety and performance, we recommend the use of flat bottomed pans with a base diameter of minimum 100mm (4”) and maximum 250mm (10”). I Use the size of pan most suited to the size of the burner - ie; larger pans on the larger burners, smaller pans on the smaller burners. Do not use double pans, rim based pans, old misshapen pans or any pan which is unstable when placed on a flat surface. I Put lids on saucepans and only heat the amount of liquid you need.
Using the Grill Caution: Accessible parts may be hot when the grill is used young children should be kept away. Open the top oven / grill door. Push in and turn the top oven / grill control knob clockwise to the ‘FULL ON’ position. To switch off, turn the control knob anticlockwise to return it to the off position. Important: The top oven / grill door must be fully open when the grill is used. Preheating For best cooked results, we recommend that you preheat the grill for about 3 minutes.
Using the Grill Detachable grill pan handle Using the grill grid Push the grill pan towards the back of the shelf, to position it under the grill. The speed of grilling can be controlled by selecting a higher or lower shelf position. For toasting, and for grilling foods such as bacon, sausages or steaks, use a higher shelf position. handle handle position indicators grill pan For thicker foods such as chops or chicken joint pieces, use a middle to low shelf position.
Using the Ovens Caution: When you are cooking keep children away from the vicinity of the oven. If it is found, over a period of time, that the ovens become hotter when used at a particular temperature, then the thermostat may need to be replaced. In the event of the oven burner flame being accidentally extinguished, turn off the burner control and do not attempt to re-ignite the oven burner for at least one minute.
Using the Ovens Using the top oven cooking process, hot air is expelled through a vent at the top of the oven. When opening the top oven door, care should be taken to avoid any possible contact with potentially hot air, since this may cause discomfort to people with sensitive skin. We recommend that you hold the underneath of the oven door handle. Ignition Push in and turn the top oven control knob anticlockwise to the ‘FULL ON’ position (gas mark 9).
Using the Ovens Zones of heat The temperature at the centre of the oven corresponds with the selected gas mark and is slightly higher towards the top of the oven and slightly lower towards the oven base. Oven shelves Extra shelves may be ordered from your local supplier. The oven shelf must be positioned with the upstand at the rear of the oven and facing upwards.
Using the Ovens Top oven baking guide Dish Recommended gas mark Suggested shelf position Approximate cooking time (preheated oven) Scones Meringues 7 “S” slow setting top - middle bottom 10 - 15 mins 2 - 3 hours 5 5 6 4 15 20 10 20 5 middle middle middle middle (side by side) middle Pastry Rough Puff Flaky / Puff Shortcrust Flan 7 6 6 6 middle middle middle middle cooking time depends on recipe & type of filling Biscuits Shortbread fingers Nut brownies Brandy snaps Flapjacks Ginger nuts 5 5
Using the Ovens Main oven baking guide Dish Recommended gas mark Suggested shelf position Approximate cooking time (preheated oven) Scones Meringues 7 “S” slow set middle - top bottom 8 - 15 mins 2 - 3 hours 5 5 6 4 middle middle middle middle 15 20 10 20 4 3 3 2 or 3 middle middle middle middle - bottom 20 -30 mins 1 - 11⁄4 hours 1 - 11⁄4 hours 21⁄2 - 3 hours 1 or 2 bottom 3 middle - bottom depending on recipe 2- 21⁄2 hour Pastry Rough Puff Flaky / Puff Shortcrust Flan 7 6 6 6 middle m
Using the Ovens Traditional fruit cakes Roast turkey It should be remembered that ovens can vary over time, therefore cooking times can vary, making it difficult to be precise when baking fruit cakes. Roasting turkey involves cooking two different types of meat - the delicate light breast meat, which must not be allowed to dry out, and the darker leg meat, which takes longer to cook. It is necessary therefore, to test the cake before removal from the oven.
Using the Ovens Roasting guide Notes: I When cooking stuffed meat or poultry calculate the cooking time from the total weight of the meat plus the stuffing. The times given in the roasting guide are only approximate, because the size and age of the bird will influence cooking times as will the shape of a joint and the proportion of the bone. I For joints cooked in foil or covered roasters, and for lidded casseroles, add 5 minutes per 450g (1lb) to the calculated cooking time.
Programmer / Clock (if fitted) The programmer buttons the second tone, etc. Releasing the button after the tone has sounded will automatically select that tone. minus plus The ‘function’ button in the centre is used for setting the minute minder and setting up the automatic cooking. See below for details. To set the time of day When the power is turned on to the appliance, the time of day starts from 0.00. Press and release the (minus) and (plus) buttons simultaneously. Set the time of day, eg 2.
Programmer / Clock (if fitted) Setting the minute minder Press and release the function button. The minute minder bell symbol will appear and flash on the display. Use the plus and minus buttons to set the required alarm time. After setting, the display will revert to show the time of day and the bell symbol will stop flashing. Pressing the function button will display the minutes remaining. If the time has counted down to the last minue, the remaining seconds are shown.
Programmer / Clock (if fitted) Semi-automatic cooking displayed alongside the minute minder bell indicator in the time of day display. This clock funcion can be used when you have started cooking a meal or a dish in the oven and want to set the time for the oven to switch off. A Press and release the function button twice. The display will show the oven symbol flashing and also the A (auto) symbol is shown.
Cleaning Caution: Any cleaning agent used incorrectly may damage the appliance. Burner caps and heads Important: Allow burners to cool before cleaning. Always let the cooker cool before cleaning. Caution: Hotplate burners can be damaged by soaking, automatic dishwashers (or dishwasher powders / liquids), caustic pastes, hard implements, coarse wire wool, and abrasive cleaning pastes.
Cleaning Enamel surfaces of the outer door glass panel), and pushed fully in to the stop position. To remove the glass panel, open the door wide, hold the top and bottom edges and slide out. OVEN CAVITIES Caution: Most types of cleaning agent will damage these surfaces. Only use a few drops of washing up liquid in hot water.
Installation Instructions Before you start: Please read the instructions. Planning your installation will save you time and effort. For installation in countries other than the UK, the appliance must be connected in accordance with all local gas and electrical regulations. In the Republic of Ireland, Installers should refer to IS813 Domestic Gas Appliances.
Installation Instructions Clearances Whilst every care is taken to eliminate burrs and raw edges from this product, please take care when handling - we recommend the use of protective gloves during installation. No shelf or overhang or cooker hood should be closer than a minimum of 650mm, but check with cooker hood manufacturer’s recommendations. The cooker must have a side clearance above hob level of 90mm up to a height of 400mm.
Installation Instructions Stability bracket 4. Fix the bracket to the floor. Measure from If the cooker is fitted with a flexible connection, a stability bracket should be fitted to engage in the back of the cooker. A stability bracket can be bought from your local supplier. LEVEL to in the back of the cooker and add 3mm. FLOOR ENGAGEMENT EDGE 5. Assemble the underside of the top part of the bracket to this height. A stability bracket can be fitted as follows: Levelling 1.
Installation Instructions Connect to the electricity supply Warning: This appliance must be earthed. As the colours of the wires in the mains lead for the appliance may not correspond with the coloured markings identifying the terminals in your plug, proceed as follows: The flexible mains lead is supplied connected to a BS 1363 fused plug, having a fuse of 13 amp capacity. 1. The wire which is coloured green and yellow must be connected to the terminal marked E (Earth) or coloured Green.
Installation Instructions Connect to the gas supply Grill - Open the top oven / grill door. Push in and turn the top oven / grill control knob clockwise to the ‘FULL ON’ position. The inlet to the cooker is 1⁄2” BSP internal situated at the rear right corner. Fit the bayonet connection. This should be located so as to ensure that the flexible connector hose does not kink.
Technical Data Data badge - Lower part of front frame Ovens - Oven burners are sheet steel, with pierced ports in stainless steel flame strip. Spark Gap: 3 - 4mm. Flame supervision: Thermoelectric type. Thermostat phial: Rear right hand side of oven. Type of gas - This cooker must be used with Natural Gas only Gas category - Natural Gas - I2H, Electrical supply 220 - 240V ~ 50Hz Pressure setting G20 Natural Gas @ 20 mbar Warning: This cooker must be earthed.
Technical Data Gas Natural Gas Burner Nominal Rate Qn Injector Size Hob - small Hob - medium Hob - large 1.0kW 2.0kW 3.0kW 77 104 129 Main Oven Top Oven 2.5kW 1.75kW 180 Amal 110 Amal Max. heat input ∑Qn 12.
08 27427
Belling Customer Care Please keep this handbook in a safe place as the information inside may be of use should you sell, or pass on the appliance. Please fill in the model number and serial number in the spaces provided below as they will assist us should you need to call. 0844 815 3746 When you dial this number you will hear a recorded message and be given a number of options. This indicates that your call has been accepted and is being held in a queue.