
User Manual


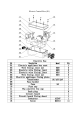
Table Of Contents

2
III. DAILY INSPECTION
Daily inspection is effective to find the malfunction or fault on
the lift table. Before operation, check the lift table according to
the following points.
Do not use the lift table if any malfunction or fault is found.
• Check all the terms of WARNING and CAUTION.
• Check scratches, bending or crack on the lift table.
• Check smooth movement of the table.
• Check if there is any hydraulic oil leakage.
• Check for any imbalance on the table.
• Check if all the bolts and nuts are firmly tightened.
IV. OPERATING THE LIFT TABLE
1. LOADING
The maximum capacity of the lift table is 2200 lbs. The
load should be distributed on the lift table equally.
2. LIFTING THE TABLE
CAUTION!
Do not overload the li table.
Ensure the balance of loading. Do not load partially or concen-
trically.
• Check to disengage the emergency stop switch.
• Push the UP button and power pack starts to work to li
the load.
• Release the UP button and power pack stops working.
3. LOWERING THE TABLE
Do not put foot or hand in scissors mechanism
WARNING!
• Push the DOWN button and the table will lower.
• Release the DOWN button and the table will stop.
Note: The table is equipped with an aluminum guard
to avoid accidental danger.
• If there is any interference while the table is descending,
_ the aluminum guard will stop the operation once it's in
_ contact with an object. Remove the interference and
_ press the UP button to resume operation.
4. EMERGENCY STOP
ere are two methods of emergency stop as follows.
• Push down the emergency stop switch
.
• Interference when in contact with the table descending.
5. TRANSPORTATION
Use the attached ring bolts to safely transport the lift table to
the floor or installation surface, following the steps below.
•
•
Attach chain hooks such as sling hooks, S-hooks, pull chains
or similar hooking system onto each of the ring bolts.
Suspend the chain securely on a forklift or similar equipment
and move the suspended lift table to the location it is to be
installed. The installation area should be clean and located
near 110 Volt power.
V.
WALL MOUNT BRACKET INSTRUCTION
VI.
HYDRAULIC CIRCUIT & ELECTRIC
PRINCIPLE DIAGRAM
See Figure 1 & Figure 2.
Fig. 1 Hydraulic circuit
Fig. 2 Electric Principle Diagram
Note: Using the RING BOLTS is the suggested manner of
moving the table; all other methods are not recommended.
•
Use M8 screws, adhesive tape, or velcro strips to attach
the wall mount bracket onto the mounting surface.
Note: Mounting hardware not included. Hardware type
and hardware size varies on wall thickness and material.
•
Safely store the hand pendant control on the wall
mount bracket, when not in use.
2
1321