
User Guide


Using the camera
11
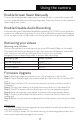
Retrieving your videos
Retrieving using a PC/Mac:
Connect the camera to a computer using a micro USB cable (Cable not included).
The camera will automatically turn on, and the computer will detect a “removable
disk”, similar to connecting a USB type Flash Drive on your computer.
Navigate to the corresponding folder to access video recordings;
Recording Type Folder Location
Normal Recording \VIDEO
Emergency Protected \EMERGENCY
Photo Snapshot \PHOTO
Firmware Upgrade
Step 1: Download latest rmware from our ofcial website, unzip the le.
Step 2: Copy & Paste/drag & drop the extracted .bin le to the root of the Micro SD
card.
Step 3: Insert the Micro SD card into the camera’s card slot once the transfer is
completed.
Step 4: Connect the camera into a power source and then turn the camera ON.
Step 5: The LED indicator will start ashing to conrm the update’s progress.
Step 6: Once the upgrade is completed, the camera will automatically reboot.
Step 7: To verify the installed rmware version, access the ‘Version’ tab on the
mobile app.
Step 8: Before using the camera, please reformat the memory card using the mobile
app.
Please Note:
• To ensure a stable rmware upgrade, we recommend formatting the memory card
prior to the upgrade process.
• DO NOT unplug or power-off the camera during a rmware upgrade process, as it
may cause irrepairable damage to the camera.
Enable Screen Saver Manually
To manually enable screen saver, press the Power button once and the screen will
turn off, while the camera is still recording video. Press any button on the camera to
deactivate Screen Saver.
Enable/Disable Audio Recording
Audio recording can be enabled/disabled by pressing the “DOWN” button while the
camera is in video recording mode. An icon with a disabled microphone will appear
at the top right corner of the screen, conrming audio recording has been disabled.