
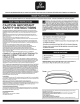
User's Manual


PRE-INSTALLATION
Planning Installation
Compare
all parts
with
the
"Hardware Included" section.
If
any
part
appears missing
or
damaged,
do
not
install
this
product
and
contact
the
Customer
Service
team
at
1-888-543-1388
or
e-mail
to
info@globe-electric.com.
Tools
Required
1=:1
safety
goggles
philips
head screwdriver electrical
tape
wire
stripper
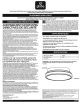
Hardware Included
NOTE: Hardware is
not
shown
to
actual size.
Item Quantity
wire
connectors 3
outlet
box screws 2
canopy
1
II
·f
ca~
frosted glass shade 1
MOUNTING
INSTRUCTIONS
ELECTRICAL INSTALLATION
FIO.
1.
Place
the
wall
switch
to
the
"OFF" position.
Depending
on
which
type
of
fuse
box
you
have
in
your
home:
FIO.
2.
Place
either
the
main
(Master)
switch
to
the
"OFF" position,
cutting
off
power
to
your
entire
home
OR
turn
off
the
individual
switch
that
provides
power
to
where
the
fixture
will
be installed.
OR
FIO. 3. Place
either
the
main
(Master)
switch
to
the
"OFF" position,
cutting
off
power
to
the
entire
home
OR
unscrew
the
fuse
that
provides
power
to
where
the
fixture
will
be installed.
FIG.l
WALL
SWITCH
FIG.2
BREAKER PANEL
FIG.3
FUSE BOX
INSTALLATION
Note: The
wire
colors
indicated
in
this
manual
are
the
common
colors
and
may
differ
in
some
homes. Please
contact
an
electrician
if
you
have
different
wire
colors.
Stepl
-Remove existing
fixture
after having
turned
off
the
power
at
the
circuit
breaker
and
tested
the
outlet
with
a voltage tester.
-Please
mark
your
positive
and
negative wires
from
the
outlet
to
help
you
with
the
new
connection.
-Attach
the
ground
wire
from
the
fixture
to
the
ground
wire
from
the
outlet
box.
-
Connect
the
negative
wire
(white)
form
the
outlet
to
the
negative
wire
in
the
fixture.
-Connect
the
positive
wire
(black)
from
the
outlet
to
the
positive
wire
in
the
fixture.
- Secure all connections
with
the
wire
connectors
and
wrap
electrical
tape
(not included)
around
the
wire
connectors.
- Push all excess
wire
back
into
the
outlet
box.
50457