ForteRAID™ Manual 4-Drive RAID Array with FireWire 800 and 400, USB 2.0 and eSATA 610031-2.0 ForteRAID Manual.pdf November 21, 2011 Proprietary Notice and Disclaimer Unless noted otherwise, this document and the information herein disclosed are proprietary to Glyph Technologies, 3736 Kellogg Road, Cortland NY 13045 (“GLYPH”).
Contacting Glyph Please use the following contact information to contact Glyph and its distributors. Glyph USA offers phone support Monday through Friday, 8:00 am to 5:00 PM Eastern Time. Note: DO NOT ship any return goods to the mailing addresses below unless you have a valid RMA number. All goods will be refused delivery unless a valid RMA number is displayed on the outside of the package. United States of America Glyph Technologies 3736 Kellogg Rd.
About the ForteRAID and Drive Modes The ForteRAID enclosure contains four hard disk drives, which function as one single volume. Through the use of the Glyph Manager software utility, it supports six drive modes: RAID 0, 1, 3, 5, 10, and Spanning. Each drive mode has its own advantages, depending upon the application. RAID 0 (striping) is designed for increased speed but offers no redundancy benefits.
A note about spare drives When 3 hard drives plus 1 spare drive are used, the total capacity will be only as large as two drives. When one drive fails, the data will be rebuilt immediately by using the spare drive, rather than waiting for the faulty drive to be replaced. Using the ForteRAID with Pro Tools® Software There is a current limitation with Pro Tools® and volume size. Pro Tools does not support record or playback on volumes 2TB or larger.
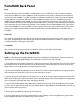
ForteRAID Back Panel Ports The fastest interface on the ForteRAID is eSATA and there is one eSATA port on the rear panel. In RAID 0 mode, the ForteRAID can sustain 120MB/sec (read speed) when connected via eSATA to the included EC2 eSATA card. (Up to 230MB/s is possible with higher performance eSATA cards, such as the Sonnet E4P card.) FireWire 800 is the next fastest and there are two FW800 ports on the rear panel. ForteRAID can sustain 80MB/sec using FW800.
Understanding Glyph Manager Software NOTE: For information on installing Glyph Manager, see installation instructions later in this manual The Glyph ForteRAID ships with Glyph Manager software, a utility for Mac OS X and Windows. When a ForteRAID is connected to the computer either by FireWire or USB, information about the drives contained within the ForteRAID will be displayed. Glyph Manager essentially does two things: 1. Configures the ForteRAID in one of the drive modes. 2.
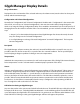
Glyph Manager Display Details Array Information: Displayed are the serial number of the selected enclosure, the volume name (once the drive has been partitioned) and the connection type. Configuration and Selected Configuration: Normally the “Configuration” and “Selected Configuration” should match. “Configuration” is the current disk drive mode, as it was last set. “Selected configuration” is the new drive mode that it’s being changed to, which is set using the “Change Configuration” utility.
Glyph Manager Display Details (continued) Init status: In normal operation the status should be “Success”. Possible error conditions are “Disk too small”, “Incorrect disk count”, “Invalid RAID set”, “Multiple RAID sets”, “Disk erase fail” and “Unknown init error”. Any of these messages indicate a problem with the RAID array. Individual drive information: Port Status: Indicates the condition of the drive within the array. “Active” means the disk is in use in the array.
Glyph Manager Operation In Mac OS X The ForteRAID ships in RAID 0 mode, and drive mode changes are made by using the Glyph Manager software utility (not the OS X Disk Utility). OS X Disk Utility is used to format the new device after drive mode changes are made. READ THIS FIRST! Changing drive modes with Glyph Manager will require you to re-format the ForteRAID, and result in erasing all of the current data on the drive.
3. Un-mount the volume(s) associated with the unit you are configuring by dragging them to the trash in the Finder. This is very important to ensure successful drive mode change because it forces Mac OS to “forget” the current configuration. 4. Click the Change Configuration button. 5. Select the desired configuration on the following screen and click the Change button. In the example shown, we are changing from RAID 0 to RAID 5. Note that the top selection (single drive) is not selectable at this time. 6.
8. At this point you may see the Mac OS Disk Insertion window. Now that the drive configuration has changed, Mac OS has re-discovered the ForteRAID and prompts you to format the newly configured device. If you see the window below, click Eject. If you do not see this message, simply go to step 9. 9. Power off the ForteRAID, unplug the FireWire, USB or eSATA cable, plug the cable back in, then power it back on again. This is important to force Mac OS to “forget” any current drive information. 10.
Select the desired configuration on the following screen and click the Select button. In the example shown, we are changing from RAID 0 to RAID 5. Note that the top-left selection (single disk) is not selectable at this time. Confirm the changed configuration by clicking Continue on the following screen. Finally, click Initialize to initialize the drive array with the new configuration.
Changing a Failed Hard Drive Module If one of the hard drives fails, the two “Check GM” LEDs will display flashing or solid yellow, and Glyph Manager will alert you. Open Glyph Manager software to determine which drive has failed and what the error condition is. If a drive has failed and the RAID mode is set to RAID 1, 3, 5, or 10, the data can still be accessed, but it is strongly suggested that you replace the faulty drive mechanism immediately to assure continued backup and data safety.
5. To remove a drive module, turn the thumbscrew counter-clockwise and then pull it out. 6. Slide the replacement drive module into the enclosure, and fasten the locking screw in place to complete the drive installation. The drive modules can be installed at any position in the enclosure, there is no specific order required. 7. Plug in and power on the ForteRAID, and connect to your computer. NOTE: Do not force the drives into place.
Glyph Manager Installation Glyph Manager Installation in Mac OS X: Insert the Glyph Manager CD, or to get the latest version of Glyph Manager, go to the support section of www.glyphtech.com and download the version for your operating system. The Mac version of Glyph Manager 4 supports Mac OS 10.4 and above. It is a Universal Binary (supports both Intel and PowerPC Macs). You can find your operating system version by going to the Apple Menu and clicking on “About This Mac”.
Formatting Instructions Windows 2000 / XP / Vista / Windows 7 Formatting Instructions 1. Right-click My Computer and click Manage. 2. In the Computer Management window, under Storage, click Disk Management. The Write Signature wizard pops up. 3. Use the wizard to write a signature to the new drive. If you want only one partition we suggest using a primary partition and selecting the maximum size. In most cases you’ll want to use NTFS volumes, this is the default for most versions of Windows.
Mac OS X Formatting Instructions Since your ForteRAID comes pre-formatted for Macintosh you don’t need to format them on installation. If you decide to reformat or partition your drive at a later date, use Disk Utility (supplied with the Mac OS X operating system). Caution: This procedure will destroy any data currently on the drive. Before formatting a drive, save any important data it contains. 1.
More Information ForteRAID Features Removable drives in case of failure. SATA II 3.0Gb/s drives. RAID controller built into enclosure - no special RAID card needed. Engineered to support professional content creation applications Supports software-selectable drive modes: RAID 0, 1, 3, 5, and Spanning. 230MB/sec sustained transfer rate over eSATA. Internal power supply, no wall wart, internal quiet fan. Glyph Manager software for configuring unit, runs on Mac and PC.
About eSATA • eSATA is an external interface technology that grew from the internal SATA I interface. • The ForteRAID’s eSATA port supports speeds up to 3 Gb/sec (300 MB/sec), much faster than FireWire 400 or FireWire 800. • Shielded eSATA cables up to 2 meters in length are available. • eSATA cables are different than SATA I cables, they are shielded and cannot be used with internal SATA I connectors.
RAID software is not needed because the RAID intelligence is built into ForteRAID hardware. To configure the array, use the Glyph Manager software to switch drive modes, and format the drive. Instructions for re-initializing your drive are included in this manual. Q: My Windows computer doesn’t show the drive in My Computer. What’s up? The default format on the ForteRAID is for the Macintosh, and Windows doesn’t recognize it.