
Owner's manual


9
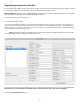
6. The next window requires that you verify the change
request. Click OK to change the drive conguration. NOTE:
ALL DATA ON THE DRIVES WILL BE DESTROYED.
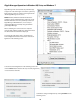
8. At this point you may see the Mac OS Disk Insertion window.
Now that the drive conguration has changed, Mac OS has
re-discovered the PortaGig 62 and prompts you to format the
newly congured device. If you see the window below, click
Eject. If you do not see this message, simply go to step 9.
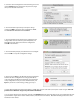
7. The next window reports that the drive conguration has
changed. After a few seconds the system will update, and
Glyph Manager will display the new drive conguration.
Click OK in this window.
7. The next window prompts you to nalize the new congura-
tion. Click YES to accept the conguration change.
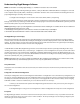
5. Select the desired conguration on the following screen and
click the Change button. Note that the top selection (single
drive) is not selectable at this time.
9. Power o the PortaGig 62, unplug the FireWire or eSATA cable, plug the cable back in, then power it back on again. This is im-
portant to force Mac OS to “forget” any current drive information.
10. If you get the Disk Insertion dialog box, this time click Initialize which will open Disk Utility. If not, open Disk Utility from your
System Volume > Applications Folder > Utilities Folder, and format the new volumes. Mac OS X formatting instructions can be
found later in this manual.