
Owners manual


9
REV.01
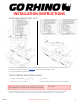
STEP # 14
INSTALLATION INSTRUCTIONS
STEP # 15
© 2016 Go Rhino Products. All rights reserved
• With assistance, adjust and align the bumper
into position.
• Tighten all hardware securing the auxiliary
and frame brackets.
• Remember to check and retighten all factory
and supplied nuts and bolts periodically.
• If no additional lights were
purchased, reinstall the 2 mesh
covers to the bumper using the
hardware saved from step 7.
• Tighten screws to 70 in/lbs. Max.
DO NOT OVERTIGHTEN
SCREWS.
• Install additional lights if purchased
using hardware saved from step 7.
• Tighten screws to 70 in/lbs. Max. DO NOT
OVERTIGHTEN SCREWS.