ANDROID 4.2 OWNER’S MANUAL ONLY FOR BROADCOM CPU SMARTPHONES VISIT OUR WEBSITE WWW.GOCLEVER.
User manual Version 1.0 for Android 4.2.
About this user manual This user manual is specially designed to help our users enhance their product experience Please read this manual thoroughly to ensure safe and proper use of Goclever devices Images and screenshots may differ in appearance from the actual product Goclever reserves the right to revise this user manual or withdraw it at any time without prior notice.
Contents Con HOME SCREEN 6 MAIN MENU 7 BASICS 8 LOCK AND UNLOCK THE SCREEN 11 RECENTLY USED APPS 12 THE NOTIFICATION MENU 12 QUICK SETTINGS 13 ENTER TEXT 14 STATUS ICONS 16 MAKE A PHONE CALL 18 ANSWER OR DIVERT CALLS 19 THE CALL LOG 20 OPTIONS DURING A CALL 21 CALL SETTINGS 21 READ AND MANAGE MESSAGES 22 SEND OR RESPOND TO A MESSAGE 23 CHANGE MESSAGE SETTINGS 25 OPTIMIZING BATTERY PERFORMANCE 26 CONTACTS 26 SPEED DIAL 28 EMERGENCY CALLS 28 USING A MEMORY CARD AS A U
INTERNET BROWSER 39 CAMERA 41 PHOTO GALLERY 43 CALENDAR 43 CLOCK 44 CALCULATOR 44 MUSIC 44 FM RADIO 45 SETTINGS 46 SAFETY GUIDE 50 FREQUENTLY ASKED QUESTION 51 SAFETY WARNINGS AND NOTICES 52 WARRANTY CARD 56 5
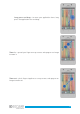
Home screens Home screens –Your home screen is the starting point for accessing all of phone’s features. The home screen has multiple panels to view them swipe right or left. Status bar –Many useful information and notifications will be displayed here e.g. calendar reminders, Gmail notifications, download status. Applications and widgets–New applications installed on the device will automatically add shortcuts on the home screen. You can move them or remove them by long pressing and dragging.
Main menu Main menu screen –Your main menu screen contains all the apps you have installed on the device. You can also browse through available widgets. To browse between multiple panels, swipe left or right with your fingertip. Touch to return to a previous screen or touch the home button to return to the home screen at any time. Applications and widgets tab – You can select apps or widgets and browse through the ones available. Applications screen – Here you can see all the available applications.
Basics Caution –only use your fingertips while using the device. Tap - to open an application, press an on screen button, to enter a character using the on screen keyboard or to select a menu item gently tap it with your fingertip. Tap and hold – tap and hold for a short while to access extra options available for a given item.
Long press and drag – to move your application icons, long press the application icon and drag.
Motion gesture – You can rotate your phone in order to have a better view. For many screens you can automatically change your screen orientation by tilting the device sideways. While writing you can tilt the device in order to use a bigger keyboard. Tip – in order to stop automatic screen rotation, you can turn it off in the notification panel.
Lock and unlock the screen Automatic lock screen – When your phone is not in use, lock your phone to prevent unwanted operation and save battery life. To lock the screen, press the power button To unlock the screen, press the power button and slide the lock icon to the side When your phone is locked, nothing happens if you touch the screen. While your screen is locked you may still: Receive: calls, text messages, emails and other notifications.
Recently used apps Press and hold to easily access recently used apps, slide your finger up and down to review the complete list. The notification menu Notifications – To make sure you don’t miss any information many applications provide alerts and notifications. An alert may appear briefly at the top left of your screen and fade away if you don’t respond to them, or in the middle of the screen as a clearly visible icons remaining there until the user reacts.
Quick settings Quick settings – quick settings allow you to conveniently and swiftly change major device functions like: WIFI, GPS, Data connection and others Accessing quick settings access quick settings slide the notification panel with fingertip and press the quick icon. Quick settings – By simply tapping a desired icon you can check and change the status of any of the following: – to down your menu 1. Brightness - Adjust the brightness level of your screen. 2.
7. Bluetooth –Activates or deactivates the Bluetooth feature 8. GPS – Activates or deactivates the GPS feature 9. Flashlight-Activates or deactivates the torch 10. Audio profiles – switch between : general, outdoor, silent and meeting audio profiles 11. Alarm- set the alarm time 12. Memory clear- Clear cache memory Returning to the notification panel from quick settings – you can easily return to the notification panel from the quick settings menu by pressing this icon.
Typing – as you type, each letter appears above your finger. The letter isn’t entered until you choose the desired word or press space. Uppercase letters – Tap the shift key for one uppercase letter. Tap and press to toggle on and off uppercase letters.
Copy and paste text – Tap and hold on the text you have typed to bring up the copy and paste menu. Select the whole text– Tap select the whole text Cut text– Tap part of the text Paste text –Tap Copy text - tap marked part of the text to to cut the marked to paste text to copy the Status icons Status icons – the icons appear at the top of the screen and display important information about the device Call in progress Missed call New SMS or MMS WIFI connected .
GPRS network connected EDGE network connected HSPA + network connected Roaming, outside of the normal service area.
Make a phone call You can make calls from the Phone app, the People app, or other widgets that display contact information. Wherever you see a phone number, you can usually touch it to dial. To open the Phone app, touch the Phone icon on a Home or All Apps screen. There are three sections in the Phone app: Call log. The call log displays incoming, outgoing, and missed calls. Dialer. Let’s you dial manually. To make a call; type the number, then touch the Phone icon below the keypad.
Answer or divert calls When you receive a phone call, the Incoming Call screen opens and displays the phone number. If the caller is an existing contact in your Peoples app, additional information may be displayed. When a call arrives, touch the white phone icon and slide over to one of the following icons: Answer call Start talking to the caller. Send voicemail to Direct the caller to leave a voicemail message. Send message a Opens a list of quick text responses.
The call log The call log is a list of all the calls you’ve placed, received, or missed. It provides a convenient way to redial a number, return a call, or add a number to your Contacts. Within the Phone app, the call log is in the lower left corner of the screen. Tap a number for more information about the call, or touch the call the number back.
Options during a call During a call, you can touch the following icons near the bottom of the screen. Shows the keypad Turns the speakerphone on or off. If a Bluetooth headset is connected, this functions as a three-way switch among the built-in earpiece, the speakerphone, and the headset. The icon changes to indicate the current output. Touch & hold to see a three-way menu. Mute your microphone. Put the other party on hold.
Touch sounds - check for touch sounds. Read & manage messages Open messages From a Home or All apps screen, touch the Messaging icon The Messaging screen opens, where you can create a new message or open an ongoing conversation. To read the messages in an existing conversation, touch the conversation. A list of its messages appears. Touch & hold a message in an existing conversation to take any of these actions. Copy text. Copy the message text. Forward.
Send or respond to a message You can send text (SMS) messages of up to 160 characters to another mobile phone. If you keep typing after the limit, your message will be delivered as a series of messages (if your network provider supports this feature) Tip – Multimedia (MMS) messages can contain text and a picture, a recorded voice, an audio file, or a video Send a text message 1. In the main Messaging screen, touch the New Message icon 2.
4. Touch the Send icon The Message screen opens. Reponses appear in the screen. As you view and send additional messages, a message conversation is created. Create and send a multimedia message 1. In the main Messaging screen, touch the New Message icon 2. Enter a name, mobile phone number, or email address in the “To” field. 3. When you’re ready, touch Type message and start typing 4. Touch Menu > Add subject to add a message subject. 5.
6. Touch the Send icon . Respond to messages you received - Messages you receive are displayed in the messaging screen. Otherwise, you receive a new message notification and a new message icon appears on your screen. Touch the new message notification to open the Messaging screen and reply to the message If Auto-retrieve is unchecked in your Messaging MMS settings, you must touch Download to view the message.
Always auto-retrieve – Always auto-retrieve MMS even data is off. WAP PUSH Setting Enable WAP PUSH- Enable to retrieve WAP PUSH Other settings Edit quick text- click to edit quick text Personal Signature- Attach a personal signature to your message Signature content- Set content of your personal signature.
contacts, the contacts will only be added to the phonebook you have selected. View contacts – On the home screen, or in the main menu tap Tip – by default the phone contacts and sim contacs are displayed Search for contacts – tap the search icon and enter the firs letters of the contact name in the search bard (the device shows search results immediately). Select the desired contact Call a contact - Find the desired call in the phonebook and tap the number area or tap for a video call.
Import export contacts - View contact list by tapping the phone book button . Tap > Import/export, select the contacts storage, choose the desired contacts and tap OK. Delete contacts - With “All” icons checked, and the delete button clicked, all the contact people data, including cell phone and SIM card of contact will be erased.
Emergency calls Emergency calls – In some regions, you can make emergency calls even if you don’t have a SIM card installed. If you are not in the vicinity of a base station you will not be able to make an emergency call. Tip – in most European countries the emergency number is 112. \ Using a Memory Card as a USB Disk If you want to send music, pictures or other files to your phone you can do it via a usb cable.
3) In the notification panel, choose the "Media equipment (MTP)" connection mode. It can be used with a PC to act as an USB storage device. The phone connection camera (PTP) – let’s you transfer photos using camera software and transfer any files on computers that don’t support MTP. 1) Use the USB cable to establish a connection with the computer. You don't have to turn off USB debugging.
If you enable the notification option in the Wi-Fi settings, The status box will display this icon when an open available wireless network has been found. Touch one of the Wi-Fi choices to connect to the network. When you choose the open network option, the phone will connect to it automatically. If you choose WEP, WPA/WPA2 with a password, you should type the password first, then connect to the network.
The above symbolize data transfer speeds. They have been listed from the fastest to the slowest. The speed of the data transfer depends on a couple of factors. Including your operator. GPS basics GPS receiver basics Like a cell phone, a GPS receiver relies on radio waves. But instead of using towers on the ground it communicate with satellites that orbit the Earth. There are currently 27 GPS satellites in orbit – 24 are in active use and 3 act as a backup in case another satellites fails.
Bluetooth Turn on Bluetooth or set the phone as available for detection 1) Press Home>Menu, then tap Settings. 2) Tap Wireless and internet, then select the Bluetooth box to open the Bluetooth functionality. Once started, the status box will show this icon devices” to start scanning for all devices within range. . Touch “Scan for 3) Tap Bluetooth settings, all devices found will be displayed in the list under the icon.
Mail Create an email account 1. Select Email> Settings. You can activate or edit existing e-mail accounts as well as set up a new email account. 2. Select Gmail. Tap in one of the main panels. Google account creation interface is displayed Then touch ‘Next step’> Create account>Enter name, last name and then the desired email account.
Dialing When the icon depicting signal strength is visible, it is possible to make and receive calls. The signal bar in the top right corner shows the strength of the network signal (the maximum is 4 signal bars) . Start dialing Open the Main menu>Dial. You may choose to dial with either SIM1 or SIM2, or choose a default SIM card. Dialing Use the keyboard to enter the desired phone number and then click the dial key , after that you should choose one of the SIM cards or an internet call.
Two-way call/multiparty call (conference call) Notice: this function needs a SIM card supporting the multiparty call feature. 1) A call is already active 2) Click “Add callers”, make another call, after both parties are connected one can view the status of the call. 3) select “combine call”– you can combine two calls into one 4) after multiparty call has been made and connection established, you can separate the calls or hang up one of them using “the small arrow of conference call”.
3) Peer video replacement: Set a picture to be displayed when peer video is unavailable. 4) Enable back camera: Enables switching cameras if the option is turned on. 5) Bigger Peer video: Turn on to make the peer video bigger than the local video. 6) Auto drop back: Drop back to voice call connecting automatically 7) Outgoing video call: Display local video when making a video call. 8) Incoming video call: Display local video when accept an incoming video call. 9) Other settings: a. Call forwarding, b.
Send MMS to certain phone number When creating message, it is created as an SMS by default, it will be turned to MMS when following operations are done. You can send a MMS by clicking “Send” after editing. 1) On the “Edit” screen click the “Menu” button: 2) Click “Attach”, you can send attachments, then the message will be turned to a MMS automatically.
Access point names (APNs) Add a new access point - Access Point Names (APNs) connect your phone to data networks for services such as mobile web browsing. Tip – before you add another data connection, have the access point name and settings from your mobile operator ready (including username and password if necessary) On the home screen or quick menu tap , tap More>Mobile networks>Access Point Names. On the APNs screen, tap > New APN. Enter the APN settings, tap Save.
Website images - Tab an hold on an image on a website to: save it, view it, set it as your wallpaper or share the link with your friends. Links - Tab an hold on an link on a website to: open it, open it in a new tab, save the link, copy the links URL address, save the link as a bookmark or to select a the text. Internet browser options – press the settings button access the web browser options to Homepage - Selecting “Home”, enables the set homepage to be loaded.
Tip – you can clear your browsing history by accessing the web browser settings, tapping Privacy & Security>Clear history>OK Camera Open the camera app – in the Main Menu, select Camera. Take pictures 1) Aim your screen at the object. 2) Tap the “shutter” button on the screen. Photos will be saved in the camera’s gallery folder named using the time when they were taken. You can view the photos by touching the preview box button.
During a recording –the recording timer will be displayed here. Tip – in both picture and video modes, you can zoom in, by double tapping the screen or performing the zoom in gesture Camera settings - You can tap settings or the camera in the camera panel.
Photo gallery Photo gallery – In the photo gallery, you can browse your available images in various folders. . View images - From the picture screen, tap a photo album to view images. . Tap the thumbnail to view the picture in full screen mode. You can choose to display small or large thumbnails. Hold down the screen towards the left side to view the next photo or towards right to view the previous one.
Notice: Special occasions such as birthdays set the all-day option to Yes. If the activity takes place at a certain time period, select the start time and end time. 3)Enter the event location, description, guests, repeat, reminder time. 4) Click Finish to return to calendar. Clock Open the main menu panel tap Tap the Set alarm button on the screen and enter the desired alarm clock setting Alarm Once the alarm has been set we reach the time in question, a ringing or vibrating alert is generated.
selected artist will appear. Select one album, then the songs in it will be played. Interface Buttons Menu: Refresh music – refreshing music list Party shuffle- shuffle songs Shuffle all- shuffle all songs Radio FM You may listen to FM radio using your phone. FM radio requires a wired headset to act as an antenna. After you have successfully plugged in your earphones and the radio application is running, you can manually switch to speakers.
Settings Some default device settings may be provided, so you may not be able to change these settings. Wi-Fi Tap Wi-Fi , to enable. The display changes to . While Wi-Fi is enabled the devices searches for available networks automatically, networks without password protection can be accessed directly, others need to have the password entered first. Tip – When you turn flight mode on it disables WIFI automatically Bluetooth Tap Wi-Fi to enable. The display changes to .
Audio profiles Here you can change the phones existing audio profiles, or add new audio profiles. You can change: Volumes, Voice call ringtones, Video call ringtones, Default notification sounds, toggle vibrations and change other sound options.
Location access Access to my location -Let’s apps that have asked for your permission use your location information Wifi & mobile network location –Lets apps use Googles location service to estimate your location faster. Anonymous location data will be collected and sent to Google Gps satellites toggle GPS on and off.
Language- set default language for voice search Speech output- set type of speech output Block offensive words- hide recognized offensive voice results Bluetooth handset- records audio through Bluetooth headset if available Text-to-speech output – Text-to-speech output settings o Preferred engine – choose preferred speech engine o Speech rate- set speed witch the text is spoken o Listen to an example – Play short demonstration of speech synthesis Pointer speed – set pointer speed o o o o Backup & res
Autorebot- check to be able set autoreboot time setting Large text- check to display large text on screen Power button ends call Auto-rotate screen Text-to-speech output – Text-to-speech output settings o Preferred engine – choose preferred speech engine o Speech rate- set speed witch the text is spoken o Listen to an example – Play short demonstration of speech synthesis Touch & hold delay- set time of delay Enhance web accessibility – allow or deny to install scripts from Google that make their
Frequently asked questions The touch screen responds slowly or improperly Remove any protective covers from the touch screen Please make sure that your hands are clean and dry when handling a device with a touch screen Ensure that you have the latest software version installed The display shows SIM failure Double check if the Sim card has been mounted correctly, if the problem persists your SIM card may be damaged.
Others cannot hear you speaking during a call Make sure that you are not covering the built in microphone Make sure that the microphone is close to your mouth Cannot find other bluetooth devices Make sure that the Bluetooth feature is activated on your device Make sure that the Bluetooth feature is active on the device you wish to connect to and that it’s visible to other devices Make sure that both devices are close enough to each other (10 m) Safety Warnings and Notices Before using y
gets into your eyes. If this occurs rinse eyes immediately with clear water (under no circumstances rub your eyes) and immediately go to a hospital for treatment. Do not disassemble or modify your mobile phone in any way. You forfeit your warranty and you risk damaging your device. Please do not use needles, pen tips or other sharp objects on the keypad as this may damage the mobile phone or cause it to malfunction.
If the liquid from inside the batterie goes into your eyes, there is a risk of blindness. If this occurs do not rub your eyes, but immediately rinse them with clear water and go to the hospital for treatment. Please do not disassemble or modify the battery, as this will cause the battery to leak, overheat, crack and catch fire. If the battery overheats, changes color or becomes distorted during use, charging or storage, please stop using it and replace it with a new battery at once.
Please do not use the charger if the power cord is damaged, as this will cause fire or electrical shock. Please immediately clean any dust gathered on the electrical outlet. If the charger comes in contact with water or other liquid the power must immediately be switched off to avoid an electrical shortcircut, fire or other damages. Please do not disassemble or modify the charger, it may cause the charger to malfunction and catch fire.
Warranty Card WARRANTY CARD DATE OF SALE: ................................................................................................................................................................... MANUFACTURE DATE: ................................................................................................................................................................... DEVICE MODEL: ..............................................................................................................