GODOX PHOTO EQUIPMENT CO.LTD WITSTRO TTL Powerful & Portable Flash AD360II-C Instruction Manual Foreword Before using this product Please read this user manual carefully in order to ensure your safety and the proper operation of this product. Keep for future reference. Thank you for purchasing a GODOX product. WITSTRO TTL Powerful & Portable Flash AD360II-C applies to Canon EOS series cameras and is compatible with E-TTL II autoflash.
Dot-matrix LCD panel: with clear and convenient operation. Built-in 2.4G wireless transmission: with all-in-one functions and 100 meters further transmission Studio quality light: up to 360Ws, GN 80 (m ISO 100, with AD-S2 standard reflector). Approx. 28mm flash coverage when operating on a camera with the standard reflector. One AD360 can overpower the sun. External battery pack: PB960 (lithium, 11.1V/4500mAh), 0.05-4.5s recycling and 450 full power flashes.
product must be sent to an authorized maintenance center. 3. Stop using this product if it breaks open due to extrusion, falling or strong hit. Otherwise, electric shock may occur if you touch the electronic parts inside it. 4. Do not fire the flash directly into the eyes (especially those of babies) within short distances. Otherwise visual impairment may occur. When taking pictures for babies, keep the flash unit at least 1 meter (3.3 feet) away from them.
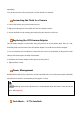
Connecting to a Power Pack Connecting the Flash to a Camera Replacing the Off-Camera Adapter Power Management Flash Mode— E-TTL Autoflash FEC (Flash Exposure Compensation) FEB (Flash Exposure Bracketing) FEL: Flash Exposure Lock High-Speed Sync Second-Curtain Sync Flash Mode—M: Manual Flash Flash Mode—Multi/Stroboscopic Flash Wireless Flash Shooting: Optic Transmission Wireless Settings Master Unit’s Flash OFF Setting the Communication Channel ETTL: Fully Automatic Wireless Flash Shooting ETTL: Use the Wire
Assist Beam Setting Bounce Flash Sync Triggering PC Sync Socket Triggering C.Fn: Setting Custom Functions Control with the Camera’s Menu Screen Protection Function Technical Data Troubleshooting Firmware Upgrade Compatible Camera Models Maintenance Conventions used in this Manual This manual is based on the assumption that both the camera and camera flash’s power switches are powered on. Reference page numbers are indicated by “p.**”.
01. Accessory Mount 02. Accessory Locking Ring 03. Flash Tube 04. Tube Socket 05. Umbrella Mounting Hole 06. Release Button 07. Power Socket 08. Wireless Control Port 09. Sync Cord Jack 10. PC Sync Socket 11. MF-Assist Beam 12. Light Sensor 13. Control Panel 14. Hotshoe Stand 15. Mini USB Port Control Panel: 15 < MODE > Mode Selection Button 16. < > Wireless Selection Button 17. Select Dial 18. Set Button 19. ON/OFF Power Switch 20. < > Test Button / Flash Ready Indicator 21.
23. Function Button 3 24. Function Button 4 LCD Panel (1) E-TTL Autoflash The display will only show the settings currently applied. The functions displayed above function buttons 1 to 4, such as and , change according to settings’ status. When a button or dial is operated, the LCD panel illuminated.
2-Reflector diffuser 1-Instruction manual Separately Sold Accessories The product can be used in combination with the following accessories sold separately, so as to achieve best photography effects: X1C Wireless Flash Trigger, FT-16 Remote Control, Softbox, Beauty Dish, Fold up umbrella, Snoots, Light stand, etc. Installing Reflector (Other Accessories) 1. Rotate Accessory Locking Ring (2) counter-clockwise until it is loosen. 2. Insert the reflector into the Accessory Mount (1). 3.
separately). *For the instructions of the power pack, see the related user manual. Connecting the Flash to a Camera 1. Loosen the locking ring on the mounting foot. 2. Slip the mounting foot of the flash unit into the camera hotshoe. 3. Secure the flash unit by rotating the locking ring the direction of the row. Replacing the Off-Camera Adapter The off-camera adapter is useful when using the product as an off-camera flash. There is a 1/4″ mounting hole at the bottom of the off-camera adapter.
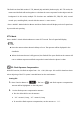
This flash has three flash modes: E-TTL, Manual (M), and Multi (Stroboscopic). In E-TTL mode, the camera and the flash will work together to calculate the correct exposure for the subject and the background. In this mode, multiple TTL functions are available: FEC, FEB, FEL, HSS, second curtain sync, modeling flash, control with the camera’s menu screen. * Press Mode Selection Button and three flash modes will display on the LCD panel one by one with each pressing.
3. Press button again to confirm the setting. FEB: Flash Exposure Bracketing You can take three flash shots while automatically changing the flash output for each shot from -3 to +3 in 1/3rd stops. The camera will record three images with different exposures: one exposed according to camera calculations, one over-exposed and another under-exposed. Over and under exposure amount is user adjustable.
With displayed on the LCD panel, press the camera’s button. If the camera does not have the button, press the < > button. 1. Focus the subject. 2. Press the button. * Aim the subject at the center of the viewfinder and press button. * The camera flash will fire a preflash and the required flash output for the subject is retained in memory. * Each time the button is pressed, a preflash will be fired and a new flash exposure setting will be locked.
Second-Curtain Sync With a slow shutter speed, you can create a light train following the subject. The flash fires right before the shutter closes. Press function button 4 < > button so that < > is displayed on the LCD panel. M: Manual Flash The flash output is adjustable from 1/1 full power to 1/128th power in 1/3rd stop increments. To obtain a correct flash exposure, use a hand-held flash meter to determine the required flash output. 1. Press button so that < > is displayed. 2.
1/2+0.7 1/2+0.3 1/4+0.7 1/4+0.3 … ←Figures displayed when increasing flash output level Optic S1 Secondary Unit Setting In M manual flash mode, press < S1/S2> button so that this flash can function as an optic S1 secondary flash with optic sensor. With this function, the flash will fire synchronously when the main flash fires, the same effect as that by the use of radio triggers. This helps create multiple lighting effects.
● Press Function Button 4 < > button to select the flash times. Turn the Select Dial to set the number. ● After you finish the setting, press button and all the settings will be displayed. Calculating the Shutter Speed During stroboscopic flash, the shutter remains open until the firing stops. Use the formula below to calculate the shutter speed and set it with the camera.
Maximum Stroboscopic Flashes: Hz 1 2 3 4 5 6-7 8-9 1/4 7 6 5 4 4 3 3 1/8 14 14 12 10 8 6 5 1/16 30 30 30 20 20 20 10 1/32 60 60 60 50 50 40 30 1/64 90 90 90 80 80 70 60 1/128 100 100 100 100 100 90 80 10 11 12-14 15-19 20-50 60-199 1/4 2 2 2 2 2 2 1/8 4 4 4 4 4 4 1/16 8 8 8 8 8 8 1/32 20 20 20 18 16 12 1/64 50 40 40 35 30 20 1/128 70 70 60 50 40 40 Flash Output Hz Flash Output If the number of flashes i
This product supports wireless flash application and functions as either a master or a slave unit. As a master unit, it can control Canon speedlites e.g. 580EXII, 600EX-RT via wireless. As a slave unit, it can receive wireless signals of Canon speedlites e.g. 580EXII, 600EX-RT and commanders of Canon cameras e.g. 7D/60D/600D. You can set up two to three slave groups for E-TTL II autoflash shooting. With E-TTL II autoflash, you can easily create various lighting effects.
You can switch between normal flash and wireless flash. For normal flash shooting, be sure to set the wireless setting to OFF. Master Unit Setting 1. Press < > button so that < >和< > are displayed on the LCD panel. Slave Unit Setting 1. Press < > button again so that < >和< > are displayed on the LCD panel. 2. Master Unit’s Flash OFF When the master unit is set to OFF, only the slave units will fire a flash. 1. Press Function Button 4 so that < 2.
3. Press the button to confirm. 4. ETTL:Fully Automatic Wireless Flash Shooting Using Automatic Wireless Flash with a Single Slave Unit 1、Master Unit Setting ● Attach a AD360II-C camera flash on the camera and set it as the master Unit. ● As a master unit, AD360II-C can control Canon speedlites e.g. 580EXII, 600EX-RT via wireless. 2、Slave Unit Setting ● Set the other camera flash as the wireless slave unit. ● As a slave unit, AD360II-C can receive wireless signals of Canon speedlites e.g.
7、Check the flash operation. ● Press the master unit’s Test Button< >。 ● Then, the slave unit will fire. If not, adjust the slave unit’s angle toward the master unit and distance from the master unit. Using Automatic Wireless Flash with Multiple Slave Units When stronger flash output or more convenient lighting operation is needed, increase the number of slave units and set it as a single slave unit. To add slave units, use the same steps as setting “automatic wireless flash with a single slave unit”.
Using Fully Automatic Wireless Flash The FEC and other settings that set on the master unit will also be appeared on the slave unit automatically. The slave unit does not need any operation. Use the following settings to make wireless flashes according to the same methods with normal flash shooting.
2、Setting < >. ● Step 2 to Step 4 are set on the master unit. ● Press the Function Button 4 on the master unit so that < > is displayed. 3、Setting . ● Press Function Button 2 < > so that is displayed. 4、Setting flash ratio. ● Press Function Button 3 < >. ● Turn the Select Dial to set the amount of flash ratio and press button to confirm. 5、Taking the picture. ● The slave units will flash according to the flash ratio.
If three slave units are all set to < > in terms of slave ID, these slave units will be controlled as if they were one camera flash in slave group A. Part ● When setting < RATIO A:B C >, group A, B and C will fire a flash synchronously; when setting< RATIO A:B >, group C will not fire a flash. ● If shooting under the situation that group C is toward the main shooting subject, over exposure might occurred.
This describes wireless (multiple shooting) using manual flash. You can shoot with a different flash output setting for each slave unit (firing group). Set all parameters on the master unit. 1、Setting the flash mode to . 2、Setting the number of flash groups. ● When < MENU 1> is displayed, press the Function Button 2 < > to set the groups to fire. ● The setting changes as follows each time you press the button: ALL(RATIO OFF)→ A/B(RATIO A:B)→ A/B/C(RATIO A:B:C)。 3、Setting flash output.
● Set the manual flash output. 6、Multi: Manual Wireless Flash Shooting 1、Setting stroboscopic flash. ● Press button so that is displayed. ● Setting the stroboscopic flash. The firing frequency of stroboscopic flash during the optic transmission wireless shooting can be set from 1Hz to 199Hz (settings from 250 Hz to 500 Hz are not available). Wireless Flash Shooting: Radio (2.
Wireless Multiple Flash Shooting You can divide the slave units into two or three groups and perform E-TTL II/E-TTL autoflash while changing the flash ratio (factor). In addition, you can set and shoot with a different flash mode for each firing group, for up to 5 groups.
Channel 1~32 1~4 A/B/C Power OFF,1/128~1/1 1/128~1/1 Other Applications Wireless Control Function The flash unit is built in with a Wireless Control Port so that you can wirelessly adjust the power level of the flash and the flash triggering. To control the flash wirelessly, you need a FT-16 remote control set (on-camera and on-flash). Insert its receive end into the Wireless Control Port on the flash and insert the transmit end into the camera hot shoe.
Auto Focus Assist Beam In poorly-lit or low-contrast shooting environments, the built-in auto focus assist beam will automatically light on to make it easier for autofocus. The beam will light up only when autofocus is difficult and get out as soon as the autofocus becomes correct. If you want to turn off the auto focus assist beam, set the “AF” to “OFF” on the C.Fn settings. If you find the auto focus assist beam does not light up, this is because the camera has got a correct autofocus.
To set the bounce direction, hold the flash head and turn it to a satisfying angle. 0-270° horizontally and -15°-90° vertically If the wall or the ceiling is too far away, the bounced flash might be too weak and result in underexposure. The wall or the ceiling should be a plain, white color for high reluctance. If the bounce surface is not white, a color cast may appear in the picture. Sync Triggering The Sync Cord Jack is a Φ3.5mm plug.
C.Fn Custom Functions Custom Function Signs Functions Setting Signs ON APO FEB ACL Settings & Descriptions Custom Functions No. ON Auto power off C.Fn-01 OFF OFF ON ON FEB auto cancel C.Fn-03 OFF OFF 0 → − → + FEB FEB order C.Fn-04 - → 0 → + ON AF BEEP C.Fn-08 OFF OFF ON ON OFF OFF Beeper C.Fn-20 12sec LIGHT LCD 1. ON AF-assist beam Backlighting time LCD contrast ratio Off in 12 sec. OFF Always off ON Always lighting 0~9 10 levels C.Fn-22 Press < Zm/C.
* Press button and the Setting No. blinks. * Turn the Select Dial to set the desired number. Pressing button will confirm the settings. * After you set the Custom Function and press button, the camera will be ready to shoot. 4. In the C.Fn states, long press the “Clear”button for 2 seconds until “OK”is displayed on the panel, which means the values in C.Fn can be reset.
*Screens from the EOS-1D Mark III. If flash exposure compensation has already been set with the camera flash, flash exposure compensation cannot be set with the camera. To set it with the camera, the camera flash’s flash exposure compensation must be set to zero. If any Flash Custom Functions and flash settings other than flash exposure compensation have been set by both the camera and the flash, the latest settings will take effect. Protection Function 1.
1/2(+0.3,+0.7) 100 1/4(+0.3,+0.7) 150 1/8(+0.3,+0.7) 200 1/16(+0.3,+0.7) 300 1/32(+0.3,+0.7) 500 1/64(+0.3,+0.7) 1000 1/128(+0.3,+0.7) Number of flashes that will activate over-temperature protection in high-speed sync triggering mode: Power Output Times 1/1 30 1/2(+0.3,+0.7); 40 1/4(+0.3,+0.7); 50 1/8(+0.3,+0.7); 60 1/16(+0.3,+0.7) 75 1/32(+0.3,+0.7); 1/64(+0.3,+0.7); 100 1/128(+0.3,+0.7); 2.
Please restart the flash unit. If the problem still exists, please send this product to a maintenance center. E2 The system gets excessive heat. Please allow a rest time of 10 minutes. E3 The voltage on two outlets of the flash tube is too high. Please send this product to a maintenance center. E9 There are some errors occurred during the upgrading process. Please using the correct firmware upgrade method.
FE lock With button or< Sync mode High-speed sync (up to 1/8000 seconds), first-curtain sync, and > button second-curtain sync Multi flash Provided (up to 100 times, 199Hz) •Wireless Flash (Optic transmission and 2.4G transmission) Wireless flash function Controllable Master, Slave, Off slave 3 (A, B,and C) groups Transmission Optic Indoors: 12 to 15 m / 39.4 to 49.2 ft. range Outdoors: 8 to 10 m / 26.2 to 32.8 ft. (approx.
minutes if set as slave) • Sync Triggering Hotshoe, 3.5mm sync line, PC sync socket, Wireless control port Mode 5600±200k •Color Temperature •Dimensions Dimension 210*85*79mm (flash tube & reflector not included) Net Weight 800g (flash tube & reflector not included) Troubleshooting If there is a problem, refer to this Troubleshooting Guide. The Camera Flash does not fire. The camera flash is not attached securely to the camera. Attach the camera’s mounting foot securely to the camera.
You used Manual Flash mode. Set the flash mode to ETTL or modify the flash output. Firmware Upgrade This flash supports firmware upgrade through the USB port. Update information will be released on our official website. USB connection line is not included in this product. The USB port is a standard Micro USB socket. Common USB connection line is applicable.
Maintenance -Shut down the device immediately should abnormal operation be detected. -Avoid sudden impacts and the product should be dedusted regularly. -It is normal for the flash tube to be warm when in use. Avoid continuous flashes if unnecessary. -Maintenance of the flash must be performed by our authorized maintenance department which can provide original accessories. -This product, except consumables e.g. flash tube, is supported with a one-year warranty. -Unauthorized service will void the warranty.
Note: This equipment has been tested and found to comply with the limits for a Class B digital device, pursuant to part 15 of the FCC Rules. These limits are designed to provide reasonable protection against harmful interference in a residential installation. This equipment generates uses and can radiate radio frequency energy and, if not installed and used in accordance with the instructions, may cause harmful interference to radio communications.