
Manual


FS175
- 33-
5007287-01
BA-DE-GB-FR-NL
®
Before starting work
After work
Weekly
Yearly
In the event of a malfunction
If damaged
Complete
machine
Visual
inspection
(condition,
absence of
leaks)
X X X
clean
X
Flange and blade
holder
clean
X
Poly-V belt
check
X X X X
replace
X
Water nozzle and
feeding hoses
clean
X
Tools
check
X X
clean
X
replace
X
5.2 Lubricating chart
Grease the blade shaft bearings after 20 working
hours with heat resistance fat. From time to time clean
the foot pedal, pointer unit and wheels and grease
them with some drops of oil.
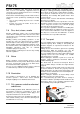
5.3 Poly-V belt
Unscrew the screws that fix the motor (4x M10x30,
DIN EN ISO 4017) and the screw that fixes the
eccentric.
Move the motor forwards by turning the eccentric
counter clockwise. In this position the poly-V belt can
be replaced easily.
Stress the poly-V belt by turning eccentric clockwise.
To fix the motor, screw down the M10x30 screws.
In the case when the eccentric is moved to its farthest
position while the belt is still not stressed, remove the
eccentric; assemble it in another hole on upper
chassis, then start to adjust the belt stress again (1,2,
3,4).
5.4 Machine
Clean the machine after each duty and check all
functions. Replace all necessary parts that are out of
order or worn out immediately.
5.5 Blade
When ending a cutting job - check blade as
follows:
Check segments for cracks, break-outs, cracks
between segment, deformation and out of round
wear.
In case of doubt, send the blade for repair.
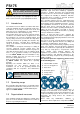
6. Taper bushes installation
instructions
6.1 To assemble
Clean and de-grease the bore and taper surfaces of
the bush and the tapered bore of the pulley. Insert the
bush in the pulley hub and line up the holes (half
thread holes must line up with half straight holes).
Lightly oil the grub screws or the cap screws and
screw them in, do not tighten yet.
Clean and de-grease the shaft. Fit pulley with taper
bush on shaft and locate in desired position.
When using a key it should first be fitted in the shaft
Keyway. There should be a top clearance between the
key and the keyway in the bore.
Using a hexagon socket wrench gradually tighten the
grub/cap screws in accordance with the torques as
listed in the schedule of screw tightening torques.
When the drive has been operating under load for a
short period (half to one hour) check and ensure that
the screws remain at the appropriate tightening torque.
In order to eliminate the ingress of dirt fill all empty
holes with grease.
1 2
3 4