
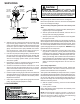
GPH16M Service Manual


SERVICING
40
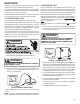
Wiring is subject to change. Always refer to the wiring diagram on the unit for the most up-to-date wiring.
NOTE: To adjust superheat, turn the valve stem
clockwise to increase and counter clockwise to
decrease.
b. If subcooling is low and superheat is high, add
charge to raise subcooling then check superheat.
c. If subcooling and superheat are high, adjust TXV
valve superheat, then check subcooling.
d. If subcooling is high and superheat is low, adjust
TXV valve superheat and remove charge to lower
the subcooling.
NOTE: Do NOT adjust the charge based on suction pres-
sure unless there is a gross undercharge.
4. Disconnect manifold set, installation is complete.
Refrigerant Charge Check (Units with Fixed Orifice
Devices)
After completing airflow measurements and adjustments
the unit’s refrigerant charge must be checked. All package
units with fixed orifice devices are charged using the super
heat method at the compressor suction line.
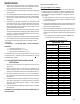
After superheat is adjusted it is recommended to check
unit sub-cooling at the condenser coil liquid line out. For
charge adjustments, see superheat and subcooling charts
shown for each model.
SUPERHEAT=SUCTION LINE TEMP-SUCTION TEMP
Models Superheat °F Subcooling °F
A/GPH1624M41 15 ±2 8 ±2
A/GPH1630M41 15 ±2 10 ±2
A/GPH1636M41 13 ±2 10 ±2
A/GPH1642M41 15 ±2 10 ±2
A/GPH1648M41 15 ±2 13 ±2
A/GPH1660M41 14 ±2 11 ±2
Design Superheat & Subcooling
@ 95
°
F Outdoor Ambient Temperature
High Stage
SYSTEM CHARGING HEATING MODE
The proper method of charging a heat pump in the heat
mode is by weighing the charge according to the total
charge listed on the rating plate.
Measure the hot gas discharge at the compressor to en-
sure proper TXV setting. To ensure optimum system
performancein heat mode, the TXV may require adjust-
ment.
1. Allow the system to operate for at least 20 minutes.
2. Attach and insulate an electronic thermometer to the
hot gas discharge line mid-way between the compres
sor and the reversing valve.
NOTE: The thermometer must be well insulated to pre-
vent ambient influences.
3. Allow the compressor to operate for about 10 addi
tional minutes and measure the hot gas discharge tem
perature.
4. Using an additional electronic thermometer, measure
the ambient temperature.
5. Adjust the TXV until the hot gas temperature equals
100°F + ambient temperature (+ or - 3°F). Close TXV
to increase the temperature.
NOTE: When adjusting the TXV, allow the compres
sor to operate for about 10 minutes before taking read
ings. Do not adjust TXV more than 1/4 of a turn be
tween readings.
CAUTION