
Guide

2019 | Condential and Proprietary | Do not distribute
This is your comprehensive guide to seing up and installing Nest thermostats.
Don’t have time to read through the steps? Go to the Additional Resources section to watch
the installation video.
If you are pre-drilling holes, use a 3/32”drill bit. If you are drilling into hard materials such as stone,
brick, concrete or marble, use a masonry drill bit and drill.
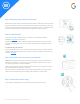
Step 1: Switch o the power
Step 2: Remove the cover of existing thermostat
Once you’re sure the power is o, remove the thermostat’s cover. Some pop o,
others need to be unscrewed.
Impoant: Take this oppounity to also take a picture of the current wiring.
Before exposing any wiring make sure power to the system is turned o. An
HVAC system can have multiple breakers so make sure to turn them all o.
To check that its o, change the temperature on the thermostat
appropriately for heating or cooling by 5 degrees and wait 5 minutes to see
if the system turns on.
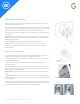
Step 3: Check system and get a wiring diagram
Let’s conrm this setup is compatible for a Nest thermostat by visiting the
Compatibility Checker. Here you will also get a customized wiring diagram to
show where to install the wires.
Incompatible wiring:
High voltage wires
If the thermostat is labeled 120V or 240V or has thick wires with wire
nuts, the system is high voltage and isn’t compatible with the Nest
thermostat. Do not connect the Nest thermostat to high-voltage
wires. Learn more.
Stranded wires
Nest thermostats are not compatible with stranded wires. Do not
connect the Nest Thermostat to stranded wires. Learn more.
Installation guide
Step by step