
Guide

2019 | Condential and Proprietary | Do not distribute
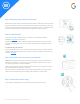
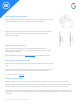
Step 5: Label the wires
If you see two sets of labels on each connector on the old thermostat’s
backplate, visit here for assistance.
Peel o the labels from the installation guide and aach them to the matching
wires on the thermostat. You can also use the white labels for additional wires if
needed.
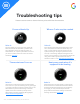
Troubleshooting wire labels
If you have labels like W, Y, or R, use the wiring diagram that you created earlier to
choose which labels to aach to these wires. If you have dierent wire labels not
covered, visit here.
GETTING STARTED:
Step 4: Remove jumper wires and save them
Remove the jumper wires, the Nest thermostat doesn’t need them, and save them.
Have the customer keep the current thermostat, the photo of the wiring, and any
jumper wires the current thermostat uses in a safe place. This is in case they move
and can reinstall the previous thermostat and take their Nest with them.
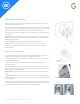
Step 6: Disconnect the wires and remove the base
Impoant: It’s impoant that the power to the system is o to avoid blowing a
fuse in the equipment. If you blow a fuse, the Nest thermostat won’t turn on, or
may display a power error aer installation.
Aer removing the base, gently wrap the wires around a pen or pencil to ensure
they don’t fall back into the hole in the wall.
Ask the customer if they’d prefer to patch the wall themselves or if they would
rather use the included trim plate to help hide scratches or screw holes.
Step 7: Mark where screws will go
Use the built in bubble level to make sure the Nest thermostat is level.