
Guide

2019 | Condential and Proprietary | Do not distribute
GETTING STARTED:
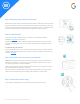
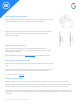
Step 10: Aach the Nest display
Hold the display so the Nest logo is right side up. Line up the pin connector on the
back of the display and push it onto the base until it clicks into place.
Tip: If you don’t hear the display click, use your thumb to push the wires fuher
into the wall. This will make sure the wires aren’t stopping the display from
connecting to the base.
Step 11: Switch power back on
Aer turning the power back on, the Nest thermostat should power on
automatically. If it doesn’t turn on, you might see a blinking red light to indicate
that the baery is charging.
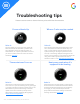
Wait for the baery to charge or check this aicle for troubleshooting steps.
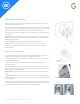
Step 12: Set up the Nest thermostat
Aer it’s nished staing up, the Nest thermostat will guide the customer through
setup.
They will tell the thermostat a few basics about their home and their heating and
cooling system so it can sta working eciently for them right o the bat.
For more on seing up visit here.
Entering your Nest Pro ID
Adding your Nest Pro ID to the customer’s thermostat gives them easy access to you if they ever need help.
When installing a Nest Thermostat, the Pro Setup section will ask you if you’d like to enter your Nest Pro ID. Select
PRO when asked if you are a PRO or HOMEOWNER to get to Pro Setup, and follow the onscreen instructions.
If the thermostat is already installed press the ring to access the main menu, turn to SETTINGS and press the ring
again to select. Then turn the ring to NEST PRO and press to select. The thermostat will ask if you want to add your
information.