For AndroidTM mobile technology platform 4.
Copyright © 2012 Google Inc. All rights reserved. Edition 1.2. Google, Android, Gmail, Google Maps, Chrome, Nexus 7, Google Play, YouTube, Google+, and other trademarks are property of Google Inc. A list of Google trademarks is available at http://www.google.com/permissions/ guidelines.html. ASUS and the ASUS logo are trademarks of ASUSTek Computer Inc. All other marks and trademarks are properties of their respective owners.
Table of contents Part One: Using Nexus 7 1. Get started 2 Insert & activate a SIM card 2 Charge the battery 4 Turn on & sign in 4 Get around 5 Browse & organize your Home screens 7 Touch & type 9 Type text by speaking 10 Why use a Google Account? 11 What’s New in Android 12 2.
3. Use the keyboard 29 Enter & edit text 29 Try Gesture Typing 31 Use keyboard dictionaries 32 4. Try some apps 33 Use All Apps 33 Start Gmail 34 Find People 35 Manage your Calendar 36 Open & use Clock 37 Manage downloads 38 5.
About Gmail Cards 62 About the Location History card 63 About the Stocks card 63 Search settings 64 Privacy & accounts 66 6. Accessibility 67 Accessibility overview 67 Accessibility gestures for Android 4.
Part Two: Adjusting settings 7. Wireless & network settings 87 Connect to Wi-Fi networks 87 Connect to Bluetooth devices 91 Optimize data usage 93 Control airplane mode & other network settings 98 Connect to virtual private networks 99 8.
9. Security settings 111 Security on Android 111 Manage security settings 111 Protect against harmful apps 112 Set screen lock 114 Encrypt your data 115 Work with certificates 117 10.
Part One Using Nexus 7 NEXUS 7 GUIDEBOOK GET STARTED 1
1 Get started Insert & activate a SIM card Applies only for Nexus 7 with mobile data. To use your tablet with 3G networks, you must first insert & activate a SIM card. If no card is installed, the message “No SIM card” appears on the tablet’s lock screen. Only the Nexus 7 with mobile data can accept a SIM card. Wi-Fi versions of the tablet can’t.
When the tablet is face down, the SIM card tray is located on the right side. The eject button is a small round opening on the left side of the tray door. To install a new SIM card: 1. Turn your tablet off and place it on a flat surface with the screen facing down. 2. Locate the SIM card tray on the right side of your tablet, and find the hole on the tray door. 3. Insert the tool that comes with the tablet (or a paperclip) into the hole on the tray, and push firmly but gently until the tray pops out. 4.
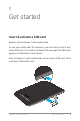
Charge the battery The battery may not be fully charged at first. It’s a good idea to fully charge it as soon as you can. Connect the micro USB cable to Nexus 7 and to the charging unit, and the charging unit to a power outlet: a IMPORTANT: Use the charging unit and micro USB cable that come with your Nexus 7. Other charging units and USB cables may charge more slowly or not at all.
• To choose a different language, touch the menu. • To continue, touch the Play icon and follow the instructions. When prompted, sign in using the email address and password for your Google Account. If you don’t have one yet, create one.
At the bottom of every Nexus 7 screen, no matter what you’re doing, you’ll always find these three navigation buttons: Back Opens the previous screen you were working in, even if it was in a different app. Once you back up to the Home screen, you can’t go back any further in your history. Home Opens Home. If you’re viewing a left or right Home screen, opens the central Home screen. To open Google Now, swipe up. Google Now gives just what you need to know, right when you need it.
TIP: In Android 4.2 and later, you can use Quick Settings to toggle Wi-Fi, change display brightness, and more. To open Quick Settings, swipe down from the top right corner of any screen. At the top of the screen you’ll find Google Search, which lets you search your tablet or the Internet. Touch Google to type your Microphone icon to speak them; you can search terms, or the also say “Google” and your query to activate a voice search.
When you’re ready to shop for more, try the suggestions in one of the Play Recommendations widgets: Touch to avoid future suggestions like this Touch to learn more Touch to see a different suggestion To resize a widget, touch & hold, then let go and drag the blue dots. To remove it, touch & hold, then drag it to the Remove icon at the top of the screen. Organize Home screens To add an app or widget to a Home screen: 1. Go to the Home screen where you want to place the app or widget. 2.
3. Lift your finger. The icon drops into its new position. To combine two icons in a folder, slide one quickly over the other. To open a folder, touch it. To rename a folder, touch its name. Touch & type To select or activate something, touch it. To type something, such as a name, password, or search terms, just touch where you want to type. A keyboard pops up that lets you type into the field. Other common gestures include: • Touch & hold.
• Double-tap. Tap quickly twice on a webpage, map, or other screen to zoom. For example, double-tap a picture in Chrome to zoom in, and double-tap again to zoom out. • Pinch. In some apps (such as Maps, Chrome, and Gallery), you can zoom in and out by placing two fingers on the screen at once and pinching them together (to zoom out) or spreading them apart (to zoom in). • Rotate the screen. The orientation of most screens rotates with your device as you turn it.
You can touch the Delete key to erase the underlined text. If you start typing or entering more text by speaking, the underline disappears. To improve processing of your voice input, Google may record a few seconds of ambient background noise in temporary memory at any time. This recording remains on the device only fleetingly and is not sent to Google. To change your tablet’s speech settings, go to Settings > Personal > Language & input.
• Keep your stuff secure and available. Google works round the clock to protect your personal data from unauthorized access and to ensure that you get it when you need it, wherever you need it. • Simplify shopping. You can connect your Google account with Google Wallet, which makes it easy to purchase music, books, apps, and more on Google Play and other online stores. • Use other Google services.
• Quick Settings (Android 4.2) Use Quick Settings to easily access Wi-Fi settings, manage display brightness, open the main Settings menu, and more. Swipe down from the top right corner of any screen to open Quick Settings, then touch one of the boxes to open a specific setting. • Expandable notifications Expandable notifications were introduced in Android 4.1, including the option to perform actions from the notification itself. In Android 4.
Swipe up from the bottom center of any screen, or touch the Google Search bar on any Home screen. • Say “Google” to search When the Google Now screen is open, you can say “Google” to activate a voice search. Open Google Now, then say “Google” and your query to search.
2 Explore your tablet Swipe up for Google Now Google Now is about getting you just the right information, at just the right time. It tells you today’s weather before you start your day, how much traffic to expect before you leave for work, and even your favorite team’s score while they’re playing. All of this happens automatically. Google Now intelligently brings you the information you want to see, when you want to see it. No digging required.
Give it a try! Swipe your finger up from the bottom of any screen, or touch the Google Search bar at the top of the screen. When you want to see more cards, touch Show more cards at the bottom of the screen. When you don’t need them any more, swipe them out of the way. You’re in control When you decide to use Google Now, you’re turning on location reporting and location history. Google Now also uses location information provided by Google’s location service and GPS, if those are currently turned on.
Swipe down for notifications & settings Notifications alert you to the arrival of new messages, calendar events, and alarms, as well as ongoing events, such as video downloads. When a notification arrives, its icon appears at the top of the screen.
You can perform these actions from the notification shade: Dismiss all Touch to respond to other guests Swipe down using one finger to expand certain notifications NOTE: The notification tray differs slightly in Android 4.1.2 and earlier versions.
Quick Settings Available for Android 4.2 and later. Use Quick Settings to easily toggle Wi-Fi, manage display brightness, open the main Settings menu, and more. To open Quick Settings, swipe down from the top right corner of any screen: Touch to open all settings Touch a square to open the specific setting Relax with Google Play Google Play brings together all your favorite content in one place – movies, TV shows, books, music, magazines, apps, and more – so you can reach it from any of your devices.
• Recommended on Play. Suggests music, movies, and other content that may interest you. Touch the suggestion to learn more about it. • Recommended apps. Recommends apps that you can add to your Home screen. Touch the recommendation to learn more about it. All Google Play recommendation widgets work the same way: Touch to avoid future suggestions like this Touch to learn more Touch to see a different suggestion To resize a widget, touch & hold, then let go and drag the blue dots.
Shop on Google Play To open the Google Play Store app, touch the Play Store icon in your Favorites tray on every Home screen. Play Store Most things you purchase on Google Play are available from your computer as well as from any of your Android mobile devices. (Android apps are one exception – they run only on Android devices.) Sign in to play.google.com to get your entertainment from anywhere.
Touch icon in this location to see your content of that type You can quickly access your content this way, from the Google Play Store app, even if you originally purchased it on Google Play using a different phone or tablet. If you get a new device, all your media will automatically be waiting for you here when you turn on and sign in. Google Play settings To adjust your Google Play settings, switch accounts, or get help, Menu in the top right choose the option you want from the corner.
tween them. Lock screen widgets let you scan recent Gmail messages, Calendar entries, and other app content without unlocking your screen. To set or change the type of lock, see Set screen lock. Add a widget to the lock screen 1. In portrait mode, swipe right across the upper part of the Plus icon. In landscape mode, screen until you see the swipe right from the left side of your screen 2. Touch the Plus icon. If prompted, enter your PIN, pattern, or password. A set of the available widgets appears.
Try Face Unlock You can set an automatic screen lock for your tablet. After you set a lock, the screen locks when the display goes to sleep or when you press the Power button. You can set locks of different strengths using lock settings: 1. Go to Settings > Personal > Security > Screen lock. 2. Touch the type of lock you’d like to use. Face Unlock is one of the options available. After you’ve set it up, you can unlock your tablet simply by looking at it.
2. Move the back of your tablet toward the back of the other device. When the devices connect, you hear a sound, the image on your screen reduces in size, and you see the message Touch to beam. 3. Touch your screen anywhere. Your friend’s device displays the transferred content. Or, if the necessary app isn’t installed, Google Play opens to a screen where your friend can download the app.
You can download additional wallpapers on Google Play. 3. To set a wallpaper, touch Set wallpaper or, for Gallery images, determine the cropping and touch Crop. To change your tablet’s wallpaper, go to Settings > Device > Display > Wallpaper. Settings Take a screenshot You can easily take a screenshot on your tablet that you can save in your Gallery or share with others: 1. Make sure the image you want to capture is displayed on the screen. 2. Press the Power and Volume down buttons simultaneously.
You may need an adapter to connect the keyboard or other device to your tablet’s USB port. To connect more than one USB device at a time, use a powered USB hub to reduce the drain on your tablet’s battery. IMPORTANT: Using external devices such as keyboards via USB will cause a significant additional drain on your battery, as will continuous use of a mouse via Bluetooth. You pair and connect Bluetooth input devices to your tablet in the same way as any other Bluetooth device.
• Only one mouse button is supported. • If your mouse has a trackball or scroll wheel, you can use it to scroll both vertically and horizontally. Other input devices You can connect joysticks, gamepads, and other input devices to your tablet. If they work without special drivers or adapters on your PC, they will likely work with your tablet.
3 Use the keyboard Enter & edit text You can enter text using the onscreen keyboard. Some apps open it automatically. In others, you open it by touching where you want to type. Touch a suggestion to type it Touch & hold to type this character Touch & hold to see input and keyboard settings Touch & hold to choose a smiley face To make the keyboard go away, touch the modified ton below it. Back but- Basic editing • Move the insertion point. Touch where you want to type.
• • • • • The cursor blinks in the new position, and a blue tab appears below it. Drag the tab to move the cursor. Select text. Touch & hold or double-tap within the text. The nearest word highlights, with a tab at each end of the selection. Drag the tabs to change the selection. The tab disappears after a few moments. To make it reappear, touch the text again. Delete text. Touch to delete selected text or the characters before the cursor. Type capital letters.
dicts words you may want. If you don’t want any of the options, type the next word without using the space bar. Your tablet will continue to suggest words as you type. To change your tablet’s keyboard and input methods, go to Settings > Personal > Language & input. Settings To turn next-word suggestions on or off, go to Settings > Personal > Language & input > Keyboard & input methods > Android keyboard. Touch the Settings icon, then check the box next to Next-word suggestions.
Settings To change Gesture Typing settings, go to go to Settings > Language & input > Keyboard & input methods > Android keyboard. Then touch Settings and look under Gesture Typing. Use keyboard dictionaries To manage keyboard dictionaries, go to Settings > Personal > Language & input. Personal dictionary You can add your own words to your personal dictionary so that your tablet remembers them. Touch the Add icon to add a word or phrase, as well as a shortcut to easily use that word or phrase.
4 Try some apps Use All Apps To see all your apps, touch any Home screen. All Apps in the Favorites tray on This is where you can see all your apps, including those downloaded on Google Play. You can move app icons to any of your Home screens. From All Apps, you can: • Move between screens. Swipe left or right. • Open an app. Touch its icon. • Place an app icon on a Home screen. Touch & hold the app icon, slide your finger, and lift your finger to drop the icon in place. • Browse widgets.
slide your finger toward the top of the screen, and drop the app App Info icon . over the Most apps include a Menu icon near the top or bottom of the screen that lets you control the app’s settings. Start Gmail Use the Gmail app to read and write email from any mobile device or browser. To open it, touch the Gmail icon on a Home or All Apps screen. Gmail But Gmail isn’t just about email.
No matter where you are within Gmail, you can always get back to Gmail icon at the top of the screen. the Inbox by touching the Find People The People app gives you quick access to everyone you want to reach. To open it, touch the People icon on a Home or All Apps screen. People When you first turn on your tablet and sign into a Google Account, any existing contacts from that account are synced with your People app.
• Change your settings. While viewing the main list screen, Menu icon to import or export contacts, choose touch the display options for the Groups and All tabs, and add or edit accounts. No matter where you are within People, you can always get back People icon at the top of the to the main lists by touching the screen. Manage your Calendar Use the Calendar app to view and edit your schedule. To open it, touch the Calendar icon on a Home or All Apps screen.
To email everyone who’s invited to an event, you have two options: • Open the event from the Calendar app at any time and touch Email guests. • When a notification of the event arrives just before the meeting starts, swipe down the notification shade. Then swipe using one finger to expand the notification if necessary, and touch Email guests. Open & use Clock To open the Clock, touch the Clock icon from a Home or All Apps screen. Set an alarm 1.
The timer beeps when the time is up. It keeps beeping until you touch Stop. Use the stopwatch 1. Touch the Stopwatch icon in the top right corner of the screen. 2. Touch Start to start the stopwatch. If you want to pause the stopwatch, touch Stop. You can also add laps while the stopwatch is running by touching the icon to the left of the stopwatch. To share your results, touch the Share icon to share via Google+, Gmail, and more.
app to view, reopen, or delete what you download in this way. From the Downloads app: • Touch an item to open it. • Touch headings for earlier downloads to view them. • Check items you want to share. Then touch the Share icon and choose a sharing method from the list. • Check items you want to delete. Then touch the Trash icon. • At the bottom of the screen, touch Sort by size or Sort by date to switch back and forth.
5 Use Google Now & Search About Google Now Google Now gives you just the right information at just the right time. Swipe up from the bottom of your tablet to get commute traffic before work, popular nearby places, your favorite team’s current score, and more. You can turn Google Now on or off at any time. Swipe up the same Menu > Settings > Google Now. If the keyboard’s way and touch Back button to lower it.
your commute is like when you wake up in the morning. It also uses information from Google services such as your Web History for sports or flight updates, or from your synced calendar entries for appointment reminders. About Google Now cards A Google Now card is a short snippet of useful information that slides into view right when you’re most likely to need it. For example, here’s a traffic card: To see some sample cards from the main Google Now screen, Menu > Sample cards.
important when you need it, in the hope that such alerts are a useful additional source of information. To learn more, visit support. google.com/publicalerts. About location access, reporting, & history Location access settings determine whether your tablet can use your current location. When location access is turned on, apps can use it to give you more relevant information, such as nearby restaurants or commute traffic.
screen, touch tion services. Menu > Settings > Privacy and accounts > Loca- For more details, see “Control location access, reporting, & history.” About Web History & other data Google Now uses data from multiple sources to help predict what you need. For example, if you have a synced calendar entry for a dentist appointment, Google Now can check traffic and suggest when to leave.
Edit card settings To change the settings for an individual Google Now card: • Touch Menu > Settings on the card. OR • From the lower right corner of the Google Now screen, touch Menu > Settings > Google Now. The Google Now settings screen appears, where you can turn a specific card On or Off or adjust its settings. After you turn off a card, it won’t appear when you open Google Now. Dismiss cards To dismiss a card from the Google Now screen, swipe it away.
• Touch Menu > Settings when the card appears. OR • From the lower right corner of the Google Now screen, touch Menu > Settings > Google Now, and adjust the settings under Notifications. To change ringtone and vibrate options for all standard notificaMenu > Settions, start from the Google Now screen, touch tings > Google Now, and adjust the settings under Standard Notifications. Turn off Google Now Turning off Google Now stops the display of cards and returns Google Now settings to their defaults. 1.
Control location access, reporting, & history This section describes how to set your home and work addresses and manage other location-related features used by Google Now. Define home & work As you use Google Now, you may be asked to confirm your home or work address to get commute traffic information, travel help, and more. You can change these addresses in several other ways: • When a Traffic card appears for home or work, touch Menu > Edit.
2. To turn off location reporting, touch Location reporting > Do not update your location. 3. To turn off location history, uncheck Enable location history. Delete location history details Even if you turn off both location reporting and location history, your previously recorded history is still available to Google services such as Google Now. To delete location history details, follow these steps from a desktop computer: 1.
IMPORTANT: Turning off location access for your tablet also turns it off for Google Now, other Google apps, and third-party apps. That means that no apps can receive your precise location information and many useful features will be disabled. To keep location access on, you must keep GPS satellites, Wi-Fi & mobile network location, or both settings checked.
• When you’re viewing the Google Now screen, you don’t have to touch anything. Just say “Google.” Next, speak the terms to search for or the Voice Action to perform. For more details on Voice Actions, see “Use Voice Actions.” The ability to trigger a search or action by saying “Google” is called hotword detection. To turn it off or on, start from the Google Now screen and touch Menu > Settings > Voice > Hotword detection.
Search tips & tricks What you want What to type or say Examples Sports information [team’s name] San Francisco Giants Pictures Pictures of [topic] Pictures of San Francisco images of [topic] Images of cats Convert measurements [original measurement] in [new measurement] 30 degrees Celsius in Fahrenheit Movie showtimes Movie Movie Movie [location] Movie Chicago [movie name] The Horse’s Mouth Word definition Define [word] Define campanile Weather forecast Weather Weather Weather [lo
Translation Translate to [language] [phrase] Translate to Spanish, Where is the Palace Hotel?’ Calculator [A math phrase] 75 divided by 6 Food [Type of food] Mexican food [Type of food] in [location] Mexican food in Urbana, Illinois Use Voice Actions You can use Voice Actions with Google Search to get directions, send messages, and perform a number of other common tasks.
a panel that prompts you to complete the action by speaking or typing more information. • Touch any text already entered in the panel to add or edit the text by typing. Microphone To speak text instead of typing, first touch the key near the bottom right of the onscreen keyboard. • Touch underlined words or phrases or drag across multiple words to view a list of alternate transcriptions, or to edit by speaking or typing.
“Directions to” or “Navigate to” Address, name, business name, type of business, or other destination “Directions to 1299 Colusa Avenue, Berkeley, California” or “Navigate to Union Square, San Francisco.” Contact name “Mike LeBeau” (opens Mike’s contact card) “Go to” Search string or URL “Go to Google.com” “Send email” One or more of: “Send email to Hugh Briss, subject, new shoes, message, I can’t wait to show you my new shoes, period.
Google Now Card list Cards are displayed when you’re most likely to need them. Most are based on information available to your Google account, such as your current location, recent searches, or calendar entries. Gmail cards display information based on recent confirmation messages in the Gmail account you’ve selected for use with Google Now. For more details, see “About Gmail Cards.” Travel cards appear when you’re away from home. Not all cards listed here are available for Android 4.1.2 and earlier.
Flights Shown before flights that you’ve searched for. Gmail: Event bookings Shown before an event booking confirmed by Gmail.
Gmail: Flights Shown before flights confirmed by Gmail. Gmail: Hotels Shown when you receive a confirmation email and before your scheduled checkout.
Gmail: Packages Displayed when you receive a shipping notification for an online purchase. Gmail: Restaurants Shown before a restaurant reservation confirmed by Gmail. Location history Shows a rough approximation of how far you walked or cycled during the past month.
Movies Shows movies playing in your vicinity, and tells you when a movie you’re interested in is playing nearby. News update Shows updates related to news items you’ve read recently. Next appointment Shown before scheduled meetings.
Photo spot nearby Shown when you’re near a popular spot for taking photos. Places Shows nearby businesses and other places of potential interest. Public alerts Gives public advisories for your location from the National Weather Service, U.S. Geological Survey, and similar services.
Public transport Shown with relevant schedules when you’re near a train station, bus stop, or other public transit stop. Sports Shown for teams that interest you before, during, or after a game. Stocks Shown periodically for stocks you’re tracking. For more details, see About Stocks card page 63.
Traffic Shown before your usual commute times. Travel: Currency Shows the latest currency conversion information for your location. Travel: Nearby attractions Shown when you’re near well-known attractions, such as restaurants, museums, cafes, and so on.
Travel: Time back home Shown periodically when you’re in a different time zone than usual. Travel: Translate Shown when you’re visiting a place with a different language, to help translate words and phrases. Weather Periodically displays weather for home, work, or your current location. About Gmail Cards Gmail cards are based on confirmation messages sent to the Gmail account you’ve selected for use with Google Now.
such as a link to the email on which the card is based, or directions to a restaurant or hotel from your current location. You can turn Gmail cards off or on at any time .To do so from the main Google Now screen go to Menu > Settings > Google Now and check or uncheck Show cards based on Gmail. About the Location History card The Location History card appears once a month. It provides a very rough approximation of how far you’ve walked or cycled during that month compared to the previous one.
To change Stock card settings from the main Google Now screen, go to Settings > Google Now > Stocks. Search settings Some settings differ for Android 4.1.2 and earlier. To view Google Search settings, including those for Google Now, Menu scroll to the bottom of the Google Now screen and touch > Settings. The first three types of settings are described here. For Privacy and accounts, see the next section. Google Now Google Now settings let you turn Google Now on or off.
go to touch of the list. Menu > Settings > Google Now and look at the end Voice settings Voice settings control different aspects of speech input and output when you search by voice or use voice actions: • Language. The language you select here for Voice Search input and output can be different from the language displayed by your tablet. • Speech output. To turn on speech output only when you’ve got a headset attached to your tablet, select Hands-free only. • Block offensive words.
Privacy & accounts Some settings differ for Android 4.1.2 and earlier. These settings control the account for use with Google Search and search-related privacy options for that account. You can view them in two ways: • From the Google Now screen: Menu > Settings > Privacy & accounts. • From your tablet’s main Settings app: Settings > Accounts > Google > Search. Touch each setting to learn more: • Google Account. The account used with Google Search and Google Now. • Manage location history.
6 Accessibility Accessibility overview Your tablet’s accessibility features make it easier to use if you have visual impairments: TalkBack is a pre-installed screen reader service provided by Google. It uses spoken feedback to describe the results of actions, such as opening an app, and events, such as notifications. Explore by Touch is a system feature that works with TalkBack, allowing you to touch your tablet’s screen and hear what’s under your finger via spoken feedback.
sighted users. You can make reading and navigating this material easier by increasing the text size – just go to Settings > Accessibility, and check the Large text option. Related Settings • To view Accessibility settings, go to Settings > Accessibility. • To control sound feedback and other TalkBack behaviors, go to Settings > Accessibility > TalkBack and touch Settings at the top right corner of the screen. Accessibility gestures for Android 4.
• Swipe right then left using a single motion. Move to the next page. • Swipe left then right using a single motion. Move to the previous page. While you’re exploring with one finger, you can use another finger to double-tap to open an app, widget, and so on. IMPORTANT: The way these gestures are interpreted is specific to TalkBack. Other accessibility services may use the same gestures for different actions Shortcut gestures in TalkBack Note: These gestures work only when Explore by Touch is turned on.
Set up your tablet Your Nexus 7 has the following hardware: • Power button/lock key. The Power button is located on the right side of your tablet. • Volume. The Volume key is directly under the Power button. • Front-facing camera. The camera is located at the top center of your screen. • Micro USB port. The USB is at the bottom of your tablet. • Headset jack. The headset jack is in the lower right side at the bottom of your tablet. • SIM tray.
associated with that account are automatically synced with your tablet. If you have multiple Google Accounts, you’ll be able to add the others later. TIP: If you share your tablet with other users and need to turn accessibility features off, you can use a shortcut to turn them back on again. To turn on this shortcut, go to Bettings > Accessibility > Accessibility shortcut, then slide the switch to the On position.
Magnify: Triple-tap & hold. Magnify & pan: Triple-tap & hold, then drag your finger. Toggle magnification in or out: Triple tap & release. While you’re zoomed in, you can: Pan: Drag two or more fingers across the screen. Adjust zoom level: Pinch or expand using two or more fingers. Use TalkBack TalkBack provides spoken feedback to help you navigate your tablet, describing what you touch and activate.
tap to activate the last spoken item, and swipe with two fingers to perform swiping actions that normally require just one finger. Change TalkBack settings To modify TalkBack settings, go to Settings > Accessibility > TalkBack, then double-tap Settings in the top right corner. When to speak • Speech volume. You can set this as a percentage of media volume. • Use pitch changes. Check to speak keyboard feedback at a lower pitch. • Speak when screen is off.
Manage TalkBack volume To change the volume settings for TalkBack, go to Settings > Sound > Volumes. Use the slider for Music, video, games, & other media to change the volume level. You can also use the volume control on the right side of your tablet when you hear spoken feedback. Enhance web accessibility In order to have full accessibility support for products such as Gmail and Chrome, you’ll need to turn on the Enhance web accessibility option.
IMPORTANT: If you chose not to turn on Explore by Touch when you turned on TalkBack, you can switch it on later. Go to Settings > Accessibility > TalkBack > Settings, then check Explore by touch. You can use the same checkbox to turn it off at any time. Each action you take with your finger alerts you with spoken feedback, as well as sound (if enabled).
• Back. Opens the previous screen you were working in, even if it was in a different app. Once you back up to the Home screen, you can’t go back any further in your history. • Home. Opens Home. If you’re on a left or right Home screen, this button opens the central Home screen. • Recent apps. Opens a list of thumbnail images of apps you’ve worked with recently. To open an app, touch and double-tap. To remove a thumbnail from the list, use two fingers to swipe it left or right.
• To see additional Home screens, swipe left then right or right then left in a single motion, or left or right using two fingers. At the top of the screen, you’ll find the status bar: • Status icons on the left tell you which apps have sent you notifications—for example, that a message has arrived, or it’s time for a meeting. If you have TalkBack or another accessibility service running, it will speak the notification when it first appears.
– movies, books, music, magazines, apps, and more – so you can reach it from any of your devices. Use Google Play widgets These widgets are available on your Home screens: • Recommended on Play: Suggests music, movies, and other content that may interest you. Find the suggestion and double-tap to learn more about it. • Recommended apps: Recommends apps that you can add to your Home screen. Find the recommendation and double-tap to learn more about it.
Find your content If you purchased from Google Play in the past, you’ll automatically have access to this content on your Nexus 7 – just make sure you’re signed in using the same account that you used to purchase it. You can get to your content using any of the Google Play icons in your Favorites tray, including Books, Magazines, Movies, and Music. (Note: To read magazines in text mode, visit Reading in text mode at the end of this article.) Or, find the Play Store icon and double-tap to open Google Play.
and double-tap Content filtering or Set or change PIN. For more detailed information about Google Play, visit support. google.com/googleplay. Use Gmail Note: These instructions assume that you have turned on TalkBack, Explore by Touch, and Enhanced Web Accessibility. Read your messages • From a Home or Apps screen, find the Gmail app and doubletap to open it. Gmail opens to your Inbox. To hear the subject lines of your conversations, swipe right or down.
3. Find and double-tap the Send icon in the main action bar at the top of the screen to send your message. Search your Inbox 1. From a conversation list, find the Search icon in the action bar at the top of the screen and double-tap. 2. To use the keyboard to edit the Search mail field, slide your finger across the keyboard and lift your finger on the chosen key to input text. 3. As you type, suggestions appear below the Search field. Find a suggestion and double-tap to search for it immediately. 4.
Browse Chrome These instructions assume that you have turned on TalkBack, Explore by Touch, and Enhanced Web Accessibility. • From a Home or Apps screen, find the Chrome icon and double-tap to open it. Chrome opens to display your homepage or the most recent page you were browsing. The web address (URL) of the current page is located at the top of the screen in the address box (also called the omnibox). To edit or input a web address, you can: 1.
blocks of text, or swipe up then down using a single motion to go back to the previous reading level. • Zoom. To zoom out, touch the screen with two fingers and pinch them together. To zoom in, spread them apart. Ascending and descending tones alert you when zooming in or out. To customize web page zooming, go to More options > Settings > Accessibility. You can also browse in Incognito mode. To open an Incognito tab, find and double-tap More options > New Incognito tab.
Use the lock screen About the lock screen Your tablet’s lock screen is enabled if any of the following occurs: • The tablet goes to sleep (and it locks automatically). • The screen turns off after a specified timeout (depending on your display settings). • You force your screen to turn off and the tablet to lock by pressing the power button. Unlock your tablet 1. Hold the screen in portrait mode and turn it on by pressing the Power button on the right side of your tablet. 2.
magnify what’s under your finger. (For users with low vision) • Large text. Check to increase the text size on all your tablet’s screens. (For users with low vision) This option changes the font size to the largest available. For more fine-grained control over font size, go to Settings > Display > Font size. Note that this setting does not apply to the Google Chrome app – it has its own text scaling control. • Auto-rotate screen.
Part Two Adjusting settings NEXUS 7 GUIDEBOOK WIRELESS & NETWORK SETTINGS 86
7 Wireless & network settings Connect to Wi-Fi networks If your tablet has multiple users, each can change the global WiFi settings. Turn Wi-Fi on & connect to a Wi-Fi network If you’re adding a Wi-Fi network when first setting up your tablet, Wi-Fi is turned on automatically. 1. Touch Settings > Wireless & networks > Wi-Fi. 2. Slide the Wi-Fi switch to the On position. The tablet scans for available Wi-Fi networks and displays the names of those it finds.
To modify a network’s settings, touch & hold the network name. TIP: To extend the life of your battery between charges, turn off Wi-Fi when you’re not using it. You can also set your tablet to disconnect automatically from Wi-Fi networks when it’s sleeping. Add a Wi-Fi network You can add a Wi-Fi network so that your tablet will remember it, along with any security credentials, and connect to it automatically when it’s in range.
connect to it automatically or if it’s a network that you no longer use. 1. Turn on Wi-Fi, if it’s not already on. 2. In the Wi-Fi settings screen, touch the name of the network. 3. Touch Forget in the dialog that opens. Configure proxy settings for a Wi-Fi network Some network administrators require you to connect to internal or external network resources via a proxy server.
1. Turn on Wi-Fi, if it’s not already on. 2. In the Wi-Fi settings screen, touch Menu > Advanced. These are the settings you can adjust: • Network notification. By default, when Wi-Fi is on, you receive notifications in the Status bar when your tablet detects an open Wi-Fi network. Uncheck this option to turn off notifications. • Keep Wi-Fi during sleep. To conserve mobile data usage, your tablet stays connected to Wi-Fi when the screen goes to sleep.
Connect to Bluetooth devices If your tablet has multiple users, each can change the global Buetooth settings. To connect to a Bluetooth device, first turn on your tablet’s Bluetooth. Then, the first time you use a new Bluetooth device, you need to “pair” it with your tablet so that both devices know how to connect securely to each other. After that, they connect automatically. TIP: To extend the life of your battery between charges, turn off Bluetooth when you’re not using it.
2. Touch Bluetooth. 3. In the Bluetooth screen, touch Menu > Rename tablet. 4. Type a new name and touch Rename. Pair your tablet with a Bluetooth device You must pair your tablet with a device before you can connect to it. Once you pair your tablet with a device, they stay paired unless you unpair them. If the device you want to pair with isn’t in the list, ensure that the it’s turned on and set to be discoverable. 1. Under Settings > Wireless & networks, make sure Bluetooth is turned on. 2.
2. In the list of devices, touch a paired but unconnected device. When the tablet and the device are connected, the device is displayed as connected in the list. Configure or unpair a Bluetooth device Some Bluetooth devices have multiple profiles. Profiles can includes the ability to transmit your conversations, play music in stereo, or transfer files or other data. You can select which profiles you want to use with your tablet.
To monitor your data usage, go to works > Data usage. Settings > Wireless & net- WARNING: The usage displayed on the data usage settings screen is measured by your tablet. Your carrier’s data usage accounting may differ. Usage in excess of your carrier plan’s data limits can result in steep overage charges. The settings described here can help you track your usage, but is not guaranteed to prevent additional charges.
By default, when you open the data usage settings screen you see the settings for mobile data: that is, the data network or networks provided by your carrier: It’s possible to show Wi-Fi data usage settings in a separate tab. , then Show Wi-Fi usage. To do so, touch the Menu icon Near the top of the screen, note the on-off switch for mobile data. The instructions that follow assume that this switch is turned on.
Just below the on-off switch, note the data usage cycle. Touch it to choose a different cycle. This date range is the period of time for which the graph displays data usage. The vertical white lines on the graph show a period of time within the data usage cycle. This range determines the usage amount displayed just below the graph. Drag lines to change the period. Set auto-sync You can also conserve data usage by syncing your apps manually, only when you need the data, rather than relying on auto-sync.
IMPORTANT: The usage displayed on the data usage settings screen is measured by your tablet. Your carrier’s data usage accounting may differ. Usage in excess of your carrier plan’s data limits can result in steep overage charges. The feature described here can help you track your usage, but is not guaranteed to prevent additional charges. For best results, set a conservative limit.
4. To stop background data usage for this app, check Restrict background data. 5. Read the message that appears. If you’re willing to proceed, touch OK. Advanced data usage settings Two other settings available from the Menu icon can have dramatic effects—but may sometimes be useful: • Data roaming can result in steep additional charges. However, in some locations this may be the only way to connect to the Internet.
• Android Beam. Touch to turn Android Beam off or on. When NFC is checked and Android Beam is on, you can touch your tablet to other devices to exchange web pages, contact info, and other data. See “Share content with Android Beam.” • Mobile networks. Touch to adjust settings that control your tablet’s connections with mobile data networks. Connect to virtual private networks Virtual private networks (VPNs) allow entry into secured local networks from the outside.
Connect to or disconnect from a VPN 1. From the VPN screen, touch the name of the VPN. 2. In the dialog that opens, enter any requested credentials. 3. Touch Connect. When you’re connected to a VPN, a Status icon and notification are displayed continuously. To disconnect, touch the notification for the VPN connection. Edit a VPN 1. 2. 3. 4. From the VPN screen, touch & hold the name of the VPN profile. In the dialog that opens, touch Edit profile. Edit the VPN settings you want. Touch Save.
8 Device settings Change sound settings If your tablet has multiple users, each has separate Sound settings. To customize the sounds your tablet makes, go to Device > Sound: Settings > • Volumes sets the master volume separately for music, notifications, and alarms. You can still use the physical volume control on the tablet to raise or lower volume of whatever sound is currently playing.
When Daydream is on, your tablet displays photos, colors, and more while it is charging or docked. Turn on Daydream 1. Go to Settings > Device > Display. 2. Touch Daydream. 3. Slide the switch to On. To decide if your tablet sleeps while docked, charging, or both, touch When to daydream. You can choose what your tablet displays when Daydream is on: • Clock displays the tablet’s digital or analog clock.
3. Touch one of the options. Turn off Daydream 1. Go to Settings > Device > Display. 2. Touch Daydream. 3. Slide the switch to Off. Transfer files through USB You can use a USB cable to transfer music, pictures, and other files from your tablet to a computer and vice versa. This connection uses the MTP protocol, which is supported by most recent versions of Windows but not by Mac OS X. For file transfer to Mac OS X, you use the free Android File Transfer application. Windows transfer 1.
2. Connect your tablet to your computer with a USB cable. Android File Transfer starts, if it’s not already running, and opens a window that displays the contents of your tablet, along with storage space details at the bottom of the window. 3. Work with this window much as you do in the Finder window: open and close folders, create new folders, and drag files to or from it and other Finder windows. 4. Disconnect the USB cable when you finish.
Settings > Accounts > Google account-name. This means you need to sync manually to collect messages, email, and other recent information, and won’t receive notifications when updates occur. • If you know you won’t be near a Wi-Fi network for a while, switch to Airplane mode: press and hold the Power button, or go to Settings > Wireless & Networks > More > Airplane mode. Check battery level and usage details Open Settings > Device > Battery.
when you want to know more about what’s happening behind the scenes in order to better manage your storage. IMPORTANT: Android manages and carefully guards the portion of internal storage where the system, apps, and most data for those apps are stored, because this area may contain your private information. It’s not possible to view this portion of internal storage when you connect your device to a computer with a USB cable.
• Downloaded. Displays apps you’ve downloaded on Google Play or other sources. • Running. Displays all apps, processes, and services that are currently running or that have cached processes, and how much RAM they are using. The graph at the bottom of the Running tab shows the total RAM in use and the amount free. At the top right of the screen, touch Show cached processes or Show running services to switch back and forth. • All.
tain file types by default, you can clear that setting here. • Permissions. Lists the kinds of information about your tablet and data the app has access to. About tablet sharing If you share your tablet with family or friends, they can set up separate user spaces for themselves. You first add a new user to the tablet. Then hand it over to that person to set up the new space, just as you did when you turned on the tablet for the first time.
See the documentation for a setting to find out how it works when more than one user is set up to use the tablet. In most cases, this information is available from a Help menu near the top of each Settings screen as well as in this help. Related setting To add or delete users for your tablet, go to Settings > Device > Users Settings Add, modify, or delete users To work with user settings, go to Settings > Devices > Users. Use this screen to share your tablet with family and friends.
up the Google account and other details. • If the person isn’t available, touch Not now. A generic new user appears in the list. When you can hand over the tablet to the person for setup, touch the user image in Settings > Device > Users or on the lock screen. Modify user info From the Users screen, each user can modify their own image and info on the lock screen: • Change the picture: Touch the user name, then the image beside the local profile name. • Change the nickname: Touch Nickname.
9 Security settings Security on Android Android takes a multi-layered approach to security: Prevent. Apps in Google Play are scanned continuously to block harmful apps and policy violators. You can also choose to have apps installed from other sources verified. Control. App “sandboxes” keep apps from accessing other parts of your tablet’s operating system, or each other, unless you give permission at installation. Screen lock and encryption help prevent unauthorized access to the entire tablet. Defend.
You can manage the security settings for your tablet by going to Settings > Personal > Security. • Screen security. Manage screen lock options, such as using the Power button to lock your screen. • Encryption. Encrypt the data on your tablet. • SIM card lock. Set up a PIN to lock your tablet’s SIM card. • Passwords. Make passwords visible, which helps you to enter a password that is more complex and secure. • Device administration.
cation is turned on, your tablet may send information identifying the app to Google. If the app is harmful, Google may warn you not to install it, or it may block the installation completely. IMPORTANT: When you verify apps, Google receives log information, URLs related to the app, and general information about the device, such as the Device ID, version of the operating system, IP address, and one or more cookies. Control app verification Tablets running Android 4.
Turn off app verification To stop verifying apps at any time, go to Settings > Security > Verify apps, then uncheck the box. Set screen lock You can lock your screen for additional security. After you set a lock, the screen is locked after the display goes to sleep. 1. Go to Settings > Personal > Security > Screen lock. 2. Touch the type of lock you want and follow the onscreen instructions.
Password tips: For best security, specify a password that is • A least 8 characters long. • Contains a mixture of numbers, letters, and special symbols. • Doesn’t contain any recognizable words or phrases. To change when your tablet goes to sleep, go to Settings > Device > Display > Sleep. Settings To see your passwords when you input them, go to Settings > Personal > Security > Make passwords visible.
many cases the PIN or password you set for encryption is controlled by the system administrator. Before turning on encryption, prepare as follows: 1. 2. 3. 4. Set a lock screen PIN or password. Charge the battery. Plug in your tablet. Schedule an hour or more for the encryption process: you must not interrupt it or you will lose some or all of your data. When you’re ready to turn on encryption: 1. Touch Settings > Personal > Security > Encryption > Encrypt tablet. 2.
Work with certificates You can use digital certificates to identify your device for a variety of purposes, including VPN or Wi-Fi network access as well as authentication to servers by apps such as Email or Chrome. To use a certificate to identify your device, you must obtain it with help from your system administrator, and install it in your device’s trusted credential storage . Android supports DER-encoded X.509 certificates, saved in files with a .crt or .cer file extension.
5. Enter a name for the certificate and touch OK. Typically, a CA certificate included with a client certificate is installed at the same time. You can also install separate CA certificates using the same steps. If you have not already set a pattern, PIN, or password for your device, you’re prompted to set one up. The type of lock that’s acceptable may be predetermined by your system administrator.
2. To examine the details of CA certificate, touch its name. A scrolling screen displays the details. 3. To remove or disable a CA certificate, scroll down to the bottom of the details screen and touch either Disable for system certificates or Remove for user certificates. When you disable a system CA certificate, the button at the bottom of its details screen changes to Enable, so you can enable the certificate again if necessary.
10 Personal, account, & system settings Manage location access If your tablet has multiple users, each has separate Location access settings. Some settings differ for Android 4.1.2 and earlier. You can let your tablet access GPS, Wi-Fi networks, and mobile networks to estimate your location. Apps that have your permission can use this information to deliver location-based services, such as the ability to check in, view commute traffic, or find nearby restaurants.
location service to help estimate your location faster, with or without help from GPS. When the switch is Off, your tablet can’t find your precise location or share it with any apps. IMPORTANT: Turning off location access for your tablet also turns it off for Google Now, other Google apps, and non-Google apps. That means that no apps can receive your precise location information, and many useful features will be disabled.
To view the settings described here, go to & reset. Settings > Backup You can back up settings and other data associated with one or more of your Google Accounts. If you need to replace or factory reset your device, you can restore your data for any accounts that were previously backed up. These options are available: • Back up my data.
After resetting your tablet, you’ll need to re-enter the same information requested when you first set up your tablet. If you’ve been backing up your data to a Google account, an option during the setup process allows you to restore it. Some third-party apps also make use of the backup service, so if you reinstall one, its settings and data are restored. Add or remove accounts If your tablet has multiple users, each has separate account settings.
Remove an account You can remove any account and all information associated with it from your device, including email, contacts, settings, and so on. To remove a Google account, touch its name under Settings > Menu > ReAccounts or Settings > Accounts >Google, then move account. For any other type of account go, to Settings > Accounts > account-name and look for the Remove option. Configure sync options If your tablet has multiple users, each has separate sync options.
Configure auto-sync for all apps To control Anto-sync for all apps that use it, open Settings > Data Menu and check or uncheck Auto-sync data. usage > If you turn off Auto-sync, you need to sync manually to collect messages, email, and other recent information, and won’t receive notifications when updates occur. For example, changes that you make in your People app are automatically made to your Google contacts on the web.
Sync a Google Account manually 1. Go to Settings > Accounts > Google. 2. Touch the account whose data you want to sync. 3. Touch Menu > Sync now.
Appendix: Hardware reference What’s in the box Micro USB cable Nexus 7 USB charging unit Warran Quick Start Guide ty Warranty Nexus 7 3G tablets also include a SIM card ejection tool. • A SIM card ejection tool is also included with the mobile data model. • If any item is damaged or missing, contact your point of purchase for assistance • The bundled USB charging unit varies by country or region.
Nexus 7 FRONT Front-facing camera Touch screen SIDE SIDE BACK Microphone NFC area Power/lock key Microphone Volume key SIM card tray Speaker 4-pin connector 3.5mm headset jack Micro USB port BOTTOM NOTE: SIM card tray available only for Nexus 7 with mobile data, and microphone is lower on Wi-Fi-only model.
Battery To charge the battery, connect the Micro USB cable to Nexus 7 and to the charging unit, and the charging unit to a power outlet: a IMPORTANT: Use the charging unit and micro USB cable that come with your Nexus 7. Other charging units and USB cables may charge more slowly or not at all. • The USB charging unit varies by country or region. • Use only the USB charging unit that comes with your Nexus 7. Using a different charging unit may damage your tablet.
only when Nexus 7 is in sleep mode (screen off) or turned off. Charging through the USB port will take longer than charging with the USB charging unit. DO NOT throw the battery in municipal waste. The symbol of the crossed out wheeled bin indicates that the battery should not be placed in municipal waste. DO NOT throw Nexus 7 in municipal waste. This product has been designed to enable proper reuse of parts and recycling.
Specs (Wi-Fi models) Screen 7” 1280x800 HD display (216 ppi) Back-lit IPS display Scratch-resistant Corning® glass Size 198.5 x 120 x 10.45mm Weight 340g Camera 1.2MP front-facing camera Wireless WiFi 802.11 b/g/n Bluetooth Memory 16 or 32 GB internal storage 1 GB RAM USB Micro USB Battery 4325 mAh (up to 8 hours of active use) OS Android 4.
Specs (32GB + mobile data) Screen 7” 1280x800 HD display (216 ppi) Back-lit IPS display Scratch-resistant Corning® glass Size 198.5 x 120 x 10.45mm Weight 347g Camera 1.2MP front-facing camera Wireless WiFi 802.11 b/g/n Bluetooth NFC (Android Beam) Memory 32 GB internal storage (actual formatted capacity will be less) 1 GB RAM Sensors Microphone NFC (Android Beam) Accelerometer GPS Magnetometer Gyroscope USB Micro USB Battery 4325 mAh (up to 8 hours of active use) OS Android 4.
CPU NVIDIA® Tegra® 3 quad-core processor Network Unlocked GSM/UMTS/HSPA+ GSM/EDGE/GPRS (850, 900, 1800, 1900 MHz) 3G (850, 900, 1700, 1900, 2100 MHz) HSPA+ 21 Compatible file types DOC/DOCX/DOT/DOTX/RTF/TXT (Word) XLS/XLSX/CSV (Excel) PPT/PPTX/PPS/PPSX/POT/POTX (PowerPoint) PDF NEXUS 7 GUIDEBOOK APPENDIX 133