
Instructions


GMC-I Messtechnik GmbH 71
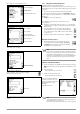
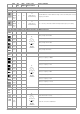
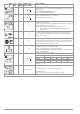
Go to page 3/3 in the database menu.
After selecting text search
and entering the desired text (only full matches are found – no
wild cards, case sensitive)
the first match is displayed.
Further matches can be found by selecting
the icon shown at the right.
If no further matches are found, the message shown above is dis-
played.
16.4 Saving Data and Generating Reports
Preparing and Executing a Measurement
Measurements can be performed and stored to memory for each
structural element. Proceed as follows, adhering to the prescribed
sequence:
➭ Select the desired measurement with the rotary knob.
➭ Start the measurement by pressing the ON/START or IΔ
N
key.
Upon completion of measurement, the “→ Floppy Disk” softkey is
displayed.
➭ Briefly press the “Save Value” key.
The display is switched to the memory menu or the
structural view.
➭ Navigate to the desired memory location, i.e. to the desired
structural element / object, for which the measurement data
will be saved.
➭ If you would like to save a comment along with the
measurement, press the key shown at the right and
enter a designation via the “EDIT” menu as described in
section 16.3.1.
➭ Complete data storage by pressing the “STORE” key.
Alternative Storage Procedure
➭ The measured value can be saved to the last se-
lected object in the structural diagram by pressing
and holding the “Save Value” key, without switching
the display to the memory menu.
Note
If you change the parameters in the measurement view,
they are not saved for the structural element. A measure-
ment with changed parameters can nevertheless be
saved to the structural element, and any changed param-
eters are documented in the report for each measure-
ment.
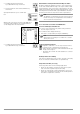
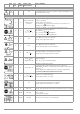
Retrieving Saved Measured Values
➭ Switch the display to the distributor structure by pressing the
MEM key and select the desired electrical circuit with the scroll
keys.
➭ Switch to page 2
by pressing the key shown here:
➭ Display the measurement data
by pressing the key shown here:
One measurement with date
and time, as well as any com-
ment you might have entered, is
displayed in each screen.
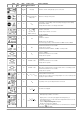
Example:
RCD Measurement
Note
A check mark in the header means that the respective
measurement has been passed.
An X means that the measurement has not been passed.
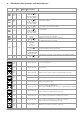
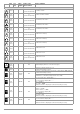
Search for ID number
Search for text
Search for ID number or text
Select character
Select character
↵ Accept character
Delete characters
Character selection:
✓ Save object designation
Continue searching
End search