Instructions-Parts List Pistol Grip Flow Gun For dispensing ambient temperature sealants and adhesives. Important Safety Instructions Read all warnings and instructions in this manual. Save these instructions. See page 2 for part numbers and maxumum working pressure.
Models Models Pistol Grip, Base Seal Part Number Model Pistol Grip, Tip Seal Description 2500 psi (17.2 MPa, 172 bar) maximum working pressure C27020 12004 Standard base seal C27031 12004X Two stage, easy pull C27067 12005 Balanced piston Part Number Model Description 2000 psi (13.79 MPa, 137.9 bar) maximum working pressure C27078 12006 Pistol Grip, Tip Seal Contents Models . . . . . . . . . . . . . . . . . . . . . . . . . . . . . . . . . . . 2 Warnings . . . . . . . . . . . . . . . . . . . . . . .
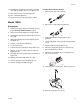
Warnings Warnings Warning ELECTRIC SHOCK HAZARD Improper grounding, setup, or usage of the system can cause electric shock. • Turn off and disconnect power at main switch before disconnecting any cables and before servicing equipment. • All electrical wiring must be done by a qualified electrician and comply with all local codes and regulations. • Connect only to grounded power source. SKIN INJECTION HAZARD High pressure fluid from gun, hose leaks, or ruptured components will pierce skin.
Grounding and Electrical Requirements Grounding and Electrical Requirements 1. Pump: connect a ground wire and clamp to a true earth ground as shown in pump manual. 2. Applicator: ground through motor cable assembly. The following are minimum requirements for a basic dispensing system. Your system may include other equipment or objects that must be grounded. Check your local electrical code for detailed grounding instructions for your area and type of equipment.
Installation Installation Inspect flow gun for shipping damage. If damage is found notify the carrier immediately. If material hose will be suspended by a hanger or tool balancer, route hose through the suspension device before securing each end of material hose. 1. Connect flow gun to any standard Graco hose assembly. 2. Connect the opposite end of the heated hose assembly to any fluid supply system. See Model table, page 2 for maximum fluid working pressure for your gun model. 3.
Troubleshooting Troubleshooting Problem Cause Gun fails to dispense when trigger is Material lodged in nozzle actuated Material supply, hose, passages, clogged Solution Follow Pressure Relief Procedure, page 5. Clear nozzle of blockage. Check material supply settings, hoses, etc. for proper material supply. Verify integrity of trigger pin through yoke. Repair or replace cartridge assembly as necessary.
Troubleshooting 309739 7
Service Service Models 12004, 12004X Reassembly Disassembly 1. Actuate gun to purge material and relieve pressure in gun. Pressure Relief Procedure, page 5. 2. Disconnect material supply line from gun handle. 3. Hold adapter (9) stationary and unscrew nozzle and collar (16). 4. With trigger depressed, unscrew adapter (9) from gun body (17). Clean all parts thoroughly before reassembling. Check them carefully for damage or wear, replacing parts as needed.
Service 14. Hold adapter (9) stationary and screw nozzle and collar (16) into adapter. Do not over tighten collar. Cartridge Disassembly Procedure 1. Remove guide (22) from needle (8). 15. Reconnect flow gun to material supply line. 16. Turn on material supply line. 17. Return flow gun to normal operating condition. Model 12005 ti4035a 2. Remove two o-rings (23) from guide (22). Disassembly 1. Actuate gun to purge material and relieve pressure in gun. Pressure Relief Procedure, page 5. 2.
Service Reassembly 12. Tighten nut (19) on needle (8). Clean all parts thoroughly before reassembling. Check them carefully for damage or wear, replacing parts as needed. For best results replace the original parts with new parts in repair kits. Prior to assembly, lubricate all seals and o-rings with PARKER-O-LUBE or an equivalent lubricant. 1. Connect needle (8) and stop nut (2) to yoke (1). 2. Secure yoke (1) in soft jawed vise. Lock stop nut (2) against yoke. ti4051a 13.
Service Model 12006 Reassembly Disassembly Clean all parts thoroughly before reassembling. Check them carefully for damage or wear. Replace parts as needed. For best results replace the original parts with new parts in repair kits. 1. With trigger (20) depressed, remove collar (17) securing nozzle (18) to gun. 2. Remove nozzle (18), holding adapter (10) firmly to prevent it from turning. Prior to assembly, lubricate all seals and o-rings with PARKER-O-LUBE or an equivalent lubricant. 3.
Parts Parts Models 12004 & 12004X 13 1 2 5 4 7 3 6 14 15 10 9 21 19 16 20 12 17 8 11 23 18 Item Part No.
Parts Model 12005 13 1 3 10 9 2 5 4 16 6 14 15 27 24 25 22 21 19 23 12 17 20 8 28 11 18 Item 1 2 3 4 5 6 8 9 10 11 12 13 14 15 309739 Part No.
Parts Model 12006 8 3 18 9 16 5 2 6 14 7 4 15 16 24 21 22 11 10 1 13 12 25 20 Item 1 2 3 4 5 6 7 8 9 10 14 Part No. C27080 C27053 C27058 C27060 106555 C27061 C19284 C27052 C02064 C27063 Description NEEDLE SUPPORT, packing PACKING, nut SEAL, needle PACKING, o-ring SCREW, adjustment NUT, hex YOKE GASKET ADAPTER, ball seat Qty 1 1 1 3 1 1 1 1 1 1 Item 11 12 13 14 15 16 17 18 19 20 21 22 23 24 25 26 Part No.
Technical Data Technical Data Maximum fluid working pressure . . . . . . . . . . . . . . . . . . . Models 12004X, 12004, and 12005: 2500 psi (17.2 MPa, 172 bar) Model 12006: 2000 psi (13.79 MPa, 137.9 bar) Inlet port size on gun housing . . . . . . . . . . . . . . . . . . . . . 1/2-14 NPT Weight . . . . . . . . . . . . . . . . . . . . . . . . . . . . . . . . . . . . . . . Models 12004X, 12004, and 12005: 1.4 lb (.64 kg) Model 12006: 1.6 lb (.73 kg) Dimensions. . . . . . . . . . . . . . . . . . . . . . . .
Graco Standard Warranty Graco warrants all equipment referenced in this document which is manufactured by Graco and bearing its name to be free from defects in material and workmanship on the date of sale to the original purchaser for use. With the exception of any special, extended, or limited warranty published by Graco, Graco will, for a period of twelve months from the date of sale, repair or replace any part of the equipment determined by Graco to be defective.