Instructions Parts Pressure Compensating Valve 309133C The pressure compensating valve minimizes the effects of pressure changes from the fluid source and reduces or eliminates material flow variances caused by piston pump changeover and unbalanced pump lowers. Eliminating surge variations adds consistency to the application process. The pressure compensating valve is used: in applications requiring a consistent bead size throughout the dispense cycle.
Table of Contents Symbols . . . . . . . . . . . . . . . . . . . . . . . . . . . . . . . . . . . . . . . . . . . . . . . . . . . . . . . . . . . . . . . . . . . . . . . . . . . . . . . . . . . . . . . . . . . 3 Warnings . . . . . . . . . . . . . . . . . . . . . . . . . . . . . . . . . . . . . . . . . . . . . . . . . . . . . . . . . . . . . . . . . . . . . . . . . . . . . . . . . . . . . . . . . . . 3 Compensator Models . . . . . . . . . . . . . . . . . . . . . . . . . . . . . . . . . . . . . . . . . . . . .
Symbols Warning Symbol Caution Symbol WARNING CAUTION This symbol alerts you to the possibility of serious injury or death if you do not follow the instructions. This symbol alerts you to the possibility of damage to or destruction of equipment if you do not follow the instructions. WARNING EQUIPMENT MISUSE HAZARD Equipment misuse can cause the equipment to rupture or malfunction and result in serious injury. INSTRUCTIONS This equipment is for professional use only.
WARNING FIRE AND EXPLOSION HAZARD Improper grounding, poor ventilation, open flames or sparks can cause a hazardous condition and result in a fire or explosion and serious injury. Ground the equipment and the object being sprayed. Refer to Grounding on page 8. If there is any static sparking or you feel an electric shock while using this equipment, stop spraying/dispensing immediately. Do not use the equipment until you identify and correct the problem.
WARNING MOVING PARTS HAZARD Moving parts, such as the air motor piston, can pinch or amputate your fingers. Keep clear of all moving parts when starting or operating the pump. Before servicing the equipment, follow the Pressure Relief Procedure on page 10 to prevent the equipment from starting unexpectedly. INJECTION HAZARD Spray from the gun, hose leaks, or ruptured components can inject fluid into your body and cause an extremely serious injury, including the need for amputation.
Unpacking and Repacking Unpacking the Product 2. Unseal the box and inspect the contents carefully. There should not be any loose or damaged parts. The pressure compensating valve was carefully packaged for shipment by Graco. When the product arrives, perform the following procedure to unpack the unit: 3. Compare the packing slip against all items included in the container. Any shortages or other inspection problems should be reported immediately. 1.
Overview Description The purpose of the pressure compensating valve is to provide a consistent flow of sealant and adhesive material downstream, through a hose, to a dispense valve and nozzle. The pressure compensating valve applies a precisely regulated air pressure to a rolling diaphragm to open a valve spool. Downstream back pressure is applied to the opposite end of the spool to push it closed.
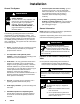
Installation Ground The System WARNING FIRE, EXPLOSION, AND ELECTRIC SHOCK HAZARD To reduce the risk of fire, explosion, and serious injury, proper electrical grounding of every part of your system is essential. Read the warning section, FIRE AND EXPLOSION HAZARD, on page 4 and follow the grounding instructions, below. The following grounding instructions are minimum requirements for a basic dispensing system. Your system may include other equipment or objects which must be grounded.
Installation Installing the Pressure Compensating Valve Before mounting the pressure compensating valve, extra inlet/outlet plugs and insulating wrap (for heated units only) need to be assembled. There are two inlets and outlet ports. Decide which are to be used and plug the others. Completely wrap the steel fluid housing with provided insulation wrap and tape. 3.
Installation To change the differential across the pressure compensating valve, adjust the precision air regulator pressure up or down to bring the fluid pressure gauges to within the 300 psi tolerance (obtain a pressure difference as close as possible to zero psi). Adjust the air regulator when the material is being dispensed. By increasing the air pressure to the cylinder, you increase the outlet fluid pressure. By decreasing the air pressure you decrease the outlet fluid pressure.
Maintenance Table 1 shows the preventive maintenance schedule for the Pressure Compensating Valve. Table 1. Preventive Maintenance Schedule Schedule Weekly Component Description Compensator body Remove plug to visually inspect grease. If a lot of pumped material is present, disassemble following instructions on page 13. Clean or replace components as needed. Weekly Lubricate the components Remove plug to visually inspect grease. If needed, lubricate with Gray Mobilith SCH220 grease.
Troubleshooting Problem Cause Solution Outlet material pressure not consistent. Inlet pressure is too low. Adjust inlet pressure from supply pumps. Outlet pressure builds up while not dispensing. Internal throat seals, o–rings and/or plunger are worn. Internal throat seals, o–rings and/or plunger are worn. Replace seals, inspect, and/or replace plunger. Replace seals, inspect, and/or replace plunger. Material is leaking externally. Internal seals are worn. Replace seals.
Service NOTE: Reference numbers and letters in parentheses in the text refer to the callouts in the figures and the parts drawing on pages 16–19. WARNING EQUIPMENT MISUSE HAZARD Exercise care when mounting and handling the Pressure Compensating Valve to prevent equipment damage or personal injury. Disassembly 1. Disconnect all hoses connecting the pressure compensating valve to the gun and heating units. 2. On heated models, remove insulation wrap. 3.
Service 5. Carefully align the block outlet (11) and compensator body (16) and secure using the four screws (12). Torque screws (12) to 45 ft-lb. (61 N m). 12. Attach the mounting plate (14) to the compensator body (16) using the four cap screws (3). See Fig 1. which shows the correct orientation of the mounting plate (14) to the compensator body (16). 6. Secure the heating unit to the block outlet (11) using the two screws (20) and washers (21). 13. On heated models, wrap with insulation. 7.
Notes 309133 15
Parts List 23:1 Ratio Compensators Model Nos. 243655, 243656, & 243658 Note: The parts listed below are not used in all models. See 120 volt wiring diagram on page 20 See 240 volt wiring diagram on page 20 Part not shown Used on model 243655 only Used on model 243658 only Used on model 243656 only Used on models 243656 and 243658 only Ref No. Part No.
Parts 23:1 Ratio Models: 243655, 243656, and 253658 2 Torque to 45 ft lbs Generously lubricate using high temperature synthetic grease or Graco cartridge no. 115982 only. 3 When the cylinder is fully retracted there should be a gap of .44” between the base of the air cylinder and the nut.
Parts List 51:1 Ratio Compensators Model Nos. 243206, 243654 & 243657 Note: The parts listed below are not used in all models. Used on model 243654 only See 120 volt wiring diagram on page 20 See 240 volt wiring diagram on page 20 Part not shown Used on model 243206 only Used on model 243657 only Used on models 243206 and 243657 only Used on all models except 243654 Ref No. Part No.
Parts 51:1 Ratio Models: 243206, 243654, and 253657 1 Torque to 45 ft lbs 2 Generously lubricate using high temperature synthetic grease or Graco cartridge no. 115982 only. 4 When the cylinder is fully retracted there should be a gap of .44” between the base of the air cylinder and the nut.
Wiring Diagram 120 Volt Models 27 18, 36 28 240 Volt Models 57 27 20 309133 62 64 63
Repair Kits and Accessories Use Only Genuine Graco Parts and Accessories Compensating Valve Repair Kit 233082 For all 23:1 and 51:1 models ordered after May 2000. Ref. No. 6 9 10 29 30 45 Part No. 106258 C07124 C20138 C34137 C33049 115751 Description O–RING, packing viton SEAL, PTFE PACKING, O–RING SHEET FIBERGLASS TAPE, high temperature SEAL, rod Qty. 1 2 1 100” 100” 1 Compensating Valve Upgrade Kit 243464 For all 19:1 compensating valves with aluminum fluid sections ordered before May 2000. Ref. No.
Technical Data Category Data Fluid Inlet 1 npt(f) Fluid Outlet 1 npt (f) Air Inlets 1/4 npt (f) Voltage g Required q (heated ( models)) 120 volts for models 243206 and 243658 240 volts for models 243656 and 243657 Output Wattage 400 watts Maximum recommended pressure drop 300 psi Maximum air inlet pressure 250 psi ( 1.70 MPa, 17.0 bar) Maximum operating pressure 100 psi (0.7 MPa, 7.
Dimensions 51:1 pumps: 10.5 in. 23:1 pumps: 9.5 in. 51:1 pumps: 9 in. 23:1 pumps: 7 in. 1.5 in. 51:1 pumps: 17 in. 23:1 pumps: 15 in. 2 in.
Graco Standard Warranty Graco warrants all equipment manufactured by Graco and bearing its name to be free from defects in material and workmanship on the date of sale by an authorized Graco distributor to the original purchaser for use. With the exception of any special, extended, or limited warranty published by Graco, Graco will, for a period of twelve months from the date of sale, repair or replace any part of the equipment determined by Graco to be defective.