
User's Manual


Operation
311306C 5
Electrical Installation
115VAC
The pump comes pre-wired with a 30 in. (762
mm) power cord with a 3 prong grounded plug.
Power to the pump must be 115VAC, 60Hz,
single phase. If an extension cord is used it
should be a 3-wire cord with a ground.
To permanently hardwire the pump, remove
the conduit box cover and remove the power
cord strain relief. The conduit box wiring open-
ing is for a 1/2 in. conduit pipe. The motors are
all 115 VAC single phase, requiring a 3-wire
grounded electrical service.
Electrical Installation
12 VDC
The 12 VDC model (260100) is not shipped
with a power cord since the installation will
determine the length of the power cord.
1. Verify the on/off switch is in the off position.
2. Remove the wiring junction box cover by
removing the four screws.
3. Use 10 AWG wire to connect the red (+)
and black (-) wires to the 12 VDC supply.
4. Reattach the wiring junction box cover with
the four screws.
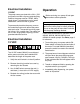
Operation
Follow these instructions for operation of the
260105, 260106, 260108, 260109, and
260240 oil transfer pumps. See Parts, page 8
for reference.
1. To start the pump, turn power switch ON.
Power switch is located on the back side of
the motor. For model 260240 (reversible),
ensure the switch is moved to the desired
flow direction.
2. The pump has an internal bypass valve that
will open when the pump discharge pres-
sure exceeds 150 psi (1.03 MPa, 10.3 bar).
If flow is blocked the fluid will bypass within
the pump.
3. Transfer or dispense fluids by opening the
required valves in your system.
4. Immediately after dispensing, turn power
switch to off position.
Before servicing, turn pump off and open
the nozzle to relieve pressure.
CAUTION
Do not operate pump dry. Make sure pump
has fluid in it when pump is initially installed.
Do not run the pump for more than 2 minutes
with the pump discharge blocked.