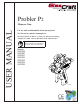
Probler P2 USER MANUAL Dispense Gun For use with non-flammable foam and polyurea. Not for use in explosive atmospheres. 90-110 psi (0.62-0.76 MPa, 6.2-7.6 bar) Air Inlet Pressure Range 3500 psi (24.1 MPa, 241 bar) Maximum Static Fluid Pressure Important Safety Instructions Read all warnings and instructions in this manual. Save these instructions.
Table Of Contents Section 1 Installation Warnings ............................................................................................................................................................ Introduction ........................................................................................................................................................ Standard Equipment .....................................................................................................................
Warnings The following warnings are for the setup, use, grounding, maintenance, and repair of this equipment. The exclamation point symbol alerts you to a general warning and the hazard symbol refers to procedure-specific risk. Refer back to these warnings. Additional, product-specific warnings may be found throughout the body of this manual where applicable.
Warnings EQUIPMENT MISUSE HAZARD WARNING Misuse can cause death or serious injury. • Do not operate the unit when fatigued or under the influence of drugs or alcohol. • Do not exceed the maximum working pressure or temperature rating of the lowest rated system component. See Technical Data in all equipment manuals. • Use fluids and solvents that are compatible with equipment wetted parts. See Technical Data in all equipment manuals. Read fluid and solvent manufacturer’s warnings.
Warnings Isocyanate Hazard To prevent exposing ISO to moisture: Spraying materials containing isocyanates creates potentially harmful mists, vapors, and atomized particulates. Read material manufacturer’s warnings and material MSDS to know specific hazards and precautions related to isocyanates. Prevent inhalation of isocyanate mists, vapors, and atomized particulates by providing sufficient ventilation in the work area.
Warnings Keep Components A and B Separate Changing Materials CAUTION To prevent cross-contamination of the equipment’s wetted parts, never interchange component A (isocyanate) and component B (resin) parts. The gun is shipped with the A side on the left. The fluid manifold, fluid housing, side seal assembly, check valve cartridge, and mix chamber are marked on the A side.
Section 1 - Installation: Introduction Introduction The information in this document is intended only to indicate the components and their normal working relationship typical use. Each assembly should be directed by a GlasCraft distributor or made from the GlasCraft Assembly instructions provided. Before operating, maintaining or servicing any GlasCraft system, read and understand all of the technical and safety literature provided with GlasCraft products.
Section 1 - Installation: Standard Equipment Standard Equipment Part Description Number GCP2RX Probler P2 Dispense Gun 313213 User Manual Translations Manual No.
Section 1 - Installation: Equipment Assembly How The Gun Works Piston Lock The trigger actuates a small valve in the gun handle that controls the flow of air into the piston assembly. When the trigger is pulled, air flows through the valve to the front of the piston.
Section 1 - Installation: Equipment Assembly GlasCraft Equipment Installing P2 on Other Equipment WARNING Air Hose is ¼ in. NPS Do not place any part of the body in the path of the material spray. Do not point the gun at or near other personnel. Do not look into the mixing chamber orifice at any time.
Section 2 - Operation: Start-Up Instructions Refer to specific system user manuals for complete system installation. WARNING If purge air is to be turned OFF, BOTH MATERIAL SHUTOFF VALVES, MUST BE TURNED TO THEIR “OFF” POSITION AND PISTON-LOCK ENGAGED BEFORE TURNING “OFF” THE PURGE AIR ! Failure to follow this procedure will possibly result in the gun head becoming encased with mixed product. Pre operation Checklist Check that all fittings are tight and air regulators are turned to “zero pressure”.
Section 2 - Operation: Start-Up Instructions Higher pressures and temperatures may be used to increase material break-up, improve mixing and speed rise times. With hose lengths over 50 ft., or when material viscosities are high, higher material pump pressures may be necessary. Spray Technique Always operate safely and follow all safety procedures outlined. To achieve the optimum spray pattern for each application, the appropriate mixing chambers are available in seven spray sizes.
2 56d 56b 1 2 56e 30 3 3 56f 29 44 37 56c 27 14 55 r_257826_313213_1_1b 56a 41 43 16 42 GC2502 GC2504 GC2505 GCP2R4 GCP2R5 GC2501 GCP2R1 GC2503 GC2500 GCP2R0 GCP2R2 GC250A GCP2RA GCP2R3 A Probler P2 GC2515 GC2514 GC2513 GC2512 GC2511 GC2510 GC251A B GC1949 GC1949 GC1947 GC1947 GC1947 GC1947 GC1948 Hardware Kit 3 Adjust counter-clockwise until it bottoms out. 2 Apply liberal coating of lubricant (Part No. 118665) to seals and surfaces specified.
Section 3 - General Information: GCP2XX P2 Parts List Ref. No. Part No. Description Qty. 1a 256459 ISO BALL VALVE 1 1b 256460 POLY BALL VALVE 1 2 GC2340 PROBLER TRIGGER 1 3 GC2341 COMPRESSION SPRING 1 4 117634 SWIVEL HOSE FITTING 1 5 117635 SWIVEL HOSE FITTING 1 6* 15B772 1/4 NPSM (fbe) AIR HOSE (18 in.) 1 7 248130 O-RING (QTY.
Section 3 - General Information: Maintenance WARNING 2. Check the material valves, p/n 256459 and 256460 for Before attempting to perform any maintenance on this gun, relieve All Fluid and Air Pressures! • • • • • • any leaks: • Turn OFF both material valves. To relieve fluid and air pressures: Turn OFF all air supplies at system except gun trigger air. Trigger the gun until all fluid pressures have been relieved. Turn OFF the gun trigger air at the system.
Section 3 - General Information: Maintenance • Take the side blocks off by removing screws. • Use correct size drill bit to clean out the mixing chamber exit passage. Use correct size drill bit to clean the inlet side holes of the mixing chamber tak- ing care not to scratch the mixing chamber’s polished surfaces (refer to the drill chart). • Re-assemble the side blocks and tighten the screws. Grease should appear at the tip of the mixing cham- ber.
Section 3 - General Information: Maintenance Daily Shut-Down 5. Use grease gun (Part No. 117792) to inject white lithium For experienced users Once you have used the gun with a product and system, and you have become comfortable with techniques on how all the variables are affecting your operations and maintenance requirements, Daily, Weekly, and Monthly maintenance requirements can be addressed specific to your operation. grease (Part No.
Section 3 - General Information: Maintenance Refer to specific system user manuals for complete system installation.
Section 3 - General Information: Maintenance Piston Lock Adjustment and Installation Procedure 5. Remove one of the side block seal housings, from side block. Leave the seal (34) in housing and rinse with suitable solvent. The P2 gun piston throw is factory set and as a rule, should not require adjustment. The piston throw refers to how far back the air piston will travel when the gun is triggered.
Section 3 - General Information: Options Optional Equipment Part Description GC1938 Flat Spray Kit GC1952 Jet Stream Nozzle (.059 ID) GC1953 Jet Stream Nozzle (.070 ID) GC1954 Pour Adapter GC1892 * P2 Elite Conversion Kit * Maximum working pressure 3200 psi (22 MPa, 220 bar) 20 Part GC1892 Description Qty.
Section 3 - General Information: Options Service & Repair Kits GC1946, Side Seal Kit Part Description Qty. GC2498 SST Side Seal 2 GC1948, Hardware Kit -AA Part Description Qty. 248891 Drill Bit 1 276984 Drill Bit 1 GC0086 Ball Driver 1 GC1947, Hardware Kit 00-03 GC0087 Ball Driver Part Description Qty. 117661 249112 Drill Bit 1 GC0069 Drill Bit 246629 Drill Bit 111450 O-Ring 2 258762, Piston Lock Repair Kit Part Description Qty.
Section 3 - General Information: Options Service & Repair Kits Ref. 6 GC1937, Standard Repair Kit Part Description Qty. 113137 O-Ring 2 Ref. GC1950, Premium Repair Kit Part Description Qty. 6 113137 O-Ring 2 7 248130 O-Ring (Qty. 6) 1 7 248130 O-Ring (Qty.
Section 3 - General Information: Options Round Mixing Chamber Mixing Chamber Nozzle Cleaning Drill Mixing Chamber Hole Cleaning Drill GC250A 248891 .033 276984 .022 GC2500 GC0083 .049 GC0080 .035 GC2501 249112 .057 246629 .042 GC2502 GC0069 .071 246628 .052 GC2503 246625 .086 246627 .059 GC2504 246624 .094 296297 .067 GC2505 246623 0.116 246625 .086 DRILL PIN VISE 117661 Tungsten Carbide Tip Tungsten Carbide Tip Part No.
Section 3 - General Information: Options P2 Spray Options E D Standard Round Spray Air Cap N D P GC1938 Standard Flat Spray Kit Configuration A Tungsten airless tip (See page 22) R D Pour Configuration B J C K Jet Stream Configuration D M P2 Spray Options Ref. Part Description A GC1916 Gun Head B GC250X Mix Chamber Body C GC251X Mix Chamber Insert D 117517 O-ring E GC1914 Front Tip J GC1954 Pour Cap K* Tubing, 1/4 in.
Section 3 - General Information: Options Static Mixer Kit GC1956 GC0331 GC0257 GC2335 117517 GC0480 GC1955 Tungsten airless tip (See page 22) GC1956, Static Mixer Kit Part Description Qty.
Graco Standard Warranty Graco warrants all equipment referenced in this document which is manufactured by Graco and bearing its name to be free from defects in material and workmanship on the date of sale to the original purchaser for use. With the exception of any special, extended, or limited warranty published by Graco, Graco will, for a period of twelve months from the date of sale, repair or replace any part of the equipment determined by Graco to be defective.
Technical Assistance Thank You for selecting GlasCraft spray equipment Should you have any questions or need technical assistance, contact your factory authorized GlasCraft distributor. Distributor: _________________________ Phone: ____________________________ Contact: ___________________________ For any issues your distributor cannot address, the GlasCraft technical service department is always available to assist you with the operation of your spray equipment.
For Your Reference Date Purchased __________________________________________________ Distributor ______________________________________________________ ______________________________________________________ Contact ______________________________________________________ Phone ______________________________________________________ E-mail ______________________________________________________ GlasCraft manufactures a complete line of polyurethane foam and polyurea coating spray systems.
Notes
Quality and Performance… GENUINE GLASCRAFT www.glascraft.com 313213U EN Original instructions. This manual contains English. Revised June 2014 GRACO INC. AND SUBSIDIARIES P.O.