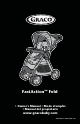
&AST!CTION™ &OLD s /WNER S -ANUAL s -ODE D EMPLOI s -ANUAL DEL PROPIETARIO www.gracobaby.
Failure to follow these warnings and the assembly instructions could result in serious injury or death. s TO PREVENT TIPPING, do not place more than 3 lbs (1.4 kg) on the parent’s tray. s TO AVOID BURNS, never put hot liquids in the parent’s tray. s TO PREVENT A HAZARDOUS, UNSTABLE CONDITION, never place purses, shopping bags, parcels or accessory items on the handle or canopy. s TO PREVENT A HAZARDOUS, UNSTABLE CONDITION, do not place more than 10 lbs (4.5 kg) in the storage basket and more then 2 lbs (0.
USING GRACO® INFANT CAR SEAT WITH STROLLER: s USE ONLY A GRACO® SNUGRIDE® CLASSIC CONNECT™ CAR SEAT with this travel system. (Not intended for use with SnugRide® Click Connect™, AUTOBABY (Europe only) and ASSURA infant car seats.). Improper use of this stroller with other manufacturers’ car seats may result in serious injury or death. s READ THE MANUAL provided with your Graco car seat before using it with your stroller.
Manquer de suivre ces avertissements et les instructions d’assemblage peut entraîner de sérieuses blessures ou un décès. s VEUILLEZ CONSERVER CE MODE D’EMPLOI POUR ÉVENTUELLEMENT VOUS Y RÉFÉRER. s DOIT ÊTRE ASSEMBLÉ PAR UN ADULTE. s NE JAMAIS LAISSER votre enfant sans surveillance. Toujours garder l’enfant à l’œil alors qu’il est assis dans cette poussette. s AFIN D’ÉVITER QUE L’ENFANT NE SE BLESSE GRAVEMENT en tombant ou en glissant hors du siège : Utiliser toujours la ceinture de sécurité.
s AFIN DE PRÉVENIR DES SITUATIONS DANGEREUSES D’INSTABILITÉ, ne jamais placer plus de 4,5 kg (10 lbs) dans le porte-bagages et ne pas placer plus de 0,9 kg (2 lbs) dans la pochette de baldaquin (sur certains modèles). s NE PAS utiliser le porte-bagages comme porte-bébé. s NE JAMAIS PLACER l’enfant dans la poussette avec la tête vers l’avant de la poussette. s NE JAMAIS PERMETTRE QU’ON SE SERVE DE CETTE POUSSETTE comme un jouet. s CESSER D’UTILISER VOTRE POUSSETTE si elle devient endommagée ou brisée.
No observar estas advertencias y las instrucciones de armado podría resultar en lesiones serias o la muerte. s POR FAVOR, GUARDE EL MANUAL DEL PROPIETARIO PARA USO FUTURO. s REQUIERE QUE LO ARME UN ADULTO. s NUNCA DEJE al niño sin supervisión. Mantenga al niño siempre a la vista cuando esté en el cochecito. s EVITE SERIAS LESIONES de caídas o resbalos. Use siempre el cinturón de seguridad. Después de ajustar las hebillas, ajuste las correas para obtener un calce apretado alrededor de su niño.
USO DEL TRANSPORTADOR PARA BEBÉ GRACO® CON EL COCHECITO: s NUNCA PONGA a un niño en el cochecito con la cabeza hacia el frente del cochecito. s NUNCA DEJE QUE SU PRODUCTO SE USE como un juguete. s DEJE DE USAR EL COCHECITO en caso de que esté dañado o roto. s USE SOLAMENTE UN TRANSPORTADOR SNUGRIDE® CLASSIC CONNECT™ DE GRACO® en este sistema de viaje. (No debe usarse con SnugRide® Click Connect™, AUTOBABY (Europa solamente) y asientos de automóvil para bebé ASSURA.
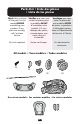
0ARTS LIST s ,ISTE DES PIÒCES s ,ISTA DE LAS PIEZAS Check that you have 6ÏRIlEZ que vous avez all the parts for this toutes les pièces pour model BEFORE ce modèle AVANT assembling your d’assembler votre product. If any produit. S’il vous parts are missing, manque des pièces, call Customer communiquez avec Service. notre service à la clientèle. No tools required. Aucun outil requis. Verifique que tiene todas las piezas de este modelo ANTES de armar su producto.
To Open Stroller s /UVRIR LA POUSSETTE s !BRIR EL COCHECITO FOLD/UNFOLD strap, located under this pocket. PLIER/DÉPLIER la courroie située sous cette pochette. 1 PLIEGUE/DESPLIEGUE la correa situada debajo de este bolsillo. 2 Pull strap and pull up on handle as shown. Tirer sur la courroie et tirer sur la poignée, tel qu’illustré. Tire de la correa y tire hacia arriba de la manija como se indica.
CHECK that the stroller is completely latched open every time you open the stroller and before continuing with the rest of the assembly steps. 3 SNAP! ENCLENCHEZ! ¡RUIDO! VÉRIFIER que la poussette est entièrement verrouillée en position ouverte à chaque ouverture et avant d’effectuer les autres étapes du montage. VERIFIQUE que el cochecito esté completamente abierto y trabado cada vez que lo abre y antes de continuar los pasos de ensamblaje restantes.
#ANOPY s "ALDAQUIN s #APOTA Insert canopy wire into the canopy mounts on each side of the stroller as shown. Insérer la tige du baldaquin dans les supports de chaque côté de la poussette, tel qu’illustré. 5 Inserte el alambre de la capota en los montajes de la capota en cada costado del cochecito como se indica. 6 To adjust. Pour ajuster. Para ajustar.
&RONT 7HEELS s ,ES ROUES AVANT s ,AS RUEDAS DELANTERAS 2X 7 CHECK that wheels are securely attached by pulling on wheel assemblies ASSUREZ-VOUS que les roues sont attachées solidement en tirant sur les assemblages de roue. SNAP! ENCLENCHEZ! ¡RUIDO! 12 VERIFIQUE que las ruedas estén bien contactadas, tirando de los montajes de las ruedas.
2EAR 7HEELS s ,ES ROUES ARRIÒRES s ,AS RUEDAS TRASERAS 2X 2X 2X 2X BEFORE attaching wheel: Be sure to place stroller on top of a piece of card board or some other protective cover to prevent any damage to floor. AVANT de fixer la roue: Assurez-vous de placer la poussette sur un morceau de carton ou un autre revêtement de protection pour prévenir tout dégât au plancher.
9 Insert axle rod through axle opening. Axle key must line up with key holes. Insérez l’essieu à manchon à travers l’ouverture de l’essieu. La clé d'essieu doit s'alligner avec les troux des clés. Inserte la varilla del eje por la apertura del eje. La llave del eje debe alinearse con los agujeros correspondientes. 10 Place wheel on axle. Installer la roue sur l’essieu. Ponga la rueda en el eje.
Push straight side of pin through axle hole. Pin will separate around the axle. Curved end of pin MUST face up as shown. 11 Pousser le côté droit de la tige dans l'orifice de l'essieu. La tige va se séparer autour de l'essieu. La partie recourbée de la tige DOIT pointer vers le haut, tel qu'illustré. Empuje el lado recto de la clavija por el agujero del eje. La clavija se separará alrededor del eje. El lado curvo de la clavija DEBE mirar hacia arriba como se indica. Snap hubcap over pin as shown.
#HILD S 4RAY s ,E PLATEAU POUR ENFANT s "ANDEJA PARA NI×OS WARNING MISE EN GARDE ADVERTENCIA Always secure your child with the seat belt. The tray is not a restraint device. DO NOT lift the stroller by the child’s tray. Use care when snapping the tray on the stroller with a child in the stroller. Toujours attaché votre enfant avec la ceinture de retenue. Le plateau pour enfant n’est pas un dispositif de retenue. NE PAS lever la poussette par le plateau pour enfant.
0OINT (ARNESS s (ARNAIS Ì POINT s !RNÏS DE PUNTOS 16 17 18 19 Use slide adjuster at shoulder and waist for tighter adjustment. To change shoulder harness slots, see page 19. Utilisez le régulateur coulissant à l’épaule et à la taille pour un ajustement plus précis. Pour changer des fentes de harnais d’épaule voir la page 19. Use el ajuste deslizable en el hombro y la cintura para hacer ajustes más apretado. Para cambiar ranuras del arnés del hombro vea la página 19.
0OINT "UCKLE s "OUCLE Ì POINT s (EBILLA DE PUNTOS To convert to 3-pt harness. 20 Pour convertir en harnais 3-points. Para convertirlo en un arnés de 3 puntos. 21 22 23 Use slide adjuster at waist for tighter adjustment. Utilisez le régulateur coulissant à la taille pour un ajustement plus précis. Use el ajuste deslizable a la cintura para hacer ajustes más apretado.
To Change Shoulder Harness Slots s 0OUR CHANGER DES DENTES DE HARNAIS D ÏPAULE s 0ARA CAMBIAR RANURAS DEL ARNÏS del hombro Shoulder harness anchor—larger child Harnais d 'ancrage à l 'épaule pour grand enfant Anclaje del arnés del hombro - niño grande Shoulder harness anchor—smaller child Harnais d 'ancrage à l 'épaule pour petit enfant Anclaje del arnés del hombro - niño pequeño Slide adjuster Glissez le régleur Ajustador deslizable 25 Use either shoulder harness anchor in the slots that are closest to c
"RAKES s ,ES FREINS s ,OS FRENOS WARNING MISE EN GARDE ADVERTENCIA CHECK that brakes VÉRIFIEZ que les freins INSPECCIONE los are on by trying to fonctionnent en essayant frenos tratando de push stroller. de pousser la poussette. empujar el cochecito.
4O 2ECLINE 3EAT s 2ÏGLAGE DU DOSSIER s #ØMO AJUSTAR EL RESPALDO WARNING When making adjustments to the stroller seat, make sure child’s head, arms, and legs are clear of moving seat parts and stroller frame. MISE EN GARDE Lorsque vous faites des ajustements au siège de la poussette, assurez-vous que la tête de l'enfant, ses bras, et ses jambes sont loin des pièces du siège et de l'armature de la poussette en mouvement.
4O &OLD 3TROLLER s 0LIER LA POUSSETTE s #ØMO PLEGAR EL COCHECITO WARNING MISE EN GARDE DO NOT allow child NE PAS permettre à to play with the fold l’enfant de jouer avec la handle. poignée qui permet de replier la poussette. ADVERTENCIA NO deje que el niño juegue con la manija para plegarlo. FOLD/UNFOLD strap, located under this pocket. PLIER/DÉPLIER la courroie située sous cette pochette. 30 PLIEGUE/DESPLIEGUE la correa situada debajo de este bolsillo. Pull strap up. Tirer sur la courroie.
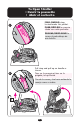
To Attach Graco® Infant Car Seat s 0OUR FIXER LE DISPOSITIF DE RETENUE pour bébé Graco® s #ØMO INSTALAR EL ASIENTO DE AUTOMØVIL PARA BEBÏ 'RACO® For models that do not come with an infant car seat one may be purchased separately. You MUST use the elastic straps shown in step 34. WARNING Use only a Graco® SnugRide® Classic Connect™ car seats with this travel system. (Not intended for use with SnugRide® Click Connect™, AUTOBABY (Europe only) and ASSURA infant car seats.
En los modelos que no incluyen un asiento para automóvil, se puede comprar uno por separado. Usted DEBE usar las correas elásticas que se ilustra en el paso 34. ADVERTENCIA Use solamente los asientos infantiles para automóviles SnugRide® Classic Connect™ de Graco® en este sistema de viaje. (No debe usarse con SnugRide® Click Connect™, AUTOBABY (Europa solamente) y asientos de automóvil para bebé ASSURA.
34 s Pull elastic straps through vehicle belt hook on both sides of the car seat. s Check that infant car seat is securely attached by pulling up on it. s Tirez la courroie élastique à travers le crochet de la ceinture du véhicule des deux côtés du dispositif de retenue pour enfant. s !SSUREZ VOUS QUE LE porte-bébé est attaché solidement en le tirant vers le haut. s Tire las tiras elásticas a través del gancho del cinturón del vehículo en ambos costados del asiento para automóvil.
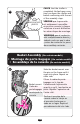
s To remove car seat: remove elastic straps from vehicle belt hook, squeeze release handle at back of car seat, and lift car seat out of the stroller. 35 s Pour retirer le dispositif de retenue pour enfant: Détachez les courroies élastiques du crochet de la ceinture du véhicule, appuyez sur la poignée de déverrouillage à l’arrière du dispositif de retenue pour enfant, et le soulever hors de la poussette.
Care and Maintenance s DO NOT MACHINE WASH SEAT. It should only be wiped with a mild soap, taking care not to soak the material. NO BLEACH. s TO CLEAN STROLLER FRAME, use only household soap and warm water. NO BLEACH or detergent. s FROM TIME TO TIME CHECK YOUR STROLLER for loose screws, worn parts, torn material or stitching. Replace or repair the parts as needed. Use only Graco replacement parts. s EXCESSIVE EXPOSURE TO SUN OR HEAT could cause fading or warping of parts.
Soins et entretien s NE LAVER PAS LE SIÈGE À LA MACHINE. Essuyez le siège avec un savon doux, ne faites pas tremper le tissu. PAS D'EAU DE JAVEL. s POUR NETTOYER L’ARMATURE DE LA POUSSETTE, utilisez un savon de ménage et de l’eau tiède. PAS D’EAU DE JAVEL ou détergent. s DE TEMPS EN TEMPS, VÉRIFIEZ VOTRE POUSSETTE pour des vis desserrées, pièces usagées, tissu ou couture déchiré. Remplacez ou réparez ces pièces si nécessaire. Utilisez seulement les pièces de remplacement Graco.
Cuidado y mantenimiento s NO LAVE EL ASIENTO A MÁQUINA. Solamente debe limpiarse con un jabón suave, teniendo en cuenta que no se empape la tela. NO USE BLANQUEADOR. s PARA LIMPIAR EL ARMAZÓN DEL COCHECITO, usar solamente jabón de uso doméstico y agua tibia. NO USE CLORO o detergente. s DE VEZ EN CUANDO, INSPECCIONE EL COCHECITO para determinar si hay tornillos flojos, piezas gastadas, material o costuras rotas. Cambie o repare las piezas según sea necesario. Use solamente repuestos marca Graco.
Notes s Notas 30
Notes s Notas 31
2EPLACEMENT 0ARTS s 7ARRANTY )NFORMATION 53! Pièces de rechange s 2ENSEIGNEMENTS SUR LA GARANTIE AU #ANADA 0IEZAS DE REPUESTO s 3ERVICIO DE LA GARANTÓA %% 55 In To purchase parts or accessories or for warranty information in the United States, please contact us at the following: Para comprar repuestos o accesorios o para el servicio de la garantía en los Estados Unidos, por favor comuníquese con nosotros en: www.gracobaby.
www.gracobaby.com SnugRide® Classic Connect™ Owner’s Manual READ THIS MANUAL KEEP INSTRUCTIONS FOR FUTURE USE. (YHQ LI XVLQJ WKLV LQIDQW UHVWUDLQW VHHPV HDV\ WR ILJXUH RXW RQ \RXU RZQ LW LV YHU\ LPSRUWDQW WR 5($' 81'(567$1' $1' )2//2: 7+( 2:1(5¶6 0$18$/ FAILURE TO PROPERLY USE THIS INFANT RESTRAINT INCREASES THE RISK OF SERIOUS INJURY OR DEATH IN A SUDDEN STOP OR CRASH.
1.0 Warning to Parents and Other Users . . . . . . . . . . . . . . . . . . 4-5 2.0 Registration Information . . . . . . . . . . . . . . . . . . . . . . . . . . . . 6-7 2.1 Register Your Infant Restraint . . . . . . . . . . . . . . . . . . . . . . . 6 2.2 For Recall Information. . . . . . . . . . . . . . . . . . . . . . . . . . . . . 6 2.3 If You Need Help . . . . . . . . . . . . . . . . . . . . . . . . . . . . . . . . . 7 2.4 Child Restraint Useful Life. . . . . . . . . . . . . . . . . . . . . . . . . .
5.0 Infant Restraint Location . . . . . . . . . . . . . . . . . . . . . . . . . . 21-26 5.1 Vehicle Seat Requirements. . . . . . . . . . . . . . . . . . . . . . . . 21 5.2 Vehicle Seat Belt Requirements . . . . . . . . . . . . . . . . . . . . 22 5.2.1 UNSAFE Vehicle Belt Systems . . . . . . . . . . . . . . . . 23 5.2.2 SAFE Vehicle Belt Systems . . . . . . . . . . . . . . . . . . . 24 5.3 LATCH Locations . . . . . . . . . . . . . . . . . . . . . . . . . . . . . . . 26 6.0 Using Infant Restraint . . . . . .
1.0 Warnings to Parents and Other Users DO NOT PLACE THIS INFANT RESTRAINT IN A VEHICLE SEATING LOCATION THAT HAS A FRONT AIR BAG. If the air bag inflates, it can hit the infant restraint with great force and cause serious injury or death to your child. Check vehicle owner’s manual for information about side air bags and infant restraint installation.
No infant restraint can guarantee protection from injury in every situation. However, proper use of this infant restraint reduces the risk of serious injury or death to your child. Failure to properly use this infant restraint increases the risk of serious injury or death in a sharp turn, sudden stop or crash. Your child’s safety depends on you installing and using this infant restraint correctly.
2.0 Registration Information Model Number: Date of Manufacture: Purchase Date: 2.1 Register Your Infant Restraint Please fill in the above information. The model number and date of manufacture can be found on a label on the underside of your infant restraint. Fill out the prepaid registration postcard attached to the seat cover and mail it today. Child restraints could be recalled for safety reasons. You must register this restraint to be reached in a recall.
2.3 If You Need Help In the U.S.A, please contact our Customer Service Department with any questions you may have concerning parts, use, or maintenance. When you contact us, please have your product’s model number and date of manufacture ready so that we may help you efficiently. These numbers can be found on a sticker on the underside of your infant restraint. 1-800-345-4109 or www.gracobaby.com www.cpsc.gov www.NHTSA.gov www.seatcheck.org 2.
3.0 Features and Components Adjustment Belt Vehicle belt/LATCH* path LATCH Storage Bars LATCH Connector Adjustable Foot Base United States Federal Motor Vehicle Safety Standards have defined a system for installing car seats in vehicles. The system is called LATCH. * LATCH may be used IN PLACE of vehicle belt ONLY if vehicle is equipped with LATCH anchor points. Please refer to vehicle owners manual for LATCH locations.
FRONT VIEW Handle Harness slots Harness clip Handle adjustment button Harness buckle Vehicle belt hook Harness buckle tongues 9 9
REAR VIEW Harness tightener Canopy Release handle Level indicator* Harness slot Owner’s manual pocket Attachment latch Locking clip** *Level Indicator **Locking Clip The level indicator is attached to the side of the infant restraint, and indicates whether or not the infant restraint is properly reclined. The locking clip is stored on the bottom of the infant restraint. You will need to use it with certain types of vehicle seat belts.
3.1 Removing and Attaching Base To remove infant restraint, squeeze handle at back of seat and lift infant restraint from base as shown . To put infant restraint in base, push infant restraint down until it clicks into base. Pull up on infant restraint to be sure it is latched firmly into base. 3.2 Adjusting Handle 1. Press handle adjustment buttons on both sides of handle . 2.
3.3 Attaching Canopy 1. Infant restraint comes with four (two on certain models) identical canopy support parts. Thread one canopy support completely through one sewn tunnel . 2. Slide straight end of a second support into the straight end of the first support . 3. On models with four canopy supports, repeat steps one and two for the other canopy tunnel. The canopy should appear as shown . 4. Attach canopy in the areas between the infant restraint and the handle base .
3.4 Seat Pad Assembly (on certain models) Step 1. Wrap bottom edge of seat pad around the foot end of seat as shown. Step 2. Wrap the top edge of the seat pad around the head end of the seat as shown. Step 3. On side of seat, wrap elastic strap around the handle as shown. Skip Steps 3 and 4 if your model does not include straps. Step 4. Fasten strap to hook that is attached to the seat pad. Repeat steps for the elastic strap and hook on the other side of the seat pad.
3.5 Head Support (on certain models) Some infants may need extra support to keep their head and body in a comfortable position. Unsnap the sides and resnap them with the harness straps threaded through the slots in the cushion . If your model does not include a head support, you may want to use a rolled towel or a blanket for support . MAKE SURE THAT NOTHING INTERFERES WITH THE HARNESS OR THE BLANKET. It must still be flat and snug against your child’s shoulders.
3.6 Cold Weather Boot (on certain models) Some models come with a cold weather boot. To use, wrap elastic around bottom of seat and place both elastic loops around vehicle belt hooks as shown . 3.7 Harness Covers (on certain models) To prevent ejection in sudden stop or crash: $OZD\V PDNH VXUH VKRXOGHU VWUDSV DUH WKUHDGHG WKURXJK VORWV DQG properly positioned on shoulders. 0DNH VXUH WKDW KDUQHVV FRYHUV GR QRW LQWHUIHUH ZLWK SODFHPHQW RI the chest clip at armpit level.
4.0 Important Information 4.1 Warnings for Use as Infant Restraint DO NOT INSTALL OR USE THIS INFANT RESTRAINT AND BASE UNTIL YOU READ AND UNDERSTAND THE INSTRUCTIONS IN THIS MANUAL AND IN YOUR VEHICLE OWNER’S MANUAL. DO NOT let others install or use the infant restraint unless they understand how to use it. FAILURE TO PROPERLY USE THIS INFANT RESTRAINT AND BASE INCREASES THE RISK OF SERIOUS INJURY OR DEATH IN A SUDDEN STOP OR CRASH.
$FFRUGLQJ WR DFFLGHQW VWDWLVWLFV CHILDREN ARE SAFER WHEN PROPERLY RESTRAINED IN REAR VEHICLE SEATING POSITIONS, RATHER THAN FRONT SEATING POSITIONS. For a vehicle with a front passenger air bag, refer to your vehicle owner’s manual as well as these instructions for infant restraint installation. NEVER LEAVE YOUR CHILD UNATTENDED. NEVER LEAVE AN INFANT RESTRAINT AND BASE UNSECURED IN YOUR VEHICLE.
THIS INFANT RESTRAINT CONFORMS to all applicable Federal Motor Vehicle Safety Standards and is certified for use in motor vehicles and aircraft. NEVER GIVE THIS INFANT RESTRAINT AND BASE to someone else without also giving them this manual. NEVER USE A SECOND-HAND INFANT RESTRAINT AND BASE or an infant restraint whose history you do not know. 4.2 Warning for Use With a Stroller USE ONLY WITH STROLLERS THAT ARE PART OF THE GRACO CLASSIC CONNECT™ TRAVEL SYSTEM.
4.3 Additional Warnings for Use as Carrier )$// +$=$5' Child’s movements can slide carrier. NEVER place carrier near edges of countertops, tables or other high surfaces. Always stay within arms reach whenever carrier is not on floor/ground. BE SURE handle locks into position before lifting carrier. NEVER place carrier in the top of a shopping cart. 68))2&$7,21 +$=$5' Infant carrier can roll over on soft surfaces and suffocate child. Never place carrier on beds, sofas or other soft surfaces.
4.4 Height and Weight Limits FAILURE TO USE INFANT RESTRAINT IN A MANNER $335235,$7( )25 <285 &+,/'·6 6,=( 0$< ,1&5($6( THE RISK OF SERIOUS INJURY OR DEATH. Your child MUST meet all requirements: WEIGHT: 5-22 lbs. (2.
5.0 Infant Restraint Location 5.1 Vehicle Seat Requirements IMPROPER PLACEMENT OF THE INFANT RESTRAINT INCREASES THE RISK OF SERIOUS INJURY OR DEATH. Some seating positions in your vehicle may not be safe for this infant restraint. Some vehicles do not have any seating positions that can be used safely with the infant restraint. If you are not sure where to place the infant restraint in your vehicle, consult your vehicle owner’s manual or call Graco at 1-800-345-4109.
The VEHICLE seat must face forward. DO NOT use infant restraint on vehicle seats with seat backs that will not lock in an upright position. DO NOT use seats that can fold down without having to release a lock or latch of some kind. These seats can fly forward and strike the child in a sudden stop or crash. 5.2 Vehicle Seat Belt Requirements MANY SEAT BELT SYSTEMS ARE NOT SAFE TO USE WITH THE INFANT RESTRAINT. THE VEHICLE SEAT BELT MUST BE DESIGNED TO HOLD THE INFANT RESTRAINT TIGHTLY AT ALL TIMES.
5.2.1 UNSAFE Vehicle Belt Systems DO NOT use any of the following systems to secure the infant restraint. LATCH can be used IN PLACE OF the vehicle belt system. Please refer to vehicle owners manual for LATCH locations. Lap Belts with Emergency Locking Retractor (ELR) This lap belt stays loose and can move until it locks in a crash or sudden stop. &RPELQDWLRQ /DS 6KRXOGHU %HOW ZLWK 5HWUDFWRU Each strap has a retractor at one end and is attached to the latch plate at the other end.
5.2.2 SAFE Vehicle Belt Systems THE FOLLOWING BELT SYSTEMS CAN BE USED WITH YOUR INFANT RESTRAINT, IF the seat location meets all other requirements of these instructions and those in your vehicle owner's manual. LATCH can be used in place of the vehicle belt system. Please refer to vehicle owners manual for LATCH locations. /DS %HOWV 0DQXDOO\ $GMXVWHG When buckled, the belt is tightened manually by pulling on the excess belt while pushing down hard on the infant restraint.
&RPELQDWLRQ /DS 6KRXOGHU %HOW with Sliding Latch Plate This belt has a latchplate that slides freely along the belt. This belt MUST be converted to prevent movement of the lap portion of the belt. You must use the locking clip provided with the infant restraint, unless your vehicle's seat belt Locking clip can be converted in another way as described in your vehicle owner's manual. ½ inch To Install Locking Clip: 1.
5.3 LATCH Locations Newer vehicles may have one or more seating positions with LATCH anchorage systems. If vehicle is equipped with LATCH, the vehicle lower anchor points may be visible at the vehicle seat crease. If not visible, they may be marked with the symbol . See your vehicle owner’s manual for exact locations, anchor identification, and requirements for use with an infant restraint. Typical seat in a passenger vehicle. Other vehicle types may have different LATCH locations or different markings.
6.0 Using Infant Restraint 6.1 Positioning Harness Straps FAILURE TO PROPERLY ADJUST THE HARNESS STRAPS FOR YOUR CHILD INCREASES THE RISK OF SERIOUS INJURY OR DEATH IN THE EVENT OF A SHARP TURN, SUDDEN STOP OR CRASH. The harness straps must be properly adjusted to fit your child according to the following instructions. 1. Remove infant restraint from base and rotate handle down to sitting position. See “3.1 Removing and Attaching Base” and “3.2 Adjusting Handle”, p. 11. 2.
5. From back, remove harness straps from harness tighteners. From front pull strap from slot . Harness tighteners 6. Reinsert strap in the appropriate slot . 7. Thread straps through tighteners exactly as shown . 8. SAFETY CHECK: a) CHECK that straps are not twisted; b) CHECK that straps are secure: pull on harness straps from front.
6.2 Securing Child in Infant Restraint Failure to properly secure your child in the infant restraint/carrier increases the risk of serious injury or death from suffocation or falls, or in the event of a sudden stop or crash. Even when used only as a carrier, make sure the harness straps are properly secured. 1. Move infant restraint handle to sitting position (see page 11). 2. Open harness clip by squeezing both sides and unbuckle as shown . 3.
5. From the back, pull strap through harness tightener to tighten the straps as shown . The remaining straps should be about equal in length. CHECK that both straps are flat and tight on child’s shoulders. To loosen the straps, hold the harness tightener up and pull the strap from the front of the seat . 6. Snap harness clip pieces together . Position harness clip in middle of chest, level with armpits and away from the neck . 7. SAFETY CHECK: a) CHECK that harness straps are not twisted.
6.3 Installing the Infant Restraint/Base Using Vehicle Belt You must carefully follow the instructions provided by your vehicle manufacturer, in addition to the information in this manual. Before proceeding, be sure you have read and understood section 5.0, “Infant Restraint Location” on p. 21-26. Make sure vehicle is on level ground so that the level indicator, which is attached to the infant restraint, can be used to properly recline the infant restraint .
Base with seat belt 2. Place the base in a rear-facing position in a forward-facing vehicle seat. Thread the seat belt. Belt MUST go under tongue Infant restraint with seat belt 3. Place the infant restraint in a rear-facing position in a forwardfacing vehicle seat. Thread the seat belt. 4. Buckle the seat belt. Make sure the buckle tongue goes into the correct buckle . The seat belt should not be twisted or turned.
5. Tighten the vehicle seat belt. Refer to your vehicle owners manual and the instructions in “5.2.2 SAFE Vehicle Belt Systems”, p.24-25, on tightening your vehicle belt. To create a very tight installation, push down hard with your knee or free hand in the middle of infant restraint or base and pull and tighten the vehicle belt. 6. Push the infant restraint down into the base and make sure that you hear a “click” . Pull up on the infant restraint to be sure it is latched securely into the base.
6.4 Using LATCH to install Base 1. 2. 3. For ease of installation, extend LATCH to its maximum length. Position base in vehicle seat as shown. Tongue Thread LATCH through base belt path normally used for vehicle seat belt. Make sure that LATCH belt is UNDER tongue on base . Belt must lay flat and not be twisted. 4. Hook Connectors to vehicle lower anchors. Pull firmly on Connectors to be sure they are attached . 5. Tighten LATCH by pushing down hard on base and pulling the adjustment belt . 6.
7R UHPRYH /$7&+ SXVK EXWWRQ ZKLOH SXOOLQJ RQ WKH /$7&+ EHOW DV VKRZQ 10. Press and hold LATCH release hinge.. 11. Push connector in, lift connector up and pull out (away from anchor point) . 12. Repeat steps 10 and 11 for other connector.
6.5 Reclining Infant Restraint/Base For your child’s safety, it is important that your infant restraint/base be properly reclined. Attached to the side of your infant restraint is a level indicator to help properly recline the infant restraint/base on the vehicle seat. Failure to properly recline the infant restraint on the vehicle seat increases the risk of serious injury or death. If the infant restraint is too upright, a child’s head may drop forward and cause breathing problems.
When using the base: To lower the foot; pull down on the bottom of the foot to the desired setting to adjust the recline . To raise the foot; set the base on a flat surface, push in on the fingers on the base and push down on the base to adjust the recline . If there is still orange in the level indicator when the foot is completely extended then place a rolled towel under the foot until ONLY blue shows .
Final Safety Check: Every time you drive with your child, PUSH DOWN on the top of the infant restraint slowly but firmly to make sure the vehicle belt does not lengthen at all and that the vehicle belt or LATCH is fastened very tightly around the infant restraint/base . Holding the infant restraint near the vehicle belt path, TWIST AND PULL the seat forward and to both sides to make sure the vehicle belt or LATCH does not lengthen or loosen and the infant restraint does not easily move .
7.0 Additional Information 7.1 Airplane Use Install in an airplane the same way as in an automobile. Notify the airline ahead of time that you intend to bring the seat on board. Use only in forward-facing aircraft seat. Follow the flight attendant’s instructions about infant restraint placement. Do not use this infant restraint if the airplane seat belt does not hold the infant restraint tightly. 7.2 Storing LATCH 1. For ease of storing, extend LATCH to its maximum length. 2.
7.3 Cleaning and Maintenance TO REMOVE AND WASH INFANT RESTRAINT PAD, follow instructions in “6.1 Positioning Harness Straps”, p. 27-28. Carefully remove the seat pad. Refer to your care tag on your seat pad for washing instructions. DO NOT USE BLEACH. Reverse steps to reinstall seat pad. Check that harness system is not twisted, and pull on harness system to be sure harness is securely reinstalled.
7.4 Buckle Cleaning Process PREVENT SERIOUS INJURY OR DEATH: Buckle must be properly latched. Periodically inspect and clean buckle to remove objects or debris that could prevent latching. 1. Turn restraint over, push retainer through crotch strap slot . 2. To clean buckle - place in a cup of warm water and gently agitate the buckle, press the red button several times while in the water . DO NOT SUBMERGE THE HARNESS WEBBING. DO NOT USE SOAPS or LUBRICANTS. DO NOT use household detergents.
Notes 42
Notes 43
Replacement Parts To purchase parts or accessories in the United States for your Graco product, please contact us at the following: www.gracobaby.
www.gracobaby.com SnugRide® Classic Connect™ Manual del propietario LEA ESTE MANUAL GUARDE ESTAS INSTRUCCIONES PARA USO FUTURO. $ SHVDU GH TXH HO XVR GH HVWH VLVWHPD GH VHJXULGDG SDUD EHEpV SDUH]FD IiFLO GH GHVFLIUDU HV PX\ LPSRUWDQWH /((5 (17(1'(5 < 6(*8,5 (/ 0$18$/ '(/ '8(f2 NO USAR DEBIDAMENTE ESTE SISTEMA DE SEGURIDAD PARA NIÑOS AUMENTA EL RIESGO DE SUFRIR LESIONES SERIAS O FATALES EN UN ACCIDENTE O AL DETENERSE DE REPENTE.
1.0 Advertencias a padres y otros usuarios . . . . . . . . . . . . . . . 4-5 2.0 Información sobre el registro . . . . . . . . . . . . . . . . . . . . . . . . 6-7 2.1 Registro de su sistema de seguridad para niños . . . . . . . . 6 2.2 Información sobre el retiro de productos del mercado . . . . 7 2.3 Si necesita ayuda . . . . . . . . . . . . . . . . . . . . . . . . . . . . . . . . 7 2.4 Vida útil del sistema de seguridad para niños . . . . . . . . . . 7 3.0 Funciones y componentes . . . . . . . . . . . . .
5.0 Ubicación del sistema de seguridad para niños . . . . . . . 21-26 5.1 Requisitos del asiento del vehículo. . . . . . . . . . . . . . . . . . 21 5.2 Requisitos del cinturón de seguridad del vehículo . . . . . . 22 5.2.1 Sistemas PELIGROSOS de cinturones para vehículos 23 5.2.2 Sistemas SEGUROS de cinturones para vehículos 24 5.3 Ubicación del LATCH . . . . . . . . . . . . . . . . . . . . . . . . . . . . 25 6.0 Usar el asiento de seguridad infantil . . . . . . . . . . . . . . . . . . . . 27-38 6.
1.0 Advertencias a padres y otros usuarios NO PONGA ESTE SISTEMA DE SEGURIDAD PARA NIÑOS EN UN ASIENTO DEL VEHÍCULO QUE TENGA INSTALADO UNA BOLSA DE AIRE DELANTERA. Si la bolsa de aire se infla, puede golpear al niño y al sistema de seguridad para niños con mucha fuerza y causar lesiones serias o la muerte de su niño. Consulte el manual del dueño del vehículo para obtener información sobre las bolsas de aire laterales y la instalación del sistema de seguridad para niños.
Ningún asiento de seguridad infantil puede garantizar la protección contra lesiones en todas las situaciones. Sin embargo, el uso correcto de este asiento de seguridad infantil reduce el riesgo de que su niño sufra lesiones serias o la muerte. El uso incorrecto de este sistema de seguridad infantil aumenta el riesgo de graves lesiones o la muerte durante un giro brusco, una parada repentina o un accidente.
2.0 Información sobre el registro Número de modelo: Fecha de fabricación: Fecha de compra: 2.1 Registro de su sistema de seguridad para niños Por favor, complete la información que se solicita más arriba. El número de modelo y la fecha de fabricación se pueden encontrar en una etiqueta ubicada en la parte inferior de su sistema de seguridad para bebés. Llene la tarjeta postal de registro prepagada que se encuentra en la funda del asiento y envíela hoy mismo.
2.2 Información sobre el retiro de productos del mercado /ODPH D OD OtQHD JUDWXLWD GH LQIRUPDFLyQ GH VHJXULGDG GH YHKtFXORV GHO *RELHUQR GH (( 88 DO 77< R YLVLWH KWWS ZZZ 1+76$ JRY *UDFR R ZZZ JUDFREDE\ FRP 2.3 Si necesita ayuda En los EE.UU., por favor, comuníquese con nuestro Departamento de Servicio al Cliente con cualquier pregunta que pudiera tener sobre piezas, uso o mantenimiento.
3.0 Funciones y componentes Cinturón del vehículo/recorrido del LATCH* Cinturón de ajuste Barras de almacenamiento del LATCH Gancho del LATCH Apoyapiés ajustable Base Las Normas Federales para Seguridad de Automóviles de Estados Unidos han determinado un sistema de instalación de asientos de seguridad en los vehículos. El sistema se denomina LATCH. * LATCH debe usarse EN LUGAR del cinturón del vehículo SOLAMENTE si el vehículo está equipado con puntos de anclaje LATCH.
VISTA DELANTERA Manija Ranura para el arnés Traba del arnés Botón de ajuste de la manija Hebilla del arnés Gancho del cinturón del vehículo Lengüetas de la hebilla del arnés 9 9
VISTA TRASERA Tensionador del arnés Capota Manija de liberación Ranura para el arnés Indicador del nivel* Bolsillo del manual del propietario Traba de conexión Traba de seguridad** *Indicador del nivel El indicador de nivel se conecta al costado del sistema de seguridad para niños e indica si el sistema de seguridad para niños está debidamente inclinado. **Traba de seguridad La traba de seguridad se guarda en el fondo del sistema de seguridad para niños.
3.1 Sacar y conectar la base Para sacar el sistema de seguridad para niños, apriete la manija de liberación en la parte trasera del asiento y levante el sistema de seguridad para niños de la base como se indica . Para poner el sistema de seguridad para niños en la base, empuje el sistema de seguridad para niños hacia abajo hasta que se trabe en la base. Tire hacia arriba del sistema de seguridad para niños para asegurarse que esté trabado firmemente en la base. 3.2 Ajuste de la manija 1.
3.3 Colocación de la capota 1. El sistema de seguridad para niños viene con cuatro (dos en ciertos modelos) piezas idénticas de soporte de la capota. Pase un soporte de la capota completamente a través del túnel cosido . 2. Deslice el extremo recto del segundo soporte en el extremo recto del primer soporte . 3. En modelos con cuatro apoyos de la capota, repita los pasos uno y dos para el otro túnel de la capota. La capota deberá tener este aspecto . O 4.
3.4 Armado de la almohadilla del asiento (ciertos modelos) Paso 1. Envuelva el borde inferior de la almohadilla del asiento alrededor del extremo del asiento donde van los pies como se indica. Paso 2. Envuelva el borde superior de la almohadilla del asiento alrededor del extremo del asiento donde va la cabeza como se indica. Paso 3. En el costado del asiento, envuelva la correa elástica alrededor de la manija como se indica. Ignore los pasos 3 y 4 si su modelo no tiene correas elásticas. Paso 4.
3.5 Apoyacabezas (en ciertos modelos) Algunos bebés necesitan apoyo adicional para mantener la cabeza y el cuerpo en una posición cómoda. Destrabe los costados y vuelva a trabarlos con las correas del arnés pasadas a través de las ranuras en el cojín . Si su modelo no incluye un apoyacabezas, puede usar una toalla enrollada o una manta como apoyo . ASEGÚRESE QUE NADA INTERFIERA CON EL ARNÉS O LA MANTA. El arnés debe quedar plano y ajustarse sobre los hombros del niño.
3.6 Bota para tiempo frío (en ciertos modelos) Algunos modelos vienen con una bota para tiempo frío. Para usarla, ponga elástico alrededor del fondo del asiento y coloque elástico alrededor de los ganchos del cinturón del vehículo como se indica . 3.7 Cubiertas de arnes (ciertos modelos) Para prevenir la eyección en un accidente o parada repentina: $VHJ~UHVH VLHPSUH TXH ODV FRUUHDV GHO KRPEUR SDVDQ SRU ODV ranuras y están debidamente instaladas en los hombros.
4.0 Información importante 4.1 Advertencias para uso como sistema de seguridad para niños NO INSTALE O USE ESTE SISTEMA DE SEGURIDAD PARA NIÑOS Y BASE HASTA QUE HAYA LEÍDO Y ENTIENDA LAS INSTRUCCIONES EN ESTE MANUAL Y EN EL MANUAL DEL PROPIETARIO DE SU VEHÍCULO. NO deje que otros instalen o usen el sistema de seguridad para niños a menos que entiendan cómo usarlo.
6HJ~Q ODV HVWDGtVWLFDV GH DFFLGHQWHV LOS NIÑOS ESTÁN MÁS SEGUROS CUANDO ESTÁN DEBIDAMENTE SUJETADOS EN LOS ASIENTOS TRASEROS DEL VEHÍCULO EN LUGAR DE LOS ASIENTOS DELANTEROS. En el caso de un vehículo con una bolsa de aire para el pasajero delantero, consulte el manual del propietario de su vehículo así como estas instrucciones para la instalación del sistema de seguridad para niños. NUNCA DEJE A SU NIÑO SOLO. NUNCA DEJE UN SISTEMA DE SEGURIDAD PARA NIÑOS Y LA BASE SIN SUJETAR EN SU VEHÍCULO.
EL SISTEMA DE SEGURIDAD PARA NIÑOS PUEDE ALCANZAR ALTAS TEMPERATURAS SI QUEDA EN EL SOL. Toque siempre la superficie de cualquier pieza de metal o de plástico antes de poner a su niño en el sistema de seguridad para niños. ESTE SISTEMA DE SEGURIDAD PARA NIÑOS CUMPLE con todas las Normas Federales de Seguridad para Vehículos Automotor y ha sido certificado para el uso en vehículos automotor y aeronaves.
4.3 Advertencias adicionales para el uso como transportador 3(/,*52 '( &$Ì'$ Los movimientos del niño pueden mover el transportador. NUNCA ponga el transportador cerca de los bordes de mesadas, mesas u otras superficies altas. Manténgase siempre cerca cuando el transportador no esté en el piso/tierra. Antes de levantar el transportador, ASEGÚRESE que las manijas estén trabajadas en posición. No ponga NUNCA el transportador encima de un carrito de compras.
4.4 Limitaciones de peso y estatura NO USAR EL SISTEMA DE SEGURIDAD PARA NIÑOS DE MANERA APROPIADA DE ACUERDO AL TAMAÑO DE SU NIÑO PODRÍA AUMENTAR EL RIESGO DE QUE SUFRA LESIONES SERIAS O FATALES. Su niño DEBE cumplir con todos los requisitos: PESO: 5-22 libras (2.
5.0 Ubicación del sistema de seguridad para niños 5.1 Requisitos del asiento del vehículo /$ &2/2&$&,Ð1 ,1$'(&8$'$ '(/ 6,67(0$ '( 6(*85,'$' PARA NIÑOS AUMENTA EL RIESGO DE SUFRIR LESIONES SERIAS O FATALES. Algunas posiciones de asiento en su vehículo podrían no ser seguras para este sistema de seguridad para niños. Algunos vehículos no tienen posiciones de asiento que puedan usarse sin peligro con el sistema de seguridad para niños.
El asiento del VEHÍCULO debe estar orientado hacia adelante. NO USE el sistema de seguridad para niños en asientos del vehículo con respaldos que no traben en la posición vertical. NO use asientos que se puedan plegar sin tener que liberar una traba o dispositivo de algún tipo. Estos asientos pueden desplazarse hacia adelante y golpear al niño en un accidente o parada repentina. 5.
5.2.1 Sistemas PELIGROSOS de cinturones para vehículos NO USE ninguno de los siguientes sistemas para asegurar el sistema de seguridad para niños. El LATCH se puede usar EN LUGAR DE el sistema de cinturon para vehículo. Por favor, consulte el manual del propietario del vehículo para obtener las ubicaciones donde debe instalarse el LATCH.
5.2.2 Sistemas SEGUROS de cinturones de vehículos LOS SIGUIENTES CINTURONES DE SEGURIDAD PUEDEN USARSE CON SU SISTEMA DE SEGURIDAD PARA NIÑOS, SI el asiento cumple con todos los otros requisitos de estas instrucciones y los que se incluyen en el manual del propietario de su vehículo. Se puede usar el LATCH en lugar de el sistema de seguridad del vehículo. Por favor, consulte el manual del propietario se el LATCH.
&RPELQDFLyQ Finturón para el hombro/abdomen y placa de seguridad con traba móvil Este cinturón tiene una placa de seguridad que se mueve libremente a lo largo del cinturón. Este cinturón DEBE convertirse para prevenir el movimiento de la parte de la falda del cinturón.
5.3 Ubicación del LATCH Los vehículos nuevos pueden tener uno o varios asientos equipados con sistemas de anclaje LATCH . Si el vehículo viene equipado con LATCH, se pueden ver los puntos de anclaje inferiores en el pliegue del asiento del vehículo. Si no están visibles, pueden estar marcados con el símbolo que sigue .
6.0 Usar el asiento de seguridad infantil 6.1 Colocación de las correas del arnés NO AJUSTAR DEBIDAMENTE LAS CORREAS DEL ARNÉS DEL NIÑO AUMENTA EL RIESGO DE LESIONES SERIAS O FATALES EN CASO DE UNA CURVA CERRADA, ACCIDENTE O PARADA REPENTINA. Las correas del arnés deben estar debidamente ajustadas para que puedan mantener a su niño de a cuerdo a las siguientes instrucciones. 1. Saque el sistema de seguridad para niños de la base y gire la manija hacia abajo en la posición de asiento. Vea la sección "3.
5. Por detrás, saque las correas del arnés de los tensionadores del arnés. Por adelante, saque la correa de la ranura . Tensionadores del arnés 6. Vuelva a insertar la correa en la ranura apropiada . 7. Pase las correas por los tensionadores exactamente como se indica . 8. 9(5,),&$&,Ð1 '( 6(*85,'$' a) VERIFIQUE que las correas no estén dobladas; b) VERIFIQUE que las correas estén bien sujetas: tire de las correas del arnés por adelante.
6.2 Sujetar el niño en el sistema de seguridad para niños No ajustar debidamente a su niño en el sistema de seguridad para niños/transportador aumenta el riesgo de lesiones serias o fatales en una curva cerrada, parada repentina o accidente. Inclusive cuando lo usa solamente como transportador, asegúrese que las correas del arnés estén debidamente ajustadas. 1. Mueva la manija del sistema de seguridad para niños a la posición de asiento (vea la página 11). 2.
5. Por detrás, pase la correa a través del tensionador del arnés para tensionar las correas como se indica. Las correas restantes deberían tener la misma longitud . ASEGÚRESE que ambas correas estén planas y ajustadas sobre los hombros del niño. Para aflojar las correas, levante el tensionador del arnés y pase la correa desde el frente del asiento . 6. Trabe la hebilla del arnés . Coloque la traba del arnés en el medio del pecho, a nivel con la axila y lejos del cuello . 7.
6.3 Instalación del sistema de seguridad para niños/base con el cinturón del vehículo Debe seguir detenidamente las instrucciones provistas por el fabricante de su vehículo, además de la información de este manual. Antes de seguir, asegúrese que ha leído y entendido la sección 5.0, "Ubicación del sistema de seguridad para niños" en las páginas 21 a 26.
Base con cinturón de seguridad 2. Coloque la base orientado hacia atrás en un asiento orientado hacia adelante. Pase el cinturón de seguridad. El cinturón DEBE pasar debajo de la lengüeta. Sistema de seguridad para niños con cinturón de seguridad 3. Coloque la sistema de seguridad par niños orientado hacia atrás en un asiento orientado hacia adelante. Pase el cinturón de seguridad. 4. Trabe el cinturón del asiento. Asegúrese que la lengüeta de la hebilla pase por la hebilla correcta .
. Ajuste el cinturón de seguridad del vehículo. Consulte el manual del propietario del vehículo y las instrucciones en la sección "5.2.2. Sistemas SEGUROS de cinturones de seguridad para vehículo”, página 24 y 25 sobre cómo ajustar el cinturón del vehículo. Para crear una instalación bien ajustada, apriete hacia abajo con fuerza con su rodilla o mano en el medio del sistema de seguridad para niños o base y tire y apriete el cinturón de seguridad del vehículo. 6.
6.4 Uso del LATCH para instalar la base 1. Para facilitar la instalación, extienda el Lengüeta LATCH hasta el máximo. 2. Ponga la base en el asiento del vehículo como se indica. 3. Pase el LATCH por el recorrido del cinturón en la base que normalmente se usa para el cinturón del asiento del vehículo. Asegúrese que el cinturón de LATCH esté DEBAJO de la lengüeta de la base . El cinturón debe mantenerse en posición plana sin torcerse. 4. Enganche los conectores a los sujetadores inferiores.
9. Para sacar el LATCH, oprima el botón mientras tira del cinturón LATCH como se indica . 10. Oprima y sujete la bisagra LATCH . 11. Empuje el conector hacia dentro, levante el conector y jálelo (en el sentido opuesto al punto de anclaje) . 12. Repita los pasos 10 y 11 para el otro conector.
6.5 Inclinación del sistema de seguridad para niños/base Es importante que su sistema de seguridad para niños/base esté debidamente reclinado para mayor seguridad del niño. En el costado de su sistema de seguridad para niños hay un indicador del nivel para ayudar a reclinar debidamente el sistema de seguridad para niños/base en el asiento del vehículo. No reclinar debidamente el sistema de seguridad para niños en el asiento del vehículo aumenta el riesgo de sufrir lesiones serias o fatales.
Cuando usa la base: Para bajar el pie; tire hacia abajo del fondo del pie hasta alcanzar el valor deseado para ajustar la inclinación . Para levantar el pie; ponga la base en una superficie plana, empuje hacia adentro los dedos de la base y empuje hacia abajo la base para ajustar la inclinación .
Verificación final de seguridad: Cada vez que sale en el automóvil con su niño, EMPUJE HACIA ABAJO lenta pero firmemente la parte de arriba del sistema de seguridad para niños para asegurarse que el cinturón del vehículo o LATCH esté asegurado apretadamente alrededor de la base/sistema de seguridad para niños .
7.0 Información adicional 7.1 Uso en aviones Instálelo en un avión de la misma manera que en un automóvil. Notifique a la compañía aérea por adelantado que va a usar el asiento abordo. Úselo solamente en un asiento del aeronave orientado hacia delante. Siga las instrucciones del personal de vuelo sobre la colocación del asiento de seguridad infantil. No use este asiento de seguridad infantil si el cinturón de seguridad del avión no sujeta el asiento de seguridad infantil firmemente. 7.
7.3 Limpieza y mantenimiento PARA SACAR Y LAVAR LA ALMOHADILLA DE SEGURIDAD DEL NIÑO, siga las instrucciones en la sección "6.1 Colocación de las correas del arnés", páginas 27 y 28. Saque cuidadosamente la almohadilla del asiento. Consulte la etiqueta de cuidado de la almohadilla del asiento para obtener las instrucciones para el lavado. NO USE BLANQUEADOR. Invierta los pasos para volver a instalar la almohadilla del asiento.
7.4 Proceso de limpieza de la hebilla PREVENGA LESIONES GRAVES O LA MUERTE: La hebilla debe abrocharse correctamente. Inspeccione y limpie la hebilla periódicamente para quitar objetos o desechos que podrían impedir la sujeción. 1. De vuelta el sistema de seguridad, pase el retén por la ranura de la correa de la entrepierna . 2. Para limpiar la hebilla, póngale en una taza de agua tibia y agite suavemente la hebilla, oprima el botón rojo varias veces mientras esté sumergida en el agua .
Notas 42
Notas 43
Piezas de repuesto Para comprar repuestos o accesorios en los Estados Unidos para su producto Graco, por favor comuníquese con nosotros en: www.gracobaby.