
User guide


9. Assembly
PNEG-1276 Top Dry Autoflow Construction Manual 24', 30' and 36' 55
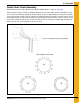
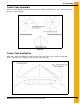
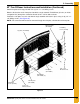
Center Cone Assembly
Bolt the sections together to form perforated cone as shown in Figure 9E. Use 1/4" x 5/8" bolts and nuts
to attach sections together.
Figure 9E
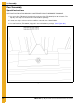
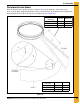
Center Cone Installation
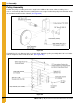
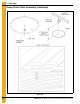
After chains have been adjusted, install cone over the center collar. Fasten cone assembly with
twelve (12) #10 x 3/4" self-drilling screws (S-280). (See Figure 9F.)
Figure 9F