Assembly Instructions Shaker Collection Wardrobe 2 Door 2 Drawer 21 1/2” 41 3/16” 72” Thank you for purchasing our furniture, it’s an honor to be in your home! Model # Finish PH#2 MADE IN BRAZIL REV - 10/2015 page 1/15
Here are some tips on assembling your flat-pack furniture in order to minimize your assembly time and frustrations: -Do Not throw away packaging material until assembly is complete. -Assemble the item on a soft surface, such as cardboard or old blanket, to protect finish from possible dents of scratches. -Choose a spacious, open area near where the piece will be located. It is easier to move parts than to relocate the furniture after it is fully assembled, depending on its size and weight.
HARDWARE LIST A1 4,0x30 A4 3,5x14 A9 3,5x16 A16 4,0x40 A18 4,0x25 A25 M4x25 C2 8,0x25 D4 metal 34 + 2 26 + 2 ! ATTENTION Before starting assembly please verify if the hardware set is complete. For missing hardware please contact support@grainwoodfurniture.
01 07 15 07 17 20 04 02 26 18 16 03 18 14 09 12 06 11 05 13 10 08 2x Parts list Part # 01 02 03 07 15 20 Box 1 Description Right side Left side Back panel Profile “H” Door stop qty 1 1 1 2 1 1 Part # 04 05 06 08 09 10 12 13 14 16 17 18 26 Box 2 Description Upper crosspiece Lower crosspiece Rear crosspiece Drawer front Drawer right side Drawer Left side Drawer bottom Drawer back Drawer bottom support Fixed shelf Wide shelf (adjustable) Hanging bar Door - short Long stabilizer Hardware qty
01) C2 C2 C2 C2 C2 C2 03 C2 C2 02 C2 10 C2 2x C2 C2 C2 C2 C2 09 2x 14 C2 C2 C2 06 C2 C2 C2 C2 26 D21 C2 C2 C2 C2 D21 D21 C2 C2 13 C2 C2 C2 D21 C2 C2 04 C2 C2 C2 C2 05 8,0x25 2x C2 44 02 ATTENTION PLEASE! Assemble Hinge ( F10 ) to hinge plate if it comes separated. Push the hinge against plate until it clicks.
02) A9 A9A9 A9 A9A9 F10 A4 D10 F10 A9A9 A4 A4 A4 F10 F10 A4 03 A4 A4 A4 A4 A4 A9A9 D10 A4 A9A9 A9A9 A4 A4 A4 A4 A4 F10 F10 02 F10 A4 A4 A4 E10 E10 A4 D10 A4 A4 A9 3,5x14 3,5x16 D10 F10 06 16 E10 12 02 E11 02 450mm - 17 3/4" 02 450mm - 17 3/4" 03) 02 A1 A1 A1 14 A1 A1 4,0x30 03 page 6/15
04) A1 04 A18 A1 A1 A18 26 A1 A1 04 A1 A1 06 A1 A1 03 A1 05 A1 A18 4,0x30 4,0x25 A1 11 02 05) A16 A16 01 A16 A16 A16 A16 4,0x40 06 ATTENTION Make sure the Finished surface is facing the inside of the Wardrobe page 7/15
06) G1 07 G1 G1G1 G1 07 G1 07 G1 G1 10x10 06 07) 15 07 07 07 07 15 G11 04 page 8/15
08) G1 A9 G1 G1 G1 G1 G1 G1 G1 G1 G1 G1 A9 G1 G1 G1 G1 G1 G1 G1 G1 G1 A9 A9 G1 G1 G1 G1 G1 G1 G1 A9 G1 G1 G1 G1 G1 G1 27 1/2” A9 G1 3,5x16 10x10 04 34 09) D4 D4 D4 16 D4 D4 Chose the desired shelf height and insert metal supports D4 metal 04 page 9/15
) 18 11) A9 A9 H4 A25 A9 A9 H4 A25 18 A9 A9 A25 H4 3,5x16 M4x25 06 A9 01 01 page 10/15
12) 18 13) H4 A9 A25 20 A9 A25 A9 H4 A9 18 A9 A9 A9 20 A9 A9 3,5x16 11 A25 M4x25 01 H4 01 page 11/15
14) 2x 12 09 A1 11 A1 A1 10 13 A1 A1 A1 4,0x30 A1 A1 A1 08 15) 2x A1 20 FLIP THE ASSEMBLED DRAWER UPSIDE DOWN TO INSTALL GLIDES 2x A4 A4 A4 E10 A4 3,5x14 A4 08 A4 A4 02 E10 450mm - 17 3/4" 02 E11 450mm - 17 3/4" 16) 2x H4 H4 A25 A25 H4 M4x25 04 A25 04 page 12/15
17) If fine tunning on the glides is needed please follow the steps below 2 nd 3rd 1 st page 13/15
18) Set in furniture A4 A4 F8 F8 A4 3,5x14 02 F8 02 F9 01 WALLBOARD F9 WALLBOARD not included page 14/15
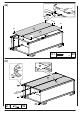
3. 3. 2. 3. 2. 1. 2. 1. 1.