GRANDVIEW REPRODUCING GENUINE COLORS INSTRUCTION MANUAL Recessed-Ceiling Motorised Projector Lift Applicable Model GRPL 1000 GRPL 1600 GRPL 1600L GRPL 2700 GRPL 2700L GRPL 4600L Please read BEFORE installation: Thank you for purchasing this product. Please read this instruction manual carefully to ensure this projector lift is suitable for your installation environment. Caution WARNING: This product should only be installed by a qualified technician.
CAUTION WARNING: To avoid electric shock or fire do not install the projector lift in wet places. 1. Please read these instructions carefully before installation to avoid damage to the product caused by inappropriate installation or operation. 2. Please keep the projector lift away from hot sources, such as radiators and heaters, fireplaces, loudspeakers or similar devices. 3. Plugging in only with ground wire is acceptable. 4. Only accessories from authorised suppliers are acceptable. 5.
ACCESSORIES n M4 Hexagonal Adjuster (1pc) n M5, M4, M3 × 20mm Screws (each 4 pcs ) n Rubber Washer 5 x 10mm (4pcs) n Controller (1pc) n Battery (1 set) n Power Socket n Instruction Manual OPTIONAL ACCESSORIES n Wall-Switch (1pc) n Multi-Media Box (1pc) 2
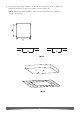
CONSTRUCTION OF PROJECTOR LIFT Front View Side View Top View 3
SPECIFICATIONS MODEL SIZE (mm) A B C D E F G GRPL 1000 600 550 345 0~930 483 483 200 GRPL 1600 704 670 600 0~1600 586 586 250 GRPL 1600L 704 770 600 0~1600 686 586 270 GRPL 2700 704 670 685 0~2700 586 586 250 GRPL 2700L 704 770 685 0~2700 686 586 270 GRPL 4600L 800 765 800 0~4600 686 686 270 4
INSTALLATION n n n This projector lift needs to be recessed into the ceiling, and this instruction shows the grille-ceiling as an example. For convenience and safety, please install the projector lift according to your individual requirements. The projector lift needs to be recessed at the best viewing angle in order to improve the image. Take out all the parts from the packaging and refer to the accessories guideline to ensure you have all parts. GRILLE-CEILING MOUNT 1.
2. Ensure the mounting distances M and N are measured (refer to figure 3). Install the brackets to the roof via the screws (figure 4). NOTE: Due to product updates, sizes and specifications are subject to change at any time.
3. Figure 5 – install the projector lift and fasten. The projector’s low frame must align with the ceiling: 4. Figure 6 – check the alignment of the projector lift: 5.
6. Figure 9 – cut the ceiling board (Step 1) to a suitable size which will maintain the gap after retraction of the projector lift 7. Please read the “Remote Electric Positioning” for controlling the projector lift. After the adjustment, ensure the height of the projector lift can satisfy your requirement after extending. Then, ensure the bottom of projector lift aligns with the ceiling after retracting.
INSTRUCTIONS 1. Remote controller instruction Button instruction for controller n n n Press “UP”, projector goes up Press “STOP”, projector stops Press “DOWN”, projector goes down Front View Remote controller guideline: n n n n Work temperature: -20°to 70° Batteries: 1.5V x 2pcs, model: AAA. Take out batteries if the controller will not be used for a long time. Please change the batteries when signal is weak.
Central Control Instruction Emitter Function 1 Common Brown 2 N/A White/Brown 3 N/A Orange 4 Extend White/Blue 5 Retract Blue 6 Stop White/Orange 7 RS232 Input B Green 8 RS232 Input A White/Green Central Control Format Agreement 1. Communications Agreement Setting: data bits: 8 bits / start bits: 1 bit / stop bit: 1bit / baud ratio: 2400 2. Directive for retracting: 0xFF 0xEE 0xEE 0xEE 0xC9 3. Directive for stopping: 0xFF 0xEE 0xEE 0xEE 0xCC 4.
GRANDVIEW PROJECTOR LIFT RS485 SETTING ADDRESS 1. RS-485, RS-232 input Continuous data send twice, each time with an interval of 200ms 3 bytes of studying address directive are custom setting address directive Central Control Format Agreement 1. Communication Agreement Setting Data Bits: 8 bits Start Bits: 1 bit Stop Bits: 1 bit Baud Ratio: 2400 Common directives are in chip of projector lift and can not be changed 2. Directive for retracting: 0xFF 0xEE 0xEE 0xEE 0xC9 3.
Connect the power for projector lift A, and send out directive oxFF ox10 ox11 ox12 oxAA. At the same time, the address of projector lift A is ox10 ox11 ox12. Entering the operating address of projector lift A can control this projector lift. Directive for retracting: Directive for stopping: Directive for extending: 0xFF 0x10 0x11 0x12 0xC9 0xFF 0x10 0x11 0x12 0xCC 0xFF 0x10 0x11 0x12 0xE9 Complete the studying in projector lift A, and then disconnect the power for projector lift A.
PROJECTOR LIFT POSITIONING FUNCTION There are 2 solutions to position the projector lift: upper/lower limitation and remote localizer. NOTE: Changing these limits will void warranty. NOTE: Do not change the factory pre-settings for any emergency, please operate according to the following instructions if necessary. 1. Remote limit setting adjustment (Soft Limits) a. When the projector lift installation has been completed, turn on the power to the lifter. Confirm the lifter is operational. b.
figure 12 figure 13 NOTE: the following operation should only be undertaken by people fully conversant with the lift’s operation: a. For upper limitation adjustment, pull out the knob and adjust using the allen key provided. A clockwise adjustment will retract the projector lift (decreasing distance between casing and installation point) and a counter-clockwise adjustment will extend the projector lift (increasing distance between casing and installation point). b.
IMPORTANT SAFETY INFORMATION Please take note of the following important information for installation and use. SAFETY HANDLING CAUTION: Please do not shake OR manually lift the projector lift MAINTENANCE & CLEANING Please clean the projector lift with diluted mild detergent, then dry using a soft cloth. Use a soft brush to clean gaps.
LOCATION CAUTIONS: n n n Please keep away from hot surfaces, dusty and dirty areas, high temperature and high humidity. Do not expose the projector to high wind or high-powered indoor fans. Do not dismantle REPAIRS Please do not dismantle the screws of the projector lift. Should this product require repaired, please contact our company or dealers. TROUBLESHOOTING The Grandview Projector Lift can be used for years, with most problems being resolved inexpensively.
Address: Level 7, 130 Pitt Street, Sydney NSW 2000 Australia Website: www.hillssvl.com.au www.grandviewscreens.com.au Enquiries email: sales@hillssvl.com.