Table of Contents Index Operator Manual 2007+ PD8070 PD8070 8-Row 70cm Pull-Type Planter Manufacturing, Inc. www.greatplainsmfg.com Read the operator manual entirely. When you see this symbol, the subsequent instructions and warnings are serious - follow without exception. Your life and the lives of others depend on it! 25414 Illustrations may show optional equipment not supplied with standard unit or may depict similar models where a topic is identical.
Table of Contents Index Table of Contents Index
Great Plains Manufacturing, Inc. Cover Index iii Table of Contents Important Safety Information ......................................1 Safety Decals .................................................................6 Introduction ................................................................10 Document Family .........................................................10 Models Covered ...........................................................10 Intended Usage ...........................................
iv PD8070 Table of Contents Finger Meter Inserts ............................................. 54 Sunflower Meter Configurations........................... 54 Seed Firmer Adjustments ........................................ 55 Keeton® Seed Firmer Adjustment ........................ 55 Press Wheel Adjustments ........................................ 55 Double-V Press Wheels ....................................... 55 Press Wheel Down Pressure ............................... 56 Press Wheel Stagger .........
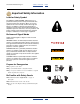
Great Plains Manufacturing, Inc. Table of Contents Index 1 Index 401-479M Important Safety Information Look for Safety Symbol The SAFETY ALERT SYMBOL indicates there is a potential hazard to personal safety involved and extra safety precaution must be taken. When you see this symbol, be alert and carefully read the message that follows it.
2 PD8070 Table of Contents Index Great Plains Manufacturing, Inc. Index 2014-07-23 Avoid High Pressure Fluids Escaping fluid under pressure can penetrate the skin, causing serious injury. ▲ Avoid the hazard by relieving pressure before disconnecting hydraulic lines. ▲ Use a piece of paper or cardboard, NOT BODY PARTS, to check for suspected leaks. ▲ Wear protective gloves and safety glasses or goggles when working with hydraulic systems.
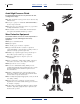
Great Plains Manufacturing, Inc. Table of Contents Index Important Safety Information 3 Handle Chemicals Properly Agricultural chemicals can be dangerous. Improper use can seriously injure persons, animals, plants, soil and property. ▲ Read and follow chemical manufacturer’s instructions. ▲ Wear protective clothing. ▲ Handle all chemicals with care. ▲ Agricultural chemicals can be dangerous. Improper use can seriously injure persons, animals, plants, soil and property.
4 PD8070 Table of Contents Index Great Plains Manufacturing, Inc. Index 2014-07-23 Keep Riders Off Machinery Riders obstruct the operator’s view. Riders could be struck by foreign objects or thrown from the machine. ▲ Never allow children to operate equipment. ▲ Keep all bystanders away from machine during operation. Use Safety Lights and Devices Slow-moving tractors and towed implements can create a hazard when driven on public roads. They are difficult to see, especially at night.
Great Plains Manufacturing, Inc. Table of Contents Index Important Safety Information 5 Tire Safety Tire changing can be dangerous and should be performed by trained personnel using correct tools and equipment. ▲ When inflating tires, use a clip-on chuck and extension hose long enough for you to stand to one side–not in front of or over tire assembly. Use a safety cage if available. ▲ When removing and installing wheels, use wheel-handling equipment adequate for weight involved.
6 PD8070 Table of Contents Index Great Plains Manufacturing, Inc. Safety Decals Safety Reflectors and Decals Your implement comes equipped with all lights, safety reflectors and decals in place. They were designed to help you safely operate your implement. ▲ Read and follow decal directions. Order new decals from your Great Plains dealer. Refer to this section for proper decal placement. To install new decals: 1. Clean the area on which the decal is to be placed. 2. Peel backing from decal.
Great Plains Manufacturing, Inc. Table of Contents Index Important Safety Information 7 Daytime Reflectors 23455 838-267C On the backside of each light mounting bar, and on the main tool bar outboard of the inner two row units; 4 total Warning: Transport Speed WARNING EXCESSIVE SPEED HAZARD To Prevent Serious Injury or Death: Do Not exceed 20 mph maximum transport speed. Loss of vehicle control and/or machine can result. 818-188C Rev.
8 PD8070 Table of Contents Index Great Plains Manufacturing, Inc.
Great Plains Manufacturing, Inc.
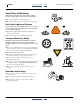
10 PD8070 Table of Contents Index Great Plains Manufacturing, Inc. Introduction Great Plains welcomes you to its growing family of new product owners. This planter has been designed with care and built by skilled workers using quality materials. Proper setup, maintenance and safe operating practices will help you get years of satisfactory use from the machine.
Great Plains Manufacturing, Inc. Table of Contents Index Introduction 11 Owner Assistance If you need customer service or repair parts, contact a Great Plains dealer. They have trained personnel, repair parts and equipment specially designed for Great Plains products. Refer to Figure 2 Your machine’s parts were specially designed and should only be replaced with Great Plains parts. Always use the serial and model number when ordering parts from your Great Plains dealer.
12 PD8070 Table of Contents Index Great Plains Manufacturing, Inc. Preparation and Setup This section helps you prepare your tractor and planter for use. Before using the planter in the field, you must hitch the planter to a suitable tractor and level the planter. Pre-Start Checklist 1. Read and understand “Important Safety Information” on page 1. 2. Check that all working parts are moving freely, bolts are tight, and cotter pins are spread. 3.
Great Plains Manufacturing, Inc. Table of Contents Index Preparation and Setup 13 Hitching Planter to Tractor Crushing Hazard: You may be several injured or killed by being crushed between the tractor and planter. Do not stand or place any part of your body between planter and moving tractor. Stop tractor engine and set park brake before installing hitch pin. 1. To prevent soil compaction on rows, set tractor wheels between rows.
14 PD8070 Table of Contents Index Great Plains Manufacturing, Inc. Index 2014-07-23 Hydraulic Hose Hookup High Pressure Fluid Hazard: Escaping fluid under pressure can have sufficient pressure to penetrate the skin causing serious injury. Avoid the hazard by relieving pressure before disconnecting hydraulic lines. Use a piece of paper or cardboard, NOT BODY PARTS, to check for leaks. Wear protective gloves and safety glasses or goggles when working with hydraulic systems.
Great Plains Manufacturing, Inc. Table of Contents Index Preparation and Setup 15 Current Style Color Coded Hose Handles Great Plains hydraulic hoses have color coded handle grips to help you hookup hoses to your tractor outlets. Hoses that go to the same remote valve are marked with the same color. Color Hydraulic Function Blue Lift Cylinders Green Marker Cylinders Refer to Figure 6 To distinguish hoses on the same hydraulic circuit, refer to the symbol molded into the handle grip.
16 PD8070 Table of Contents Index Great Plains Manufacturing, Inc. Electrical Hookup Seed Monitor Console 5 1 Refer to Figure 8 If the planter is equipped with one of the two optional seed monitors, the PM300 console 1 needs to be mounted in the cab of the tractor to be used with the planter. The monitor includes cables for power 2 , speed sensor 3 and sensor harness 4 . Installation instructions are found in the included DICKEY-john® manual.
Table of Contents Great Plains Manufacturing, Inc. Index Preparation and Setup 17 Leveling Planter 5 Figure 10 Setting tool bar Height 24009 Refer to Figure 10 During initial setup and periodically throughout the season, check that the planter runs level. When planting, the top of the hopper support panel should be parallel to the ground as shown.
18 PD8070 Table of Contents Index Great Plains Manufacturing, Inc. If necessary adjust planter frame height to achieve 51 and 56 cm (20 and 22 inches) from ground. Remove bolts 8 , located in lower holes, securing transport ground tire assembly to unit. Move tire assembly and secure assembly to upper hole 9 using previously removed bolt. 9 8 Figure 13 Ground Wheel Height 25448 Exchanging Meters These steps are only for changing between finger pickup and brush meters, or vice versa.
Table of Contents Great Plains Manufacturing, Inc. Index Preparation and Setup 19 Installing Brush Meter Plates A selection of seed plates are available for the brush meter (see “Seed Plates” on page 94). Use a seed plate specific to the crop, seed variety, and seed rate range. 1 If the seed plates (or meters) need to be changed, perform this operation before loading seed. 1 1. Select 8 of the next seed plates to install. Check that they are all for the correct seed, seed variety and cell count.
20 PD8070 Table of Contents Index Great Plains Manufacturing, Inc. Mud Scrapers (Optional) 4 Refer to Figure 18 The mud scraper 1 removes build-up that might interfere with contact drive wheel rotation and planting depth. 1. Loosen bolts 2 and 3 . 1 2. Pivot the scraper around bolt 2 until the clearance 4 between the scraper and tire is 3 to 6 mm (1⁄8 to 1⁄4 inch). 3. Tighten bolts.
Great Plains Manufacturing, Inc. Table of Contents Index Preparation and Setup 21 Monitor Setup Refer to Figure 20 The standard DICKEY-john® PM300 system monitors the following elements of a PD8070 planter: • seeds at each row unit seed tube; • ground speed. See “Seed Monitor Console Installation” on page 101. Refer to the DICKEY-john® PM300 Manual (11001-1372) for monitor operations.
22 PD8070 Table of Contents Index Great Plains Manufacturing, Inc. Index 2014-07-23 Operating Instructions This section covers general operating procedures. Experience, machine familiarity and the following information will lead to efficient operation and good working habits. Always operate farm machinery with safety in mind. Pre-Start Checklist High Pressure Fluid Hazard: Escaping fluid under pressure can have sufficient pressure to penetrate the skin.
Great Plains Manufacturing, Inc. Table of Contents Index Operating Instructions 23 Transporting the PD8070 Planter Loss of Control Hazard: Do not exceed 32 km/h (20 mph). Towing the planter at high speeds can lead to loss of vehicle control. Loss of vehicle control can lead to serious road accidents, injury, and death. Before transporting the planter, check and practice the following items. 1. Check that planter is securely hitched to a sufficient tractor.
24 PD8070 Table of Contents Index Great Plains Manufacturing, Inc. Loading Materials Loading Seed 1 1. Check that correct meters are installed. See “Meter Maintenance” on page 72. 2. For brush meters, install correct seed plates. See “Installing Brush Meter Plates” on page 19. 4 Refer to Figure 22 3. Check that hopper is correctly seated and secured: 1 pivot hooks engage at front, 2 meter clutch engages properly at side, and; 3 latch engaged at rear. 4. Remove lid by pulling back and up at rear 4 .
Great Plains Manufacturing, Inc. Table of Contents Index Operating Instructions 25 Loading Fertilizer 2 Agricultural Chemical Hazard: Read and follow all supplier instructions regarding safe handling and approved application of chemicals. Agricultural chemicals can be extremely hazardous. Review and follow the general guidelines for safe handling, application, disposal and cleanup of chemicals on page 2 and page 3 of this manual. 2 1 Refer to Figure 25 1.
26 PD8070 Table of Contents Index Great Plains Manufacturing, Inc. Seed Drive Clutch Meter Clutch Disengagement The seed meter may be disengaged from the drive system, as required in several situations, for example: 1 2 3 • hopper removal for clean-out, meter exchange or maintenance • treatment meter calibration • application without seeding Refer to Figure 28 To disengage a meter, pull the knob 1 away (left) of the row unit.
Great Plains Manufacturing, Inc. Table of Contents Index Operating Instructions 27 Field Operation 1. Perform all checks listed on Pre-Start Checklist on page 22. 2. Hitch planter to a tractor with sufficient horsepower. Refer to Tractor Requirements, “Specifications and Capacities” on page 97, and “Hitching Planter to Tractor” on page 13. 3. Set and calibrate planting rate per Planting Rate. See “Seed Rate” on page 31. 4. Load seed hoppers with clean seed.
28 PD8070 Table of Contents Index Great Plains Manufacturing, Inc. Index 2014-07-23 Marker Operation Overhead Crushing Sharp Object Hazard: Do not allow anyone to stand near or beyond the end of the wings during marker operations. Marker arms are heavy and marker discs may be sharp. A moving marker can cause serious injury or death. Dual markers are equipped with an automatic sequence valve that controls which side activates, as well as marker deployment.
Great Plains Manufacturing, Inc. Table of Contents Index Operating Instructions 29 Parking Storage 1. Park planter on a level, solid area. Store planter in a clean, dry place with all tires out of the sun. Store planter where children do not play. If possible, store planter inside for longer life. 2. Place jack on stob on the side of the planter tongue. Lower jack until weight of planter is off of tractor draw bar. Remove hitch pin and safety chain. 3. Disconnect any hydraulic hoses from tractor.
30 PD8070 Table of Contents Index Great Plains Manufacturing, Inc. Adjustments To get full performance from your PD8070 Planter, you need an understanding of all component operations. Many provide adjustments for optimal field results. Adjustment Even if your planting conditions rarely change, some of these items need periodic adjustment due to normal wear.
Table of Contents Great Plains Manufacturing, Inc. Index Adjustments 31 Seed Rate There are separate charts for brush and finger pickup meters. If you are unfamiliar with the charts, see “Reading the Brush Meter Chart” on page 33 or “Reading the Finger Meter Chart” on page 35. To change meters, see “Meter Maintenance” on page 72. For brush meters, the chart has separate columns based on the cell count of the seed plate installed. For plate selection see “Seed Plates” on page 94.
32 PD8070 Table of Contents Index Great Plains Manufacturing, Inc. Checking Planting Population After setting transmission, always field check planting population. 1. Select one row unit for testing. Release spring pressure on closing wheels or disks. 2. Tie up closing disks or wheels to hopper support using a chain or heavy wire. 3. Disengage clutches on remaining row units. 4. Adjust planting depth to a shallow setting. 5. Plant at a normal speed for a short distance.
Great Plains Manufacturing, Inc. Table of Contents Brush Meter Rates Index Adjustments ype Planter Reading the Brush Meter Chart Note: Actual chart is on page 34. Images at right are excerpts. 70 cm Rows Seed Rate: Cell Count 1. Use the chart columns for your seed plate, based on the cell count. Seed Rate: Population 2. Find the desired seed population or seed spacing.
34 PD8070 Table of Contents PD8070 Pull-Type Planter Transmission Combinations Driver Driven 17 17 17 19 17 19 17 19 17 19 19 23 19 23 24 23 24 25 17 23 24 25 26 23 24 25 26 27 23 28 27 26 25 24 28 27 26 25 19 28 27 26 28 27 23 28 24 25 23 26 24 27 25 28 26 27 28 28 27 26 28 25 27 24 26 23 25 24 28 23 27 28 26 27 28 19 25 26 27 28 24 25 26 27 28 23 27 26 25 24 23 26 25 24 23 17 25 24 23 24 23 19 23 19 19 17 19 17 19 17 19 17 17 17 Index Great Plains Manufacturing, Inc.
Great Plains Manufacturing, Inc. Table of Contents Index Adjustments 35 Finger Meter Rates Reading the Finger Meter Chart Note: Actual chart is on page 36. Images at right are excerpts. For Flat Corn optimum meter spe (Shaded area) Seed Rate: Population 1. Find the desired seed population or seed spacing. Transmission Combinations river Driven 17 17 17 Seed Rate: Meter rpms 2. Note the range of meter rpms suitable for that population. 43 522 45 134 46 870 28 27 26 73 73 75 75 75 11.3 kph 10.
36 PD8070 Table of Contents PD8070 Pull-Type Planter ATTENTION ! ! ! Index Great Plains Manufacturing, Inc. 70cm ROWS 12 Finger Meter (For all seed corn types) Great Plains always recommends test stand calibration of the finger meter to the population and ground speed desired . Note: This table applies to all seeds compatible with the installed meter.
Table of Contents Great Plains Manufacturing, Inc. Index Adjustments 37 Dry Fertilizer Rate Refer to Figure 33 1 Application Rate Risk: Make field checks to assure you are applying fertilizer at the desired rate. Fertilizer application rates can vary from the weights in the charts. Use the following instructions to check the exact number of kilograms your fertilizer attachment delivers on a 70cm row spacing. 2 DRIVING DRIVEN 1. Adjust for your fertilizer density (page 38). 2.
38 PD8070 Table of Contents Index Great Plains Manufacturing, Inc. Fertilizer Density Adjustment The fertilizer meter rate charts are based on fertilizer with a density of 65 pounds per cubic foot (1.04 kilograms per liter). If you are applying fertilizer of a different density, use the following table to convert application rate. Density kg/l (lb/ft3) 0.72 (45.0) 0.80 (50.0) 0.88 (55.0) 0.96 (60.0) 1.04 (65.0) 1.12 (70.0) 0.87 (75.0) 0.81 (80.0) Conversion Factor 1.45 1.30 1.20 1.10 1.
Great Plains Manufacturing, Inc. Table of Contents Index Adjustments 39 Contact Drive Tension Refer to Figure 35 and Figure 36 Occasionally, due to planting height or planting conditions, it may be necessary to adjust the spring tension to keep the contact drive tire from slipping. For example, if you experience low seeding rates in wet conditions, it may be possible to compensate for this by increasing contact drive tension, by tightening 4 bolts 1 (2 on each contact drive).
40 PD8070 Table of Contents Index Great Plains Manufacturing, Inc. Marker Adjustments There are four adjustments for markers: • Marker Width Once set for a specific row spacing, this only needs periodic checking to ensure the clamp is secure. • Disk Angle Even if your row spacing rarely changes, you may need to adjust disk angle for soil conditions and planting speed. • Marker Fold/Unfold Speed Once initially set by your dealer, this rarely needs modification.
Great Plains Manufacturing, Inc. Table of Contents Index Adjustments 41 Marker Disk Adjustments Sharp Object Hazard: Use caution when making adjustments in this area. Marker disks may be sharp. The mark left by the marker disk may be changed by several methods. 5 Refer to Figure 38 Marker Disk Angle 1. To change the angle of cut, loosen bolts 4 and 5 , rotate disk assembly around bolt 5 and retighten bolts. 4 6 7 Marker Disk Angle Axis 2. The disk may be mounted to throw dirt in or out.
42 PD8070 Table of Contents Index Great Plains Manufacturing, Inc. Row Implement Adjustments 1 Frame-Mounted Row Accessories 3 Terra-Tine™ Row Cleaners 2 Refer to Figure 40 These row cleaners are available for: • direct shank mounting 1 5 on the front tool bar, • sharing a Vantage I coulter shank, or; • unit-mount 2 on the 30 Series row unit. See page 89 for ordering information. Terra-Tine™s have three adjustments: 1. Height: Shank-mounted Terra-Tine™s adjust at the tube clamps 3 .
Great Plains Manufacturing, Inc. Table of Contents Index Adjustments 43 Zone Coulters Refer to Figure 43 Frame-mounted coulters may be run in-row or between rows (“zone”). They are available with Turbo or conventional fluted blades. See page 89 for ordering information. 4 1 In-Row If run in-row, or within 5.1 cm (2 inches) of the furrow, adjust the shank 1 to set the coulter depth 2 to be the planting depth or 6 mm (1⁄4 inch) shallower.
44 PD8070 Table of Contents Index Great Plains Manufacturing, Inc. Vantage II Fertilizer Coulters These coulters are available for application of dry fertilizer (with a large delivery tube), or liquid fertilizer (with a small tube). The position on the tool bar may be adjusted for in-row or zone application. The dry coulter is compatible with the standard fertilizer hopper system. The liquid system requires a customer-provisioned tank, pump and manifold system.
Great Plains Manufacturing, Inc. Table of Contents Index Adjustments 30 Series Row Units 45 1 Refer to Figure 46 From front to back, a Great Plains 30 Series row unit can include the following capabilities (some optional): 6 0. Seed Hopper: standard (not shown - sits above meter) 1. Parallel arms: standard Each row unit is mounted on the planter with spring-loaded parallel arms which allow each row unit to independently move up and down while staying horizontal.
46 PD8070 Table of Contents Index Great Plains Manufacturing, Inc. Row Unit Down Pressure Row unit springs provide the primary down pressure necessary for row unit disks to open a seed trench. The springs allow the row units to float down into depressions and up over obstructions. Springs also provide down force on coulters when using optional row mounted coulters, and provide the primary down force on seed firmers (optional) and press wheels.
Great Plains Manufacturing, Inc. Table of Contents Index Adjustments 47 Row Cleaner Adjustments 1 Refer to Figure 48 Optional rigid tine cleaners are unit-mounted, using UMC-RC: Unit-Mount Coulter RC (on coulter bracket, with or without a coulter disk present). 2 Sharp Object Hazard: Row cleaner tines, casting edges and coulter blades are sharp. Wear hand protection when working in this area. There are two adjustments: 1.
48 PD8070 Table of Contents Index Great Plains Manufacturing, Inc. Coulter Adjustments The ideal operating depth for coulters is 6.4 mm (1⁄4 inches) above opener depth. Although they may have originally been set to this depth, coulter (and opener) blades wear with time, and may need adjusting. Adjusting the coulter depth is accomplished by re-mounting the coulter blade in one of the six mounting holes arranged in a staggered pattern in the coulter bracket.
Table of Contents Great Plains Manufacturing, Inc. Index Adjustments 49 Row-Unit Opener Adjustments 30 Series openers have three adjustments: 1. planting/seed depth 2. gauge wheel/opener disk clearance 3. opener disk angle 1 Setting Planting Depth Refer to Figure 51 The “T” handle 1 sets planting depth by limiting the how high the side depth gauge wheels ride relative to the opener disks. The position of the seed tube itself is fixed relative to the disks, and is not adjusted.
50 PD8070 Table of Contents Index Great Plains Manufacturing, Inc. Adjusting Disk Angle & Side Gauge Wheels Refer to Figure 53 For 51 mm (2 inch) planting depth, adjust side gauge wheel angle so wheels contact row unit disks at the bottom of wheel - in clock hand notation, between 4:00 and 8:00 o’clock. Check with row units in soil so wheels are held up. At the same time, keep side gauge wheels close to opener disks so openers do not plug with soil or trash.
Table of Contents Great Plains Manufacturing, Inc. Index Adjustments 51 Adjusting Gauge Wheel Scrapers Refer to Figure 55 Scrapers are optional, and may be useful in moist or sticky soils that tend to accumulate on gauge wheels and reduce intended planting depth. For ordering, see page 95. 2 1 To adjust scrapers: 1. Loosen nut 1 2. Slide scraper touches tire. . 2 toward gauge wheel 3 until scraper 4 3. Slide scraper 2 away from wheel 3 mm (1⁄8 inch) gap at 4 . 3 3 leaving a 4.
52 PD8070 Table of Contents Index Great Plains Manufacturing, Inc. Seed Meter Setup and Adjustment Your PD8070 Planter was originally supplied with a choice of brush meter, or 12-finger pickup meter. • The brush meter accepts a selection of seed plates. Seed plate exchange is described on page 19. 1 4 4 3 • The finger pick up meter has an adjustable brush, and alternate inserts are available for the backing plate. 2 To change meters, see “Meter Maintenance” on page 72.
Great Plains Manufacturing, Inc. Table of Contents Index Finger Meter Brush Adjustment The brush reduces or eliminates “doubles” (delivering two seeds per finger), but if set too aggressively can cause “skips” (delivering no seed on some fingers). As needed, adjust for minimal doubles and skips. Adjustments 53 L Note: These instructions describe the current finger pickup meter shipped with new Great Plains planters, which has an integrated adjustment lever for the brush.
54 PD8070 Table of Contents Index Great Plains Manufacturing, Inc. Finger Meter Inserts Refer to Figure 59 The backing plate is equipped with an “A” insert 1 . In tests, this insert provides the best performance in most seed sizes. However, there are two alternative inserts that can be used. Before changing to a different insert, please consult with a Great Plains service representative for a recommendation. 1 The insert type is molded into the back. Changing inserts requires meter disassembly.
Great Plains Manufacturing, Inc. Table of Contents Index Adjustments 55 Seed Firmer Adjustments Sharp Object Hazard: Row unit disk blades may be sharp. Use caution when making adjustments in this area. To adjust the Keeton® Seed Firmer, lower the planter until the disks of the row units are resting on the ground. Keeton® Seed Firmer Adjustment The optional Keeton® seed firmer is an engineered polymer shape that slides down the seed furrow.
56 PD8070 Table of Contents Index Great Plains Manufacturing, Inc. Press Wheel Down Pressure Handle 1 sets down pressure, which may need adjustment for different soil types and field conditions. 3 • Relax the handle forward (in the direction of travel) for decreased down pressure. • Pull the handle 1 back for increased down pressure. 2 Note: Higher press wheel down pressures reduce the down force on the main row unit shank components, such as the openers.
Table of Contents Great Plains Manufacturing, Inc. Index Adjustments Press Wheel Centering If one press wheel is running in the seed trench, or the wheels are not centered over the trench, the angle 1 of the press wheel assembly can be adjusted as follows: 57 1 Refer to Figure 64 1. Determine how far, and in which direction, the press wheel assembly needs to move to center the wheels. 2. Raise planter and install lift assist cylinder locks. See “Lift Cylinder Lock-Up” on page 62. 3.
58 PD8070 Table of Contents Index Great Plains Manufacturing, Inc. Troubleshooting Problem One row not planting seed Meter not engaging properly Row unit is skipping Planting too many doubles Over planting Under planting Irregular or incorrect seed spacing 401-479M Possible Cause and Solution Seed meter not engaged. See “Seed Drive Clutch” on page 26. Check for foreign material in hopper. Clean hopper and finger pickup mechanism. See “Seed Meter Setup and Adjustment” on page 52.
Great Plains Manufacturing, Inc. Problem Seed spacing not as indicated in charts Scattering of seeds Seed tubes and/or openers plugging Inconsistent seed depth None of the row units are planting Table of Contents Index Troubleshooting 59 Possible Cause and Solution Check that tires are inflated to proper pressure. See “Tire Inflation Chart” on page 97. Examine seed for inconsistent size. Do field check and adjust sprockets accordingly.
60 PD8070 Problem Table of Contents Index Great Plains Manufacturing, Inc. Possible Cause and Solution Opener disks and side gauge wheels plugging Adjust gap between opener disks and side gauge wheels. See “Row-Unit Opener Adjustments” on page 49. Planter will not lower Check that pressure and return hoses are fully engaged in SCV outlets. Planter frame raises or lowers slowly Lower tractor hydraulic pressure. Tractor operating pressure must be a minimum of 10 340 kPa (1500 psi).
Great Plains Manufacturing, Inc. Table of Contents Index 61 Index 401-479M Maintenance and Lubrication Maintenance Proper servicing and maintenance is the key to long implement life. With careful and systematic inspection, you can avoid costly maintenance, downtime and repair. Always turn off and remove the tractor key before making any adjustments or performing any maintenance. High Pressure Fluid Hazard: Check all hydraulic lines and fittings before applying pressure.
62 PD8070 Table of Contents Index Great Plains Manufacturing, Inc. Lift Cylinder Lock-Up Crushing Hazard: Always install cylinder stops before working on planter. You may be severely injured or killed by being crushed under the falling implement. 1 Use transport locks to hold the planter at raised for transport, adjustments, maintenance and storage. Refer to Figure 66 Transport locks are present on all wheel modules. To install cylinder stops: 1. Raise planter to transport position. 2.
Table of Contents Great Plains Manufacturing, Inc. Index Maintenance and Lubrication 63 Material Clean-Out Seed Hopper Clean-Out 1. If hopper is more than 1⁄3 full, remove lid and scoop out seed until it is less than 1⁄3 full. For small quantities, the seed can be collected in the hopper lid. Refer to Figure 67 2. Disengage meter clutch 3. Release rear latch 2 1 (see page 26). . 4. Tip hopper forward and lift off hook cups 2 . 5.
64 PD8070 Table of Contents Index Great Plains Manufacturing, Inc. Finger Meter Clean-Out 8. Clean-out hopper (see “Seed Hopper Clean-Out” on page 63). 9. Turn hopper/meter upright. 10. Turn meter drive shaft through one or more complete revolutions of the belt, to remove seed from the belt chamber. It is generally not necessary to dismount and disassemble the finger meter for routine clean-out. See page 72 for additional finger meter maintenance. 11. Re-install hopper on row. Brush Meter Clean-Out 12.
Great Plains Manufacturing, Inc. Table of Contents Index Maintenance and Lubrication 65 Bleeding Hydraulics High Pressure Fluid Hazard: Escaping fluid under pressure can penetrate the skin, causing serious injury. Avoid the hazard by relieving pressure before disconnecting hydraulic lines. Use a piece of paper or cardboard, NOT BODY PARTS, to check for suspected leaks. Wear protective gloves and safety glasses or goggles when working with hydraulic systems.
66 PD8070 Table of Contents Index Great Plains Manufacturing, Inc. Replacing Shear Pins and Bolts Drive-Line Shear Pins Refer to Figure 73 The cotter pins 1 that connect shafts 2 to transmission 3 will shear when an excessive load is put on the shafts. 1 Infrequent or improper lubrication causes binding of moving parts within the planter. This binding will cause cotter pins to shear, thus preventing breakage of planter parts.
Table of Contents Great Plains Manufacturing, Inc. Index Maintenance and Lubrication 67 Shaft Alignment 2 3 5 4 1 Figure 75 Drive Shaft Couplers 25465 Refer to Figure 75 and Figure 76 Improper shaft alignment can cause pins to shear. To function properly, transmission shafts must be aligned and level. If the planter is consistently shearing pins, follow these steps to check and adjust the shafts. Check that transmission input shaft shaft 2 are aligned: 1 and transmission 1.
68 PD8070 Table of Contents Index Great Plains Manufacturing, Inc. Ratchet Drives Refer to Figure 77 Two ratchet assemblies, one on the left side of each ground drive tower, couple the drive shaft to each ground drive in forward motion, and de-couple it when the other ground drive is operating faster (as in tight turns). Each ratchet must operate freely in forward motion, and de-couple in reverse. To test it, raise the planter and turn each ground wheel in reverse.
Great Plains Manufacturing, Inc. Table of Contents Index Maintenance and Lubrication 69 Chain Tension As the chains wear and stretch, you may need to adjust idlers and/or remove links for proper chain length and tension. 2014-07-23 Check and replace bushings on idlers. For the correct operation of the planter check all chain routings. Refer to the illustrations on this page for proper chain routings.
70 PD8070 Table of Contents Index Great Plains Manufacturing, Inc. 30 Series Opener Disks and Scrapers 1. Lift side gauge wheel off ground. Move tire in and out to check for end play. Check for roughness in bearing by rotating wheel. If the bearings are rough, inspect and replace if necessary. 2. Remove side gauge wheels from arms to access opener disks and scrapers. Sharp Object Hazard: Be careful when working in this area. Disk edges are sharp.
Great Plains Manufacturing, Inc. Table of Contents Index Maintenance and Lubrication 71 30 Series Row-Unit Side Wheels Check that outside disk scrapers 5 are formed to disk blades to help remove any mud. Bend and twist scrapers to fit blades as necessary. After every 80 hectares (200 acres) of planter operation, check outside scrapers for proper adjustment and wear. Replace scrapers as necessary. 3 4 5 Sharp Object Hazard: Be careful when working in this area. Disk edges are sharp.
72 PD8070 Table of Contents Index Great Plains Manufacturing, Inc. 4 2 7 6 5 3 1 Figure 82 Finger Meter Assembly 22507 Meter Maintenance Finger Meter Maintenance Finger Set Inspection Finger sets should be inspected on an annual basis. After cleaning, carefully inspect the fingers and springs for wear or other abnormalities that may develop. Excessive wear may disrupt singulation performance. 3.
Table of Contents Great Plains Manufacturing, Inc. Index Population Max™ Annual Maintenance. Population Max™a should be inspected annually. Inspect plate for wear or other abnormalities that may develop. The action site area 3 might also eventually show some wear. When signs of wear appear, simply replace insert. Maintenance and Lubrication 2 73 3 1 4 Make sure transition between the Population Max™ backing plate and the insert is smooth.
74 PD8070 Table of Contents Index Great Plains Manufacturing, Inc. Skip Stop™ Annual Maintenance Skip Stop™a should be inspected on an annual basis. Inspect cushion for wear, pockets, or other abnormalities that may develop. Excessive wear or pocket formation may cause seeds to become trapped and disrupt singulation performance. As a general rule, if there is a pocket that is large enough to hold one or more seeds after the belt has passed by, Skip Stop™ Cushion should be replaced.
Table of Contents Great Plains Manufacturing, Inc. Index Maintenance and Lubrication 75 Exchanging Finger Sets Although time-consuming, corn meters may be, with care, converted to sunflower meters, and vice-versaa. Starting with factory-supplied corn meters, order quantity 16 of: 403-659A SUNFLOWER 12 FINGER CONV KIT Refer to Figure 85 This kit contains a sunflower finger set 1 , Insert C 2 and brushless block 3 .
76 PD8070 Table of Contents Index Great Plains Manufacturing, Inc. Remove Corn Finger Set Refer to Figure 88 6. Straighten and remove the cotter pin 7. Remove the nut cover 8. Remove the nut 3 2 1 4 . . . 9. Remove the corn finger set 4 . 2 3 1 Figure 88 Remove Corn Finger Set 34528 Remove Insert “A” Refer to Figure 89 10. Remove the two screws to the backing plate. 5 that secure the Insert 6 5 11. Lift the insert out of the backing plate. 6 Install Insert “C” 12.
Great Plains Manufacturing, Inc. Table of Contents Index Maintenance and Lubrication 77 Install Sunflower Finger Set 5 Refer to Figure 91 14. Select the finger set 1 from the conversion kit. Sunflower fingers have short square “flags” at the ends of the fingers, compared to corn finger sets, which have longer rounded flags. 3 Place the finger set on the meter shaft. Rotating the finger set and shaft as needed, seat the finger set fully against the back plate.
78 PD8070 Table of Contents Index Great Plains Manufacturing, Inc. Re-Install Corn Finger Set These instructions presume that the sunflower meter was originally a corn meter. Dismount Meter 1. Remove the hoppers from the rows (page 52), and remove the finger pickup meters from the hoppers (page 18). Refer to Figure 86 on page 75 2. Remove three sets of bolts and nuts cover 5 to the meter. 4 Install Corn Finger Set Refer to Figure 91 on page 77 13. Select a saved corn finger set.
Great Plains Manufacturing, Inc. Table of Contents Index Maintenance and Lubrication 79 Brush Meter Maintenance Agricultural Chemical Hazard: Follow material supplier recommendations carefully. Handle the meter as if it were treated seed. use supplier-recommended cleaning agents. Any seed treatment build-up inside a meter is likely to be at a higher concentration than on the actual seed. 3 Refer to Figure 93 and Figure 94 1. During planting days, remove, clean and inspect seed plates 1 daily.
80 PD8070 Table of Contents Index Great Plains Manufacturing, Inc. Seed Plate Maintenance Inspect seed plates for wear and damage. See “Installing Brush Meter Plates” on page 19 for plate removal. Place a straightedge across the planting face of the plate. If the gap between the top outer edge of the plate and the straightedge is greater than 1.9 mm (0.075 inches, 5⁄64 inches), replace the plate. Agricultural Chemical Hazard: Follow material supplier recommendations carefully.
Table of Contents Great Plains Manufacturing, Inc. Index Maintenance and Lubrication 81 Lubrication and Scheduled Maintenance Multi-purpose spray lubricant Multi-purpose grease lubricant Multi-purpose oil lubricant Inspection 50 Intervals (operating hours) at which service is required 34208 Seed Lubricant Per Hopper 8 hoppers See “Loading Materials” on page 24.
82 PD8070 Table of Contents Index Great Plains Manufacturing, Inc.
Table of Contents Great Plains Manufacturing, Inc.
84 PD8070 Table of Contents Index Great Plains Manufacturing, Inc.
Great Plains Manufacturing, Inc.
86 PD8070 Table of Contents Index Great Plains Manufacturing, Inc. Frame-Mounted Vantage II Coulters (Option) Seasonal Two zerks per coulter (pivot and hub), eight coulters per planter; 16 zerks total Type of Lubricant: grease Quantity: until back-pressure detected Equipment Damage Risk: To avoid seal damage, do not inject grease at high pressure.
Table of Contents Great Plains Manufacturing, Inc. Index 87 Options Planter Options Seed Monitor Seed sensors on each row, and the harness to the hitch, are standard on the PD8070 planter. The seed monitor, and speed sensor are optional. The DICKEY-john® PM300 provides real-time row-by-row and seed-by-seed monitoring of your planting, with high and low population alerts. The system includes the in-cab display (shown at right) and tractor harness.
88 PD8070 Table of Contents Index Great Plains Manufacturing, Inc. Gauge Wheel Mud Scrapers The mud scraper removes build-up that might interfere with contact drive wheel rotation. The scraper can also be used on the wheels without contact drives, to prevent build-up from interfering with planting depth. The kit can be mounted with the wheel axle in either hole of the wheel arm. The mud scraper is not recommended when a rock guard is also installed on the same wheel.
Table of Contents Great Plains Manufacturing, Inc. Index Options 89 Frame-Mounted Row Options Frame-Mounted Row Cleaners Terra-Tine™ row cleaners are available in two frame-mounted versions, and also as unit-mount (page 91). They may be ordered with the planter, or installed later. For operation, see “Terra-Tine™ Row Cleaners” on page 42. Stand-Alone Terra-Tine™s This kit includes the frame clamps and shanks. Each part number includes a left and a right assembly.
90 PD8070 Table of Contents Index Great Plains Manufacturing, Inc. Vantage I Fertilizer Coulter Vantage I is a 43 cm (17 inch) disk coulter with applicator for customer-supplied liquid fertilizer. Mounting may be adjusted for zone or in-row application. If fertilizer application is not required, see “Zone Coulters” on page 89. Vantage I may be ordered as Options with the planter, or installed later. For operation, see “Vantage I Frame-Mounted Coulters” on page 43.
Table of Contents Great Plains Manufacturing, Inc. Index Options 91 Unit-Mounted Row Options Heavy Duty Spring Package Heavy-duty springs are available to provide more down pressure on the row unit. Heavy-duty springs provide between 70 and 110 kg (155 and 245 pounds) of down pressure. To adjust spring down pressure, see “Row Unit Down Pressure” on page 46.
92 PD8070 Table of Contents Index Great Plains Manufacturing, Inc. UMC Rigid Tine Row Cleaners Optional single-arm unit-mount rigid tine row cleaners are available as an Option with the planter, or as parts for later installation. One kit includes all 8 row cleaners (4 left, 4 right). This kit requires that unit-mount disk coulters (below) also be installed, as the arms of the cleaners attach to the coulter. If ordering as a Part, also order or download the manual.
Table of Contents Great Plains Manufacturing, Inc. Index Options 93 Seed Tube Brush A seed tube brush is standard on model year 2013 and later planters, and available for older planters. Order the following part for additional or replacement brushes. Description Order Number SEED TUBE CLEANER BRUSH 891-259C 34089 See “Seed Tube Clean-Out” on page 64. Seed Meters Seed meters are required on the PD8070 Planter.
94 PD8070 Table of Contents Index Great Plains Manufacturing, Inc. Brush Meter This singulating meter accepts a variety of interchangeable seed plates. Brush meters may be ordered as an Option with the original planter, or individually for later installation. The base meter does not include plates. Description Option Part Number BRUSH METER ASSY 12 Finger corn + Brush meters (22) (23) 404-048K 403-048A Figure 127 Brush Meter Seed Plates Order quantity 8 of each plate desired.
Table of Contents Great Plains Manufacturing, Inc. Index Options 95 Side Depth Gauge Wheel Scrapers Row unit side depth gauge wheel scrapers are optional on the PD8070 Planter. When planting in moist or sticky soils, these scrapers are useful in preventing build-up that might otherwise result in shallow planting. Order 8 (one per opener). The standard side gauge wheel on the PD8070 Planter is 4 inch.
96 PD8070 Table of Contents Index Great Plains Manufacturing, Inc. Row Unit Press Wheels Press wheels are optional on the PD8070 Planter. One of three types: • double-V 1 inch thick × 12 inch diameter, • single 61⁄2 inch wide × 12 inch diameter with closing disks, or; • double-V cast staggered, may be ordered as an Option with the planter, or later as Parts. If ordering as parts, order one per row (8 total).
Table of Contents Great Plains Manufacturing, Inc. Index 97 Appendix A - Reference Information Specifications and Capacities PD8070 HP Requirements 75-104 kW (100-140 hp) estimated minimum Hydraulic Circuits 2 (closed/open center), 15 Pa, 40 liters/min (2250 psi, 10.63 gallons/min.) Hitch Pull-type Transport Width 6.4 m (21 feet) Working Width 4.9 m (16 feet) Transport Length 4.6 m (15 feet) Transport Clearance 38 cm (15 inches) Transport Height 1.95 m (6 feet 5 inches) Weight (Approx.
98 PD8070 Table of Contents Index Great Plains Manufacturing, Inc.
Great Plains Manufacturing, Inc.
100 PD8070 Table of Contents Index Great Plains Manufacturing, Inc. Torque Values Chart Bolt Head Identification Bolt Head Identification Bolt Size Bolt Size Grade 2 in-tpia Grade 5 Grade 8 N-mb ft-lbd N-m ft-lb N-m ft-lb 1 7.4 5.6 11 8 16 12 1 ⁄4-28 8.5 6 13 10 18 5⁄ 16-18 15 11 24 17 5⁄ 16-24 17 13 26 ⁄4-20 pitchc 5.8 8.8 10.9 Class 5.8 Class 8.8 Class 10.9 N-m ft-lb N-m ft-lb N-m M 5 X 0.
Great Plains Manufacturing, Inc. Table of Contents Index 101 Appendix B - Initial Setup Hydraulic Charge and Bleed 5 Connect the planter to a suitable hydraulic source and check the condition of the hydraulic systems: “Raising/Lowering Planter” on page 27, “Marker Operation” on page 28 1 See “Bleeding Hydraulics” on page 65 if any circuits do not operate smoothly.
102 PD8070 Table of Contents Index Great Plains Manufacturing, Inc. Power-Up The Console Refer to Figure 131 on page 101 1. Connect the monitor power leads 2 to a +12Vdc source. Optionally connect the monitor sensor harness 4 to the planter harness, and the monitor speed sensor lead 3 to the planter speed sensor lead. If the harnesses are not connected, expect an error screen at step 2. Refer to Figure 132 2. Press the power On/Off key . Wait for the power-up screen to complete.
Great Plains Manufacturing, Inc. Table of Contents Index Appendix B - Initial Setup Refer to Figure 136 13. Use the Left and Right Arrow keys ( or ) to select the digits to modify. Use the Up or Down Arrow keys ( or ) to increment or decrement. Change the row count to the table value for your planter model and operating configuration. 14. Press the ENTER count. key to save the correct row 103 a b c Set Planter Row Spacing 15. Press the Down Arrow key Spacing field b .
104 PD8070 Table of Contents Index Great Plains Manufacturing, Inc. Warranty Great Plains Manufacturing, Incorporated warrants to the original purchaser that this seeding equipment will be free from defects in material and workmanship for a period of one year from the date of original purchase when used as intended and under normal service and conditions for personal use; 90 days for commercial or rental purposes.
Table of Contents Great Plains Manufacturing, Inc. Index 105 Index A address .............................................. 11 adjustments ........................................ 30 finger meter .................................. 53 gauge wheel ................................. 50 markers ........................................ 40 opener .......................................... 49 press wheel .................................. 55 rigid r.c. ........................................ 47 row implement .
106 PD8070 H harness ..................................... 16, 101 harness. lighting ................................. 16 headphones ......................................... 2 hearing protection ................................ 2 heavy-duty springs ...................... 46, 91 height, frame ...................................... 17 height, hitch........................................ 17 herbicide .............................................. 2 hex adjuster ................................
Table of Contents Great Plains Manufacturing, Inc. seed lubricants ................................... 87 seed meters ....................................... 93 seed monitor ............................... 16, 87 seed monitor console ....................... 101 seed plates ............................19, 80, 94 seed rate setting ................................ 31 seed treatment ........ 18, 76, 77, 79, 80 seed tube clean-out ........................... 64 sensor harness .........................
108 PD8070 401-479M Table of Contents Index Great Plains Manufacturing, Inc.
Table of Contents Index Table of Contents Index
Table of Contents Index Great Plains Manufacturing, Inc. Corporate Office: P.O.