
Operation Manual

OPERATION OF WIRELESS REMOTE CONTROLLER
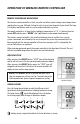
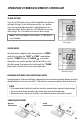
CLOCK BUTTON
Press the CLOCK button to enter Clock Setup Mode. The clock icon
will begin flashing. Set the clock by pressing the + or - buttons.
Press once for slow adjustment; press and hold down for fast
adjustment. When finished, press the CLOCK button to save your
clock settings. This is the current time, not the timer setting.
NOTE:
Clock time adopts 24-hour mode. A 12-hour format
is not available.
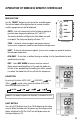
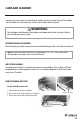
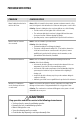
CHANGING BATTERIES AND ADDITIONAL NOTES
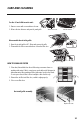
To change batteries, slide cover off battery compartment on back of remote controller. Remove and safely
discard old batteries. Insert two new AAA 1.5V dry batteries, using correct polarity. Reattach back cover.
NOTE:
• If the remote controller will not be used for a long time, remove batteries to prevent leakage damage.
• Be sure to aim the remote controller at the receiver of the main unit when operating.
• When remote emits a signal, icon will flicker; a tone will be heard when unit receives that signal.
Remove
old batteries
Install
new batteries
CHANGING BATTERIES
Clock Display
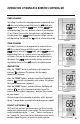
TURBO MODE
The desired room setpoint can be achieved faster in TURBO
mode. After selecting the“HEAT”or“COOL” mode button,
push the“TURBO”button. The TURBO icon will be
displayed on the remote controller and the unit will run at an
ultra-high speed. To deactivate the feature, push the“TURBO”
button again. The unit will return to normal operation.
Turbo Mode Display
14