700 PSI ELECTRIC PRESSURE WASHER GPW1704 Owner’s Manual TOLL-FREE HELPLINE: 1-888-90WORKS (888.909.6757) www.greenworkstools.com Read all safety rules and instructions carefully before operating this tool.
CONTENTS Contents............................................................................................................................... 2 Product specifications........................................................................................................... 2 Safety information................................................................................................................. 3 Symbols............................................................................................
SAFETY INFORMATION WA R N I N G Read and understand all instructions. Failure to follow all instructions listed below may result in electric shock, fire, and/or serious personal injury. WA R N I N G When using this product, basic precautions should always be followed. READ ALL INSTRUCTIONS BEFORE USING THIS PRODUCT • To reduce the risk of injury, close supervision is necessary when a product is used near children. • Be thoroughly familiar with controls.
SAFETY INFORMATION and limitations, as well as the specific potential hazards related to this product. • To reduce the risk of injury, keep children and visitors away. All visitors should wear safety glasses and be kept a safe distance from the work area. • Use the right product for the job. Don’t force the product or the attachments to do a job it was not designed for. Don’t use it for a purpose not intended. • Dress properly. Do not wear loose clothing, gloves, neckties, or jewelry.
SAFETY INFORMATION WA R N I N G High pressure jets can be dangerous if subject to misuse. The jet must not be directed at people, animals, electrical devices, or the machine itself. • Keep the motor away from flammables and other hazardous materials. • Check bolts and nuts fixing the pressure washer shell for looseness before each use. A loose bolt or nut may cause serious motor problems. • Before storing, allow the motor to cool. • When servicing use only identical replacement parts.
SYMBOLS Some of the following symbols may be used on this product. Please study them and learn their meaning. Proper interpretation of these symbols will allow you to operate the product better and safer. SYMBOLS DESIGNATION EXPLANATION V Volts Voltage A Amperes Current Hz Hertz Frequency (cycles per second) W Watts Power no No Load Speed Rational speed, at no load Alternating Current Type of current Per Minute Revolutions, strokes, surface speed, orbits, etc.
SYMBOLS The following signal words and meanings are intended to explain the levels of risk associated with this product. SYMBOL SIGNAL MEANING DANGER Indicates an imminently hazardous situation, which, if not avoided, will result in death or serious injury. WARNING Indicates a potentially hazardous situation, which, if not avoided, could result in death or serious injury. CAUTION Indicates a potentially hazardous situation, which, if not avoided, may result in minor or moderate injury.
ELECTRICAL ELECTRICAL CONNECTION This product has a precision-built electric motor. It should be connected to a power supply that is 120 volts, 60 Hz, AC only (normal household current). Do not operate this product on direct current (DC). A substantial voltage drop will cause a loss of power and the motor will overheat. DRIP LOOP To prevent water from flowing along the power cable, and possibly reaching the electrical outlet and plug, we recommend using a simple drip loop as shown below.
KNOW YOUR PRESSURE WASHER The safe use of this product requires an understanding of the information on the tool and in this operator’s manual as well as a knowledge of the project you are attempting. Before use of this product, familiarize yourself with all operating features and safety rules.(See Figure 2.) ON/OFF Switch Spray tip Water outtake Water intake Wand Trigger handle Detergent tank Fig. 2 DETERGENT TANK Remove the cap from the detergent tank to add detergent to the pressure washer.
PACKING LIST PART NAME FIGURE PART NO. Pressure Washer 1 Soap tank 1 Trigger Assembly 1 Spray Wand 1 Turbo Nozzle 1 Spray Tip Cleaning Tool 1 High pressure hose 1 Power cord 1 Operator’s Manual 1 WARNING: This Quick Start Guide is not a substitute for reading the operator's manual. To reduce the risk of injury or death, user must read and understand operator's manual before using this product. Installing the wheels Insert the axle through the wheel.
ASSEMBLY UNPACKING This product requires assembly. • Carefully remove the product and any accessories from the box. Make sure that all the contents from the packaging list are included. • Inspect the product carefully to make sure no breakage or damage occurred during shipping. • Do not discard the packing material until you have carefully inspected and satisfactorily operated the product. • If any parts are damaged or missing, please call 1-888-909-6757 for assistance.
ASSEMBLY ASSEMBLING THE SPRAY WAND See Figure 3. • Push the end of the spray wand into the trigger handle and rotate clockwise to secure. • Pull on the spray wand to be certain it is properly secured. Fig. 3 CONNECTING HIGH PRESSURE HOSE TO TRIGGER HANDLE See Figure 4. • Align the pressure hose with the trigger handle and push up and into position. • With hose pushed into position on the trigger handle, secure in place by turning the hose lock clockwise until fully tightened.
ASSEMBLY CONNECTING HIGH PRESSURE HOSE TO PRESSURE WASHER See Figure 5. • Connect one end of the hose to the water outlet connector and the other end to the trigger gun. Outlet Connector High pressure hoseL Fig. 5 CONNECTING THE GARDEN HOSE See Figure 6. C A U T I O N Always observe all local regulations when connecting hoses to the water main. Some areas have restrictions against connecting directly to public drinking water supply to prevent the feedback of chemicals into the drinking water supply.
OPERATION WA R N I N G Do not allow familiarity with tools to make you careless. Remember that a careless fraction of a second is sufficient to inflict serious injury. WA R N I N G Always wear eye protection with side shields marked to comply with ANSI Z87.1. Failure to do so could result in objects being thrown into your eyes resulting in possible serious injury. WA R N I N G Do not use any attachments or accessories not recommended by the manufacturer of this tool.
OPERATION Fig. 7 C A U T I O N Use only approved pressure washer cleaners. Do not use bleach, chlorine,or any cleaners containing acids. NOTE: Use a funnel, if needed, to prevent accidental spilling of the detergent outside the tank. If any detergent is spilled during the filling process, make sure the unit is cleaned and dried before proceeding. STARTING AND STOPPING THE PRESSURE WASHER See Figure 8. C A U T I O N Do not run the pump without the water supply connected and turned on.
OPERATION C A U T I O N Hold the trigger handle securely with both hands. Expect the trigger handle to move when the trigger is pulled due to reaction forces. Failure to do so could cause loss of control and injury to yourself and others. NOTE: AUTO ON/OFF SWITCH: This pressure washer is equipped with an auto start/stop feature. To operate: Set the power switch to the On (I) position. Pump will pressurize and shut down immediately. Once the trigger of the gun is depressed, the unit will turn on.
OPERATION USING THE SPRAY TIPS (See Figure 9) Each of the spray tips has a different spray pattern. Before starting any cleaning job, determine the best spray tip for the job. The following chart offers some general guidelines to help you choose the best spray tip for your application. NOTE: Always try spray tip in an inconspicuous area first. • Turn off the pressure washer and shut off the water supply. Pull trigger to release water pressure.
OPERATION WA R N I N G NEVER change spray tips without engaging the lock-out on the trigger handle and NEVER point the wand at your face or at others. The quick-connect feature contains small springs that could eject the spray tip with some force. Failure to heed this may cause personal injury. TO DISCONNECT A SPRAY TIP FROM THE SPRAY WAND ONCE THE CLEANING JOB IS COMPLETE: • Turn off the pressure washer and shut off the water supply. Pull trigger to release water pressure.
OPERATION OPERATING THE PRESSURE WASHER (See Figure 11) Use only detergents designed for pressure washers. Many detergents may require mixing prior to use. Prepare cleaning solution as instructed on the solution bottle. • Turn the garden hose on then squeeze the high pressure trigger to relieve air pressure. Once a steady stream of water appears, release the trigger. • After ensuring the switch is in the OFF position, connect the pressure washer to the power supply.
MAINTENANCE WA R N I N G When servicing, use only identical replacement parts. Use of any other parts may create a hazard or cause product damage. WA R N I N G Before inspecting, cleaning or servicing the machine, turn off the unit, unplug from the outlet, pull trigger to release water pressure and disconnect the high pressure hose. Failure to follow these instructions can result in serious personal injury or property damage.
MAINTENANCE STORING THE PRESSURE WASHER Store in a dry, covered area where the weather can’t damage it. It is important to store this product in a frost-free area. Always empty water from all hoses, the pump, and the detergent container before storing. NOTE: Use of a pump saver will give you better performance and increase the life of the machine. QUICK WINTERIZING PROCEDURE You can protect your pressure washer from winter damage by doing below: • Disconnect all water connections.
TROUBLESHOOTING PROBLEM Motor will not start. Unit does not reach high pressure. POSSIBLE CAUSE SOLUTION On/Off switch is in the “OFF” (O) position. Power cord is not plugged in. Set switch to the “ON” ( | ) position. Plug in power cord. Electrical outlet does not supply adequate power. Tripped pressure washer circuit breaker. Power switch is ON however gun trigger is not squeezed ON. Diameter of garden hose is too small. Water supply is restricted. Not enough water supply. Try a different outlet.
WARRANTY Greenworks® hereby warranties this product, to the original purchaser with proof of purchase, for a period of one (1) years against defects in materials, parts or workmanship. Greenworks®, at its own discretion will repair or replace any and all parts found to be defective, through normal use, free of charge to the customer.
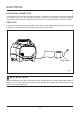
EXPLODED VIEW 24
PARTS LIST ITEM NO. 1 2 3 4 PART NO.
Greenworks Tools PO Box 1238 Mooresville, NC 28115 TOLL-FREE HELPLINE: 1-888-909-6757 Rev: 00 (01-11-18) Printed in China on 100% Recycled Paper