
User manual


E44.X.00.6C-02 Connection and operating manual GIR 300 page 20 of 28
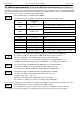
- Press button 1 to validate the selected output function. The display shows “outP“ again.
Depending on your output function setting, it may be possible that one or more settings described below won’t be
available.
- When pressing button 1 again, the device will display “1.dEL“ (delay of output 1).
- Use button 2 and button 3 to set the desired value for the switching-delay of output 1.
Hint: The selected value [0.01 ... 2.00] will be in seconds.
- Press button 1 to validate the selection. The display shows “1.dEL“ again.
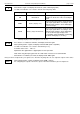
- When pressing button 1 again, the device will display “1.Err“ (preferred state of output 1).
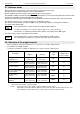
- Use button 2 and button 3 (middle or right button) to set the desired initial state in case of an error.
Display
Preferred state of the output
Notes
off
Inactive in case of an error
(contact is open)
on
Active in case of an error
(contact ist closed)
- Press button 1 to validate the selection. The display shows “1.Err“ again.
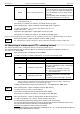
- In case you selected a 3-point-controller you have to make the following settings similar to the settings
you already made for output 1:
“2.dEL“ (delay of output 2) and
“2.Err“ (preferred state of output 2).
Depending on the selected output function you have to make the settings for switching and alarm points.
See description in chapter 6 „Switching points and alarm-boundaries“ for further information.
Hint: The settings for the switching and alarm points can be made later in an extra menu (see chapter 6)
1.DEL
1.ERR
2.DEL
2.ERR