
Use and Care Manual


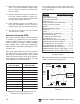
Table Of Contents

G0548ZP, G1028Z2, G1029Z2-Z2P (Mfg. 12/12+)
-23-
Figure 36. Installing "Y" inlet.
x 1
13. Remove the pre-installed screw from the inlet
cover, and secure the adapter to the cover
flange with the screw (see Figure 36).
11. Apply the 6 x 20 foam strip to the bottom of
the collector, then trim the excess and evenly
match the ends (see Figure 34).
12. Slip the plastic collection bag over the bottom
edge of the collector, snag it on the metal
hooks, and then tighten the clamp at the tight-
est notch possible (Figure 35).
Note: DO NOT force the clamp, If it is too
tight, choose the next notch over, then clamp
it in place.
Figure 35. Installing the lower bag.
Figure 34. Example of 6 x 20 foam strip
installed.
6 x 20 Foam Strip
Power Connection
After you have completed all previous setup
instructions and circuit requirements, the machine
is ready to be connected to the power supply.
To prevent accidental damage to the power cord,
make sure it is kept away from potential damage
sources at all times — whether connected or not.
Potential damage sources include high traffic
areas, sharp objects, heat sources, harsh chemi-
cals, water, damp areas, etc.
To avoid unexpected startups or property dam-
age, use the following steps whenever connecting
or disconnecting the machine.
Connecting Power
1. Turn the machine power switch OFF.
2. Insert the power cord plug into a matching
power supply receptacle. The machine is
now connected to the power source.
Figure 37. Connecting power.
Disconnecting Power
Figure 38. Disconnecting power.
1. Turn the machine power switch OFF.
2. Grasp the molded plug and pull it completely
out of the receptacle. Do not pull by the cord
as this may damage the wires inside.