
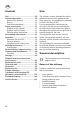
Instructions


GB
57
functionality, method of op-
eration and best practices to
you. Make sure you can im-
mediately shut o the appli-
ance in case of emergency.
Improper use of the appli-
ance may cause serious
injury.
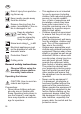
Symbols in the manual
Warning symbols with in-
formation on damage and
injury prevention
Instruction symbols (the
instruction is explained at
the place of the exclamation
mark) with information on
preventing damage
Help symbols with informa-
tion on improving tool han-
dling
Symbols on the trimmer
Caution!
Read the operating instruc-
tions carefully.
Wear eye and ear protection
Do not expose the equip-
ment to the damp. Do not
work in the rain and do not
cut wet grass.
The cutting head will
continue to rotate for
a few seconds after
the equipment has
been switched o. Keep hands
and feet well away.
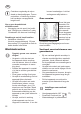
Survey
1 Power cable
2 Upper handle
3a Switch lock
3b ON / OFF switch
4 Strain relief
5 Additional handle
6 Knurled nut and screw
7 Handle rod
8 Clamp for handle section
(length) adjustment
9 Telescopic tube
10 Foot lever for adjusting the angle
of inclination
11 Motor head
12 Chassis
13 Cutter head with line spool or
cutting thread
14 Spacing bow (ower protection)
15 Castor roll
16 Cord cutter (not visible)
Functional description
The portable, hand-guided lawn trimmer is
powered by an electric motor. The trimmer
features a dual line spool as the cutting
device.
For grass trimming there are two nylon
threads rotating parallel with the ground
or, for vertical edge trimming, roughly per-
pendicular to the ground.
The following describes the functions of
the operating parts.
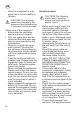
Safety instructions
Before starting to use the
appliance you should know
and understand all its parts.
Practice using the appliance
and have an experienced
user or expert explain its