Akku-Rasentrimmer Cordless Lawn Trimmer Accu-gazontrimmer Coupe bordure à accu Tosaerba a batteria Akumulatorowa przycinarka do trawników Aku strunová sekačka Akumuliatorinė vejapjovė DE GB NL FR IT PL CZ LT ART 2420 Lion ART 2420 Lion Set Originalbetriebsanleitung Translation of the original instructions for use Vertaling van de originele gebruiksaanwijzing Traduction de la notice d’utilisation originale Traduzione delle istruzioni per l’uso in originale Tłumaczenie oryginalnej instrukcji obsługi Překla
1 2 3 4 5 6 7 8 9 17 10 19 11 18a 16 18 12 15 14 13 6 20 5 14 18 11 2 18a
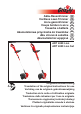
5 6 9 10 10 11 16 I 21 21 15 17 22 7 0° 180° 8 90° 23 13 13 15 14 12 3
DE Originalbetriebsanleitung............................................5 GB Translation of the original instructions for use.......22 NL Vertaling van de originele gebruiksaanwijzing........39 FR Traduction de la notice d’utilisation originale.........56 IT Traduzione delle istruzioni per l’uso in originale....74 PL Tłumaczenie oryginalnej instrukcji obsługi.............91 CZ Překlad originálního návodu k obsluze..................109 LT Vertimas iš originalių eksploatavimo instrukcijoje..
DE Inhalt Einleitung................................................5 Bestimmungsgemäße Verwendung......5 Allgemeine Beschreibung.....................5 Lieferumfang........................................6 Übersicht..............................................6 Funktionsbeschreibung........................6 Technische Daten...................................6 Sicherheitshinweise...............................7 Symbole und Bildzeichen.....................7 Allgemeine Sicherheitshinweise..........
DE Lieferumfang Packen Sie das Gerät aus und kontrollieren Sie, ob es vollständig ist: Lieferumfang bei Art.-Nr. 72035203 Gerät OHNE Akku - Akku-Rasentrimmer - Schutzabdeckung mit drei Schrauben - Zusatzgriff - Originalbetriebsanleitung Lieferumfang bei Art.-Nr.
DE Ladegerät................HYCHO132400500G Eingangsspannung/ Input ...........100-240V; ~50/60Hz; 0,32 A Ausgangsspannung/ Output ............................... 24V 0,5 A Schutzklasse....................................... II Schutzart............................................IPX0 Lärm- und Vibrationswerte wurden entsprechend den in der Konformitätserklärung genannten Normen und Bestimmungen ermittelt.
DE Entfernen Sie den Akku vor Wartungsarbeiten. LWA dB Angabe des Schallleistungspegels LWA in dB Elektrogeräte gehören nicht in den Hausmüll. Symbole in der Anleitung: Gefahrenzeichen mit Angaben zur Verhütung von Personenoder Sachschäden. Elektrogeräte gehören nicht in den Hausmüll. Schnittkreis Gebotszeichen (anstelle des Ausrufungszeichens ist das Gebot erläutert) mit Angaben zur Verhütung von Schäden. Bildzeichen auf dem Akku: Werfen Sie den Akku nicht in den Hausmüll, ins Feuer oder ins Wasser.
DE • • • • • • Erlauben Sie niemals Kindern oder anderen Personen, die die Betriebsanleitung nicht kennen, das Gerät zu benutzen. Örtliche Bestimmungen können das Mindestalter der Bedienungsperson festlegen.
DE • • • • • • 10 - Sie das Gerät nicht benutzen, - es unbeaufsichtigt lassen, - es reinigen, warten oder vor Prüfungen, - es von einer Stelle zur anderen transportieren, - die Netzanschluss- oder Verlängerungsleitung beschädigt ist, - Sie die Schneidevorrichtung abnehmen oder auswechseln sowie mit der Hand die Länge des Schneidfadens einstellen.
DE Benutzen Sie das Gerät nicht, wenn Sicherheitseinrichtungen, Teile der Schneideinrichtung oder Bolzen fehlen, abgenutzt oder beschädigt sind. Elektrische Sicherheit: Vorsicht: So vermeiden Sie Unfälle und Verletzungen durch elektrischen Schlag: • • • • • Überprüfen Sie vor jeder Benutzung die Netzanschlussleitung und die Verlängerungsleitung auf Schäden und Alterung. Benutzen Sie das Gerät nicht, wenn die Netzanschlussleitung beschädigt oder abgenutzt ist.
DE SORGFÄLTIGER UMGANG MIT UND GEBRAUCH VON AKKUWERKZEUGEN a) Laden Sie die Akkus nur in Ladegeräten auf, die vom Hersteller empfohlen werden. Für ein Ladegerät, das für eine bestimmte Art von Akkus geeignet ist, besteht Brandgefahr, wenn es mit anderen Akkus verwendet wird. b) Verwenden Sie nur die dafür vorgesehenen Akkus in den Elektrowerkzeugen. Der Gebrauch von anderen Akkus kann zu Verletzungen und Brandgefahr führen.
DE • • • • • • • • für ihre Sicherheit zuständige Person beaufsichtigt oder erhalten von ihr Anweisungen, wie das Gerät zu benutzen ist. Kinder sollten beaufsichtigt werden, um sicherzustellen, dass sie nicht mit dem Gerät spielen. Verwenden Sie zum Laden des Akkus ausschließlich das mitgelieferte Ladegerät. Es besteht Brand- und Explosionsgefahr.
DE c) Gesundheitsschäden, die aus HandArm-Schwingungen resultieren, falls das Gerät über einen längeren Zeitraum verwendet wird oder nicht ordnungsgemäß geführt und gewartet wird. Warnung! Dieses Elektrowerkzeug erzeugt während des Betriebs ein elektromagnetisches Feld. Dieses Feld kann unter bestimmten Umständen aktive oder passive medizinische Implantate beeinträchtigen.
DE Akku aufladen Lassen Sie einen frisch entladenen Akku (18) ca. 15 Minuten abkühlen, bevor Sie ihn in das Ladegerät (19) einsetzen. B 1. Nehmen Sie gegebenenfalls den Akku (18) aus dem Gerät. 2. Schieben Sie den Akku (18) in den Ladeschacht des Ladegerätes (19). Er rastet hörbar ein. 3. Schließen Sie das Ladegerät (19) an eine Steckdose an. 4. Nach erfolgtem Ladevorgang trennen Sie das Ladegerät (19) vom Netz. 5.
DE Beachten Sie den Lärmschutz und örtliche Vorschriften. Ein- und Ausschalten Achten Sie auf einen sicheren Stand und halten Sie das Gerät mit beiden Händen und mit Abstand vom eigenen Körper gut fest. Achten Sie vor dem Einschalten darauf, dass das Gerät keine Gegenstände berührt. 1. Vergewissern Sie sich, dass der Akku (18) eingesetzt ist 2. Zum Einschalten betätigen Sie mit dem Daumen die Einschaltsperre (3) und drücken dann den Ein-/Ausschalter (2). Lassen Sie die Einschaltsperre wieder los. 3.
DE Faden verlängern Ein kurzer oder abgenutzter Faden schneidet schlecht. Kontrollieren Sie daher bei nachlassenderSchnittleistung, ob die Fadenspule noch genügend Faden aufweist. as Auswechseln der Spule ist im Kapitel „Auswechseln der Schneideinrichtung“ beschrieben. Einzelfaden-Automatik Ihr Gerät ist mit einer Einzelfaden-Automatik ausgerüstet. Der Faden verlängert sich automatisch bei jedem Einschaltvorgang.
DE Senkrechtschnitt/ Rasenkantentrimmen Bei senkrecht geführtem Schneidkopf ist besondere Vorsicht und Aufmerksamkeit geboten. Halten Sie genügend Abstand zur Schneideinrichtung, um Verletzungen zu vermeiden. G H Einstellungen für den Senkrechtschnitt: Zum Schneiden von Böschungen und steilen Hängen führen Sie das Gerät langsam nach rechts und links.
DE ble Schäden am Gerät verursachen und führt unverzüglich zum Verfall der Garantie. J Fadenspule auswechseln: I 1. Schalten Sie das Gerät aus und nehmen Sie den Akku ( A 18) aus dem Gerät. 2. Drehen Sie das Gerät um, so dass sich der Schneidkopf (13) oben befindet. 3. Drücken Sie gleichzeitig die beiden Arretierungen an der Haube (21) und nehmen Sie diese ab. 4. Nehmen Sie die Fadenspule (17) vom Schneidkopf ab. 5.
DE Entsorgung/ Umweltschutz Nehmen Sie den Akku aus dem Gerät und führen Sie Gerät, Akku, Zubehör und Verpackung einer umweltgerechten Wiederverwertung zu. Elektrische Geräte gehören nicht in den Hausmüll. Werfen Sie den Akku nicht in den Hausmüll, ins Feuer (Explosionsgefahr) oder ins Wasser. Beschädigte Akkus können der Umwelt und ihrer Gesundheit schaden, wenn giftige Dämpfe oder Flüssigkeiten austreten. • • • • • 20 Geben Sie das Gerät und das Ladegerät an einer Verwertungsstelle ab.
DE Garantie Reparatur-Service Für dieses Gerät leisten wir 24 Monate Garantie. Dieses Gerät ist nicht zur gewerblichen Nutzung geeignet. Bei gewerblichem Einsatz erlischt die Garantie. Schäden, die auf natürliche Abnützung, Überlastung oder unsachgemäße Bedienung zurückzuführen sind, bleiben von der Garantie ausgeschlossen. Bestimmte Bauteile unterliegen einem normalen Verschleiß und sind von der Garantie ausgeschlossen. Die Garantie gilt für Material- oder Fabrikationsfehler.
DE Fehlersuche Problem Gerät startet nicht Mögliche Ursache Fehlerbehebung Akku (18) entladen Akku (18) laden (siehe „Ladevorgang“) Akku (18) nicht eingesetzt Akku (18) einsetzen (siehe „Bedienung“) Ein-/Ausschalter ( defekt Reparatur durch Service-Center A 2) Motor defekt Gerät arbeitet mit Unterbrechungen Starke Vibrationen Starke Geräusche Schlechtes Schneidergebnis 22 Interner Wackelkontakt Ein-/Ausschalter ( defekt A 2) Fadenspule ( schmutzt A 17) ver- Fadenspule ( A 17) defekt
GB Content Introduction Introduction...........................................23 Intended purpose.................................23 General description..............................23 Extent of the delivery........................23 Overview..........................................24 Functional description......................24 Technical data.......................................24 Safety instructions...............................25 Symbols and icons...........................
GB Scope of Delivery for Prod. No. 72035202 Device WITH battery - Battery-operated lawn trimmer - Protective cover with three screws - Auxiliary handle - Battery charger - Battery - Translation of the original instructions for use Dispose of the packaging material correctly.
GB Noise and vibration values have been determined according to the standards and regulations mentioned in the declaration of conformity. Technical and optical changes may be undertaken in the course of further development without notice. All dimensions, references and information in this instruction manual are therefore not guaranteed. Legal claims made on the basis of the instruction manual can therefore not be considered as valid.
GB Symbols on the battery Do not dispose of batteries in household waste, fire or water. Do not subject the battery to strong sunlight over long periods and do not leave it on a heater (max. 60°C). Take batteries to an old battery collection point where they will be recycled in an environmentally friendly manner. Help symbols with information on improving tool handling. General safety instructions Observe! When using the machine, please observe the safety instructions.
GB • • Always wear appropriate work clothes and personal protective equipment! Always wear a face shield or goggles as well as ear defenders, boots or shoes with non-slip soles, strong long trousers and work gloves. Never operate the equipment while bare footed or wearing sandals.
GB • • Do not operate the equipment in the vicinity of inflammable liquids or gases as this could give rise to the danger of a fire or explosion. Store the equipment in a dry place that is not accessible to children. CAUTION! The following states how damage to the equipment and possible injury to people can be avoided: Taking care of the equipment: • Ensure that the ventilation openings are not clogged. • Only use spare parts and accessories that have been supplied or recommended by the manufacturer.
GB • • the power cable is always trailing behind the operator. The extension cable can be accidentally severed. Use the envisaged cable suspensions when attaching an extension cable. Never carry the equipment by its power cable. Never pull the cable to disconnect the plug from the mains socket. Protect the cable from heat, oil and sharp edges. The mains power cable could be damaged.
GB • • • • • • • • • • 30 To charge the battery, use only the charger supplied. Risk of fire and explosion. This ensures that the safety of the device is maintained. Before each use, check the charger, cable and plug and have them repaired by qualified professionals and only with original parts. Do not use a defective charger and do not open it up yourself. This ensures that the safety of the device is maintained. Connect the charger only to a socket with an earth.
GB Charging the battery Do not expose the battery to extreme conditions such as heat or impact. Risk of injury from escaping electrolytic solution! After eye/skin contact, rinse the affected areas with water or a neutraliser and consult a doctor. Charge the battery in a dry room only. Prior to attaching the charger, check that the battery‘s outer surface is clean and dry. There is a risk of injury due to electric shock. Only use the original charger from the package to charge the battery.
GB Indicator charge level (Battery 24 V, 4 Ah) 3. Screw down the screw (6) in the auxiliary handle (5). Operation Press the „Press“ button on the right of charging level indicator in order to check the status of the battery. The number of illuminated LED lights shows the charge level of the battery. 4 lights means battery is fully charged. 1 light means that the battery needs to be charged.
GB slow down the moving cutting insert. Risk of injury! F Trimmer settings To adjust the auxiliary handle: The auxiliary handle can be set to various positions. Set the handle in such a manner that the cutting head ( 13) is slightly tilting forwards when in the working position. Loosen the screw (6) in the handle and move the auxiliary handle (5) to your favourite position. Tighten the screw in the handle.
GB Adjusting the line length manually: • Switch off the device and remove the battery ( 18) from the device. Press the retaining head ( I 17) release it again and pull the ends of the cord out. enough distance to the trimming assembly. G Manner of operation WARNING. Danger of injury! • Do not cut moist or wet grass. • Before starting the trimmer check that the cutting head will not come into contact with stones, rubble or other foreign bodies.
GB • After every trimming session, remove grass and soil from the protective cover and the trimming assembly. outlet eye (22). Pay attention that the string end does not slip off the grooves of the spool. 6. Return the hood.Ensure that the locks of the hood are accurately inserted in the corresponding recesses of the cutting head. They lock in audibly. 7. Keep the latch button (23) pressed and pull out the string end far enough so that it protrudes over the string cutter (15).
GB • • • • Remove the rechargeable battery from the device before storing the device. Store the battery only in a partially charged state. The state of chargeshould be 40 – 60 % over a longer storage period. During a longer storage period, check the state of charge of the battery and recharge if necessary roughly every 3 months. Store the equipment between 10° C and 25° C. During storage, avoid extreme cold or heat so the battery does not lose power.
GB Alternatively, you can also purchase a 1.6-mm thick nylon string from a specialised retailer and wind it up on the string spool yourself. In that case, be sure that you roll up the string and wind it into the string channel counter to the motor rotation direction. The motor rotation direction is marked with an arrow on the protective cover. Guarantee This appliance has a 24-month guarantee. This equipment is not suitable for commercial use. Commercial use will invalidate the guarantee.
GB Trouble shooting Problem Appliance won‘t start Possible cause Corrective action Battery (18) discharged Recharge battery (18) (see „Charging“) Battery (18) not in Insert battery (18) (see „Operation“) On/Off switch ( fective Send in to Service Centre for repair A 2) de- Motor defective Intermittent operation Much vibration Loud noise Bad trim Internal loose contact On/Off switch (2) defective Spool ( A 17) is dirty Clean spool (see „Cleaning and servicing“) Spool ( A 17) is defectiv
NL Inhoud Introductie ............................................39 Gebruik..................................................39 Algemene beschrijving........................39 Omvang van de levering..................40 Overzicht..........................................40 Funktiebeschrijving..........................40 Technische gegevens..........................40 Veiligheidsvoorschriften......................41 Symbolen en pictogrammen ...........41 Algemene veiligheidsinstructies.......42 Laadprocédé.
NL Omvang van de levering 13 14 15 16 Snoeikop met draadspoel Beschermende afdekking Draadsnijder (verborgen) Grendel voor de verstelling van de hellingshoek 17 Draadspoel 18 Accu 19 Laadtoestel Pak het apparaat uit en controleer, of de inhoud volledig is: Leveringsinhoud bij art.nr. 72035203 Apparaat ZONDER accu - Accu-gazontrimmer - Beschermende afdekking met drie schroeven - Bijkomende handgreep - Vertaling van de originele gebruiksaanwijzing Leveringsinhoud bij art.nr.
NL Accu (Li-Ion).............................24LB2004 Nominale spanning......................... 24 V Capaciteit.........................................2,0 Ah Laadtijd............................................ca. 8 u Laadtoestel............ HYCHO132400500G Ingangsspanning/ Input ..........100-240V; ~50/60Hz; 0,32 A Uitgangsspanning/Output ..... 24 V 0,5 A Beschermniveau.................................. II Beschermingsklasse..........................
NL Houdt een veiligheidsafstand tot andere personen en dieren. Zij zouden door weggeslingerde vreemde voorwerpen gewond kunnen raken. Verwijder de accu vóór onderhoudswerkzaamheden. LWA dB Beveiligingsklasse II Machines horen niet bij huishoudelijk afval thuis. Symbolen in de gebruiksaanwijzing Gevaarsymbool met informatie over de preventie van personenof zaakschade.
NL • • • • • • Sta nooit toe dat kinderen of andere personen, die de bedieningshandleiding niet kennen, het apparaat gebruiken. Lokale bepalingen kunnen de minimumleeftijd van de persoon, die met het apparaat werkt, vastleggen.
NL - • • • • • • • • 44 u de snijdinrichting verwijdert of verwisselt en ook als u met de hand de lengte van de snijddraad instelt. Zorg ervoor dat de snijdkop bij het aanschakelen en tijdens het werken niet met stenen, keien, draad of andere vreemde voorwerpen in aanraking komt. Gevaar voor verwondingen door weggeslingerde onderdelen. Wees voorzichtig voor verwondingen aan iedere technische voorziening, die voor het afknippen van de draadlengte dient.
NL • • • • • • • • Controleer telkens vóór gebruik het netaansluitingssnoer en de verlengkabel op beschadigingen en veroudering. Gebruik het apparaat niet als de kabel beschadigd of versleten is. Beschadigde netaansluitingssnoeren verhogen het risico op een elektrische schok. Houdt U de verlengleidingen van de snijwerktuigen verwijderd. Wordt de leiding gedurende het gebruik beschadigd, scheidt u deze onmiddellijk van het net. DE LEIDING NIET AANRAKEN, ALVORENS DEZE VAN HET NET GESCHEIDEN IS.
NL d) Bij verkeerd gebruik kan vloeistof uit de accu vrijkomen. Vermijd contact daarmee. Bij toevallig contact met water afspoelen. Als de vloeistof in de ogen komt, moet u bovendien een arts consulteren. Vrijkomende accuvloeistof kan tot geïrriteerde huid of brandwonden leiden. SERVICE a) Laat uw elektrisch gereedschap uitsluitend door gekwalificeerd, vakkundig geschoold personeel en enkel met originele reserveonderdelen repareren.
NL • • • • • • • • Houd de acculader zuiver en uit de buurt van vocht en regen. Gebruik de acculader nooit in de openlucht. Door vervuiling en het binnendringen van water vergroot het gevaar voor een elektrische schok. De acculader mag alleen met de bijbehorende originele accu’s gebruikt worden. Het laden van andere accu’s kan tot verwondingen en brandgevaar leiden. Vermijd mechanische beschadigingen van de acculader. Zij kunnen tot kortsluiting leiden.
NL Laad de accu uitsluitend in droge lokalen op. Het buitenste oppervlak van de accu moet schoon en droog zijn voordat u het laadtoestel aansluit. Er bestaat gevaar voor verwondingen door een elektrische schok. Laad uitsluitend met het ingesloten, originele laadtoestel op. Let erop dat het apparaat niet langer dan 8 uur ononderbroken opgeladen wordt. De accu en het apparaat zouden beschadigd kunnen worden en bij een langere laadtijd verbruikt u onnodig energie.
NL Verbruikte accu’s • Een beduidend kortere werkingsduur ondanks oplading geeft aan dat de accu opgebruikt is en vervangen moet worden. Gebruik uitsluitend een origineel reserve accupack, dat u via de klantenserviceafdeling kunt verkrijgen. Neem in ieder geval de telkens geldende veiligheidsinstructies en ook de bepalingen en aanwijzingen met betrekking tot de bescherming va het milieu in acht (zie “Reiniging en onderhoud”).
NL F Instellingen aan het apparaat Extra handgreep verstellen: U kunt de extra handgreep in verschillende posities brengen. Stel de handgreep zodanig in, dat de snoeikop ( 13) in de werkhouding lichtjes voorwaarts helt. Maak de handgreepschroef (6) los en breng de extra handgreep (5) in de gewenste positie. Draai de handgreepschroef weer vast aan. Hoogte verstellen: De telescopische buis maakt het voor u mogelijk, het apparaat op uw individuele lichaamslengte in te stellen.
NL Als er geen draaduiteinde zichtbaar wordt: • Vervanging von de spoel (zie Reiniging en onderhoud “Vervangen van de snijdinrichting”). van ca. 30° naar voren. Maai lang gras in lagen van boven naar onder. Verticaal maaien/trimmen van gazonkanten Draadlengte handmatig instellen: • Schakel het apparaat uit en haal de accu ( 18) uit het apparaat. Druk op de vergrendelknop (zie I 17) onder het draaduitloop-oog en trek de draad naar buiten.
NL len draden. Het gebruikvan niet Grizzly onderdelen kanverwondingen veroorzaken enonherstelbare schade aan het apparaat aanrichten. Tevens vervalt dan de garantie. Voer volgende reinigings- en onderhoudswerkzaamheden regelmatig door. Daardoor is een lang en gebruikbaar gebruik gegarandeerd. Reiniging Het water mag noch met water afgespoten, noch in water gelegd worden. Het gevaar voor een elektrische schok bestaat! • • Houd ventilatiesleuven, motorhuis en handgrepen van het apparaat netjes.
NL J 1. Schakel het apparaat uit en haal de accu ( A 18) uit het apparaat. 2. Schroef de draadsnijder (15) van de beschermende afdekking (14) af. 3. Schroef de nieuwe draadsnijder (15) aan de beschermende afdekking vast Verwerking en milieubescherming Neem de accu uit het toestel en breng het toestel, de accu, de accessoires en de verpakking naar een milieuvriendelijke recycling. Machines horen niet bij huishoudelijk afval thuis. Bewaring • • • • • • • • Reinig het apparaat voordat u het bewaart.
NL Vervangstukken Reserveonderdelen en accessoires verkrijgt u op www.grizzly-service.eu Indien u geen Internet hebt, neem dan telefonisch contact op met het ServiceCenter (zie „Service-Center“). Hou de onderstaande bestelnummers klaar. Draadspoel Set..........................91104379 Accu, 24 V, 2 Ah......................... 80001190 Accu, 24 V, 4 Ah......................... 80001191 Laadtoestel.................................80001085 Snellader....................................
NL Foutmeldingen Probleem Apparaat start niet Mogelijke oorzaak Oplossing van de fout Accu (18) ontladen Accu (18) laden (zie „Laadprocédé“) Accu (18) niet aangebracht Accu (18) aanbrengen (zie „Bediening“) Schakelaar “Aan/uit” ( A 2) defect Motor defect Intern loszittend contact Apparaat werkt met Schakelaar “Aan/uit” ( A 2) onderbrekingen defect Reparatie door servicecenter Reparatie door servicecenter Spoel ( A 17) vervuild Sterke trillingen Hevige geluiden Spoel ( Spoel reinigen (zie „
FR Sommaire Introduction.......................................... 56 Fins d’utilisation.................................. 56 Description générale........................... 56 Volume de la livraison..................... 57 Vue synoptique................................ 57 Description du fonctionnement........ 57 Données techniques........................... 57 Instructions de sécurité...................... 58 Symboles et pictogrammes............. 58 Consignes de sécurité générales....
FR Volume de la livraison 13 14 15 16 Tête de coupe avec bobine de fil Carter de protection Coupe-fil (non visible) Verrou pour réglage de l’angle d’inclinaison 17 Bobine de fil 18 Accumulateur 19 Chargeur Déballez l’appareil et vérifiez que la livraison est complète : Matériel livré d‘origine pour la réf. 72035203, Appareil SANS batterie - Coupe bordure à accu - Carter de protection et 3 vis - Poignée supplémentaire - Traduction de la notice d’utilisation originale Matériel livré d‘origine pour la réf.
FR Niveau de puissance sonore (LWA) garanti.......................................96 dB(A) mesuré........... 88,4 dB(A); KWA= 2,48 dB Vibration (ah).......................3,4 m/s2, 1,5 m/s2 Accu (Li-Ion).............................24LB2004 Tension nominale........................... 24 V Capacité...........................................2,0 Ah Temps de charge...................... environ 8 h Chargeur.................HYCHO132400500G Tension d’entrée (input)............
FR Ecarter des tiers personnes de la zone dangereuse! Ils pourraient être blessés par la projection de corps étrangers. Le chargeur n’est apte qu’à une utilisation en intérieurs. Polarité Retirez l‘accu avant les opérations de maintenance. LWA dB Indication du niveau garanti de puissance sonore maximale LWA en dB Les machines n’ont pas leur place dans les ordures ménagères. Classe de protection II Les machines n’ont pas leur place dans les ordures ménagères.
FR • • • • • 60 qu’elles aient reçu une supervision ou des instructions concernant I’utilisation de I’appareil en toute sécurité et qu’elles comprennent les dangers encourus. Les enfants ne doivent pas jouer avec l’appareil. Ne permettez jamais à des enfants ou à d‘autres personnes qui ne connaissent pas le mode d‘emploi d‘utiliser l‘appareil. Il se peut qu‘une réglementation locale fixe l‘âge minimum de l‘utilisateur.
FR • • • • • • • toutes les parties du corps, notamment des mains et des pieds. Il y a un risque de blessure par coupure. Ne démarrez pas l‘appareil, si celui est à l‘envers ou ne se trouve pas en position de travail.
FR • • Ne surchargez vous votre appareil. Utilisez le seulement pour les travaux indiqués. N‘utilisez pas de machine de faible puissance pour de lourds travaux. N‘utilisez par votre appareil pour des tâches pour lesquelles il n‘a pas été conçu. Avant et après chaque utilisation, débranchez la fiche secteur et effectuez un examen visuel de l‘appareil. N‘utilisez pas l‘appareil, si des dispositifs de sécurité, des pièces de l‘installation de coupe ou des boulons manquent, sont usés ou sont endommagés.
FR UTILISATION DES OUTILS FONCTIONNANT SUR BATTERIES ET PRECAUTIONS D’EMPLOI a) Charger les accumulateurs uniquement avec les chargeurs qui sont recommandés par le fabricant. Il y a un risque d‘incendie si un chargeur, approprié pour un type précis d‘accumulateur, est utilisé avec d‘autres accumulateurs. b) N‘utiliser que les accumulateurs prévus à cet effet avec les outils électriques. L‘utilisation d‘un autre accumulateur peut entraîner des blessures ou déclencher un incendie.
FR • • • • • • • 64 réduites, ou des personnes dénuées d’expérience ou de connaissance, sauf si elles ont pu bénéficier, par l’intermédiaire d’une personne responsable de leur sécurité, d’une surveillance ou d’instructions préalables concernant l’utilisation de l’appareil. Il convient de surveiller les enfants pour s’assurer qu’ils ne jouent pas avec l’appareil. Pour le chargement de l‘accumulateur, utilisez exclusivement le chargeur fourni à la livraison.
FR a) Coupures b) Dommages affectant l’ouïe si aucune protection d’ouïe appropriée n’est portée. c) Ennuis de santé engendrés par les vibrations affectant les bras et les mains si l’appareil est utilisé pendant une longue période ou s’il n’est pas employé de manière conforme ou correctement entretenu. Avertissement ! Pendant son fonctionnement cet outil électrique produit un champ électromagnétique qui, dans certaines circonstances, peut perturber des implants médicaux actifs ou passifs.
FR N’utilisez l’accumulateur que si l’appareil est complètement monté. Il existe un risque de blessure ! Accus usagés • Un temps de fonctionnement nettement réduit malgré la charge indique que l’accumulateur est usé et doit être remplacé. Utilisez seulement un pack d’accumulateur de remplacement d’origine que vous pouvez acheter auprès du service après-vente.
FR Avant chaque utilisation, vérifiez que l’appareil est en état de fonctionnement. L’interrupteur Marche/Arrêt et le blocage de mise en marche ne doivent pas être bloqués. Après avoir relâché le commutateur, vous devez arrêter l’appareil. Si un commutateur est endommagé, vous ne pouvez plus travailler avec l’appareil. Veuillez observer les normes de protection contre les nuisances acoustiques ainsi que les prescriptions et directives locales en vigueur.
FR Poussez le verrou (8) vers le bas et tournez la poignée (7) 0° 90° 180° jusqu‘à ce qu‘elle s‘enclenche dans la position souhaitée. Régler l‘étrier d‘écartement (protections des fleurs) : L‘étrier d‘écartement tient à distance du dispositif de coupe les plantes et les fleurs qui ne doivent pas être coupées. Poussez l’étrier d’écartement (12) en avant . Si l’étrier d’écartement n’est pas nécessaire, poussez-le en arrière, dans la position d’arrêt.
FR Couper l’herbe Coupez l’herbe en faisant pivoter l’appareil vers la droite et vers la gauche, par mouvements de va-et-vient, comme pour faucher. Coupez lentement et, lors de la coupe, maintenez l’appareil incliné à 30° environ vers l’avant. Coupez l’herbe longue couche par couche, en partant du haut vers le bas. Coupe verticale / coupe des bordures Lorsque la tête de coupe est en position verticale, il faut particulièrement être prudent.
FR Travaux généraux de maintenance • 4. Retirez la bobine de fil (17) de la tête de coupe. 5. Insérez la nouvelle bobine de fil avec le côté lisse vers le haut sur la tête de découpe et enfilez l‘extrémité du fil par l‘œillet de sortie de fil (22). Veillez à ce que l‘extrémité du fil ne glisse pas en dehors des fentes de la bobine. 6. Repositionnez le couvercle (21). Faites bien attention à ce que les dispositifs de blocage du couvercle s’adaptent exactement dans les évidements de la tête de coupe.
FR Rangement • • • • • • • • Nettoyez l’appareil avant de le stocker. Rangez l’appareil à un endroit sec et protégé de la poussière et surtout hors de la portée des enfants. Ne déposez pas l’appareil sur le carter de protection. Le plus judicieux est de le suspendre par sa poignée supérieure de sorte que le carter de protection ne soit pas au contact d’autres objets.
FR Pièces de rechange Vous obtiendrez des pièces de rechange et des accessoires à l’adresse www.grizzly-service.eu Si vous ne disposez d’aucun accès Internet, veuillez téléphoner au centre de SAV (voir «Service-Center»). Veuillez tenir prêts les numéros de commande indiqués ci-dessous. Bobine de fil ..............................91104379 Accumulateur, 24 V, 2 Ah........... 80001190 Accumulateur, 24 V, 4 Ah........... 80001191 Chargeur....................................80001085 Chargeur rapide.............
FR Dépannage Problème L’appareil ne démarre pas Cause possible Elimination des pannes Accu (18) déchargé Charger l’accu (18) (voir „Processus de chargement“) Accu (18) non inséré Mettre en place l’accu (18) ((voir „Utilisation“) Interrupteur Marche/Arrêt ( A 2) défectueux Réparation par le service après-vente Moteur défectueux L’appareil travaille par interruptions Fortes vibrations Bruits élevés Contact interne intermittent Commutateur Marche/ Arrêt ( A 2) défectueux La bobine ( souillée Répar
IT Indice Introduzione Introduzione .........................................74 Scopo.....................................................74 Descrizione generale...........................74 Contenuto della confezione..............74 Vista d’insieme..................................75 Descrizione delle funzioni ................75 Dati tecnici............................................75 Consigli di sicurezza............................76 Simboli..............................................
IT Contenuto all’art. n° 72035202 Apparecchio CON batteria - Trimmer - Copertura protettiva con 3 viti - Impugnatura aggiuntiva - Caricabatteria - Batteria - Traduzione delle istruzioni per l’uso in originale Contenuto all’art. n° 72035203 Apparecchio SENZA batteria - Trimmer - Copertura protettiva con 3 viti - Impugnatura aggiuntiva - Traduzione delle istruzioni per l’uso in originale Smaltire il materiale di imballaggio secondo le disposizioni.
IT Accumulatore (Li-Ion)............ 24LB2004 Tensione nominale......................... 24 V Capacità.......................................... 2,0 Ah Tempo di ricarica..........................circa 8 h Caricabatteria........ HYCHO132400500G Tensione di entrata / Input ......... 100-240V; ~50/60Hz; 0,32 A Tensione d uscita / Output................................ 24 V 0,5 A Classe di protezione........................... II Tipo di protezione...............................
IT Tenere una distanza di sicurezza a terzi. Potrebbero essere ferite da corpi estranei catapultati. Rimuovere la batteria prima di eseguire lavori di manutenzione. LWA dB Dati del livello di rumorosità LWA in dB Polarità Classe di protezione II Le apparecchiature non si devono smaltire insieme ai rifiuti domestici. Simboli nelle istruzioni Simboli dei pericoli con apposite indicazioni per prevenire danni a persone o cose.
IT • • • • • • 78 Non consentire mai l’uso dell’apparecchio a bambini o ad altre persone che non conoscono le istruzioni per l’uso. E’ probabile che le normative locali impongano limite minimo di età per l’uso dell’apparecchio.
IT • • • • • • • • - quando viene spostato da un luogo all’altro, - il cavo di corrente o di prolunga è danneggiato, - si rimuove o sostituisce il dispositivo di taglio oppure si desidera regolare a mano la lunghezza del filo di taglio. Assicurarsi che la testa di taglio non venga a contatto con pietre, detriti o altri corpi estranei quando l’apparecchio è acceso o durante il lavoro. Rischio di lesioni a causa di parti lanciate.
IT • • • • • • • 80 la prolunga per verificare la presenza di eventuali danneggiamenti e segni di usura. Non usare l’apparecchio se il cavo è danneggiato o consumato. Condutture elettriche danneggiate aumentano il rischio di una scossa elettrica. Tenere lontane le prolunghe dai dispositivi di taglio. Se si danneggia un cavo durante l’uso, staccarlo subito dalla rete. NON TOCCARE IL CAVO PRIMA DI AVERLO STACCATO DALLA RETE. Pericolo di schock elettrico.
IT il liquido viene a contatto con gli occhi, consultare anche un medico. Fuoriuscite di liquido della batteria può causare irritazioni della pelle o ustioni. TRATTAMENTO CORRETTO DEL CARICABATTERIA • ASSISTENZA TECNICA a) Fare riparare l‘utensile elettrico da personale specializzato qualificato e solo con ricambi originali. In questo modo si garantisce il mantenimento della sicurezza dell‘utensile elettrico.
IT • • • • • • Prevenire danneggiamenti meccanici del caricabatteria. Possono portare a corto circuiti interni. Il caricabatteria non deve essere azionato su una superficie infiammabile (p. es. carta, tessuti). Pericolo di incendio a causa del surriscaldamento generato durante il caricamento.
IT La batteria e l’apparecchio potrebbero venire danneggiati e, in caso di carica prolungata, consumano inutilmente energia. In caso di sovraccarico decade il diritto di garanzia. • Caricare la batteria prima del primo uso. Non caricare la batteria per più volte consecutive brevemente. Caricare la batteria, quando l’apparecchio lavora troppo lentamente. Un tempo d’esercizio notevolmente ridotto nonostante la ricarica indica che la batteria è consumata e che deve essere sostituita.
IT • danneggiato, non è consentito lavorare con l’apparecchio. Osservare in ogni caso le indicazioni di sicurezza valide come anche le disposizioni e indicazioni relative alla tutela dell’ambiente (vedi “Pulizia e manutenzione“). Istruzioni per il montaggio Rispettare le normative sulla rumorosità e quelle locali. Accensione e spegnimento Prestare attenzione a una posizione stabile e tenere ben saldo l’apparecchio con entrambe le mani e mantenendo una distanza di sicurezza dal proprio corpo.
IT Allentare la vite dell’impugnatura (6) e mettere l’impugnatura aggiuntiva (5) nella posizione desiderata. Ristringere la vite dell’impugnatura. Regolazione dell’altezza: Il tubo telescopico consente di regolare l’apparecchio in base all’altezza individuale. la boccola a vite Allentare (9). Regolare il tubo telescopico (10) sulla lunghezza desiderata e riavvitare la boccola a vite.
IT Indicazioni di lavoro Attenzione pericolo di lesioni! • Non tagliare erba umida o bagnata. • Prima della messa in funzione dell’apparecchio, accertarsi che la testa di taglio non sia in contatto con sassi, detriti o altri corpi estranei. • Mettere in funzione l’apparecchio prima di avvicinarsi all’erba da tagliare. • Durante il lavoro evitare di sottoporre l’apparecchio a una sollecitazione eccessiva. • Evitare ogni contatto con ostacoli fissi (pietre, mura, recinzioni a doghe ecc.).
IT Pulizia L’apparecchio non deve essere spruzzato con acqua né immerso nell’acqua. Pericolo di scosse elettriche! • • Tenere le feritoie di ventilazione, l’alloggiamento del motore e le impugnature dell’apparecchio pulite. A tale scopo usare un panno umido o una spazzola. Non usare detergenti o solventi. Possono causare danni irreparabili all’apparecchio. Dopo ogni procedura di taglio pulire la copertura protettiva e il dispositivo di taglio rimuovendo residui di erba e terra.
IT J 1. Disattivare l‘apparecchio e rimuovere la batteria ( 18) dall‘apparecchio stesso 2. Svitare il tagliafilo (15) dalla copertura di protezione (14). 3. Avvitare il tagliafilo (15) nuovo alla copertura di protezione Conservazione • • • • • • • • 88 Pulire l‘apparecchio prima di conservarlo. Conservare l’apparecchio in un luogo asciutto e privo di polvere, lontano dalla portata dei bambini. Non appoggiare l’apparecchio sulla sua copertura di protezione.
IT • Introdurre il materiale tagliano nel compostaggio e non gettarlo nel secchio della spazzatura. Ricambi Per ordinare parti di ricambio rivolgersi al servizio di assistenza tecnica all’indirizzo o numero di fax indicato. Nel caso che siano necessari altri ricambi, desumere il numero relativo al pezzo di disegno esploso. Rocchetto portafilo......................91104379 Batteria 24 V, 2 Ah......................80001190 Batteria 24 V, 4 Ah...................... 80001191 Caricabatteria ...................
IT Attenzione:In caso di contestazione o di richiesta di assistenza, inviare l’apparecchio pulito e con una nota sul difetto che presenta al nostro indirizzo di assistenza. Tutti i pacchi inviati in porto assegnato, voluminosi, espressi o con altre spese di trasporto a carico non verranno accettati. Lo smaltimento degli apparecchio difettosi consegnati viene effettuato gratuitamente.
PL Spis treści Wprowadzenie......................................91 Przeznaczenie.......................................91 Opis ogólny...........................................91 Zawartość opakowania....................92 Przegląd...........................................92 Opis działania...................................92 Dane techniczne...................................92 Zasady bezpieczeństwa.......................93 Symbole i piktogramy ......................93 Ogólne zasady bezpieczeństwa.......
PL Zawartość opakowania 13 14 15 16 Głowica tnąca ze szpulą żyłki Osłona ochronna Odcinacz żyłki (niewidoczny) Rygiel do regulacji kąta pochylenia 17 Szpula z żyłką 18 Akumulator 19 Ładowarka Rozpakuj urządzenie i sprawdź, czy jest ono kompletne. Zakres dostawy dla art. nr 72035203 Urządzenie BEZ akumulatora • Akumulatorowy trymer do trawników • Osłona ochronna z trzema śrubami • Uchwyt dodatkowy • Tłumaczenie oryginalnej instrukcji obsługi Zakres dostawy dla art.
PL Poziom ciśnienia akustycznego (LWA) gwarantowany...........................96 dB(A) zmierzony........... 88,4 dB(A); KWA= 2,48 dB Wibracje (ah)...............3,4 m/s2, K= 1,5 m/s2 Bateria blokowa (NiMH)..........24LB2004 Napięcie znamionowe.................... 24 V Pojemność........................................2,0 Ah Czas ładowania............................... ok. 8 h Ładowarka...............HYCHO132400500G Napięcie wejściowe..... 100-240V; ~50/60Hz; 0,32 A Napięcie wyjściowe...............
PL Trzymaj inne osoby z dala od urządzenia. Mogą one zostać zranione przez wyrzucane przedmioty. Polaryzacja Ładowarka jest przeznaczona tylko do stosowania w pomieszczeniach. Przed rozpoczęciem czynności konserwacyjnych wyjmij akumulator. LWA dB Wartość poziomu ciśnienia akustycznego LWA w dB Urządzeń elektrycznych nie należy wyrzucać razem z odpadami domowymi Klasa zabezpieczenia II Urządzeń elektrycznych nie należy wyrzucać razem z odpadami domowymi.
PL • • • • • • osoby te znajdują się pod nadzorem lub jeśli zostały pouczone o zasadach bezpiecznego użycia urządzenia i zrozumiały wynikające stąd niebezpieczeństwa. Dzieciom nie wolno bawić się urządzeniem. Nigdy nie pozwalaj dzieciom ani innym osobom nie znającym instrukcji obsługi na używanie urządzenia. Przepisy lokalne mogą określać minimalny wiek osoby obsługującej urządzenie.
PL • • • • • • • • 96 - przenosisz urządzenie z miejsca na miejsce, - jest uszkodzony kabel zasilający lub przedłużający, - zdejmujesz lub wymieniasz mechanizm tnący oraz ustawiasz ręcznie długość żyłki tnącej. Uważaj, by przy włączaniu i podczas pracy urządzenia głowica nie dotykała tnąca kamieni, żwiru, drutów i innych przedmiotów. Niebezpieczeństwo obrażeń przez wyrzucane części. Uważaj, by nie zranić się o mechanizm służący do odcinania żyłki.
PL • • • • • • • • Przed każdym użyciem sprawdzaj, czy przewód sieciowy i przedłużacz nie są uszkodzone i nie wykazują objawów zużycia. Nie używaj urządzenia, jeżeli kabel jest uszkodzony lub zużyty. Uszkodzone przewody zasilające zwiększają ryzyko porażenia prądem elektrycznym. Trzymaj przewody przedłużaczy z daleka od pracujących narzędzi tnących. Jeżeli przewód został uszkodzony podczas użytkowania, należy go natychmiast odłączyć od sieci.
PL d) Nieprawidłowe stosowanie może doprowadzić do wycieku elektrolitu z akumulatora Unikaj kontaktu z elektrolitem. Jeżeli elektrolit zetknął się z oczami, umyj oczy wodą. Jeżeli elektrolit dostał się do oka, skorzystaj dodatkowo z pomocy lekarskiej. Wyciekający z akumulatora elektrolit może spowodować podrażnienia skóry lub oparzenia. SERWIS a) Zlecaj naprawy narzędzia elektrycznego tylko wykwalifikowanemu personelowi i tylko z użyciem oryginalnych części zamiennych.
PL • • • • • • • • Uważaj, by napięcie sieciowe było zgodne z danymi znajdującymi się na tabliczce znamionowej znajdującej się na ładowarce. Niebezpieczeństwo porażenia prądem. Przed rozłączeniem i połączeniem złączy między akumulatorem/narzędziem elektrycznym/ urządzeniem zawsze odłączaj ładowarkę od sieci. Utrzymuj urządzenie w czystości, nie wystawiaj go na działanie wilgoci i deszczu. Nigdy nie używaj ładowarki na dworze.
PL Proces ładowania Nie wystawiaj akumulatora na ekstremalne warunki, takie jak wysokie temperatury i uderzenia. Niebezpieczeństwo zranienia przez wypływający elektrolit! W przypadku kontaktu ze skórą/ oczami spłukać miejsca kontaktu wodą albo środkiem neutralizującym i skontaktować się z lekarzem. Akumulator ładować tylko w suchych pomieszczeniach. Powierzchnię zewnętrzną akumulatora należy oczyścić i osuszyć przed podłączeniem ładowarki.
PL 5. Naciśnij przycisk odblokowujący (18a) akumulatora i wyciągnij akumulator z ładowarki (19). Wskaźnik stanu naładowania (Akumulator 24 V, 4 Ah) Montaż uchwytu dodatkowego: 2. Rozciągnij końce uchwytu dodatkowego (5) i nasuń je na podstawę uchwytu (20). 3. Przykręć dodatkowy uchwyt (5) nakrętką mocującą uchwytu (6). Obsługa Wcisnąć prawy przycisk „Press“ wskaźnika stanu naładowania , aby sprawdzić stan naładowania akumulatora. Liczba świecących się diod wskazuje stan naładowania akumulatora.
PL 3. Aby wyłączyć urządzenie, puść włącznik-wyłącznik (2). Ciągła praca pilarki bez przytrzymywania włącznika-wyłącznika jest niemożliwa. Po wyłączeniu urządzenia mechanizm tnący pracuje jeszcze przez pewien czas. Zaczekaj, aż mechanizm tnący zatrzyma się całkowicie. Nie dotykaj poruszających się płytek tnących i nie próbuj ich zahamować. Niebezpieczeństwo zranienia! Ustawienia w urządzeniu F Regulacja uchwytu dodatkowego: Uchwyt dodatkowy można ustawiać w różnych pozycjach.
PL wydłużania żyłki wymaga zatrzymania szpuli przez ponownym włączeniem urządzenia. Jeżeli na początku żyłka będzie dłuższa niż promień koszenia, zostanie ona automatycznie skrócona do prawidłowej długości przez nóż żyłki. Regularnie kontroluj żyłki nylonowe pod względem uszkodzeń i regularnie sprawdzaj, czy żyłki mają jeszcze długość zdefiniowaną przez odcinacz. Jeżeli końce żyłek są niewidoczne: • wymień szpulę z żyłkami na nową (zob. rozdz. „Wymiana mechanizmu tnącego”).
PL • Część uchwytowa: 90° (patrz F ) • Kąt cięcia: 90° (patrz F ) • Pałąk dystansowy w pozycji spoczynkowej. Ogólne czynności konserwacyjne • Przed każdym użyciem sprawdzaj, czy urządzenie nie ma widocznych wad i usterek, takich jak np. luźne, zużyte lub uszkodzone części. Sprawdzaj, czy śruby w tarczy tnącej są dobrze przykręcone. Sprawdzaj, czy osłony i elementy zabezpieczające nie są uszkodzone i czy są dobrze zamocowane. W razie potrzeby wymień te części na nowe.
PL 5. Założyć nową szpulę z żyłką na głowicę tnącą, gładką stroną skierowaną do góry i włożyć koniec żyłki przez oczko wylotu żyłki (22). Zwrócić uwagę, aby koniec żyłki nie wysuwał się ze szczelin szpuli. 6. Załóż kołpak (21). Uważaj, by zatrzaski kołpaka wpasowały się przy tym dokładnie w otwory głowicy tnącej. Gdy tak jest, zatrzaskująsię one ze słyszalnym odgłosem. 7. Przytrzymać wciśnięty przycisk blokady (23) i wyciągnąć koniec żyłki na tyle, aby wystawał on poza nóż żyłki (15).
PL Usuwanie i ochrona środowiska Wyjmij akumulator z urządzenia i przekaż urządzenie, jego akcesoria i opakowanie do zgodnej z przepisami o ochronie środowiska naturalnego utylizacji. Urządzeń elektrycznych nie należy wyrzucać razem z odpadami domowymi • • • • • Nie wyrzucaj akumulatorów do śmieci domowych, nie wrzucaj ich do ognia (niebezpieczeństwo wybuchu) ani wody. Uszkodzone akumulatory mogą być szkodliwe dla środowiska i Twojego zdrowia, jeżeli wydostaną się z nich trujące pary lub ciecze.
PL Gwarancja Serwis naprawczy Na niniejsze urządzenie udzielamy 24-miesiącznej gwarancji. To urządzenie nie jest przeznaczone do zastosowania komercyjnego. W przypadku użytkowania komercyjnego wygasają prawa z tytułu gwarancji. Szkody wywołane przez naturalne zużycie, przeciążenie lub nieprawidłową obsługę są wykluczone z zakresu gwarancji. Niektóre części konstrukcyjne ulegają normalnemu zużyciu i są wykluczone z zakresu gwarancji. Gwarancja obowiązuje dla wad materiałowych lub fabrycznych.
PL Poszukiwanie błędów Problem Urządzenie nie daje się uruchomić Możliwa przyczyna Sposób usunięcia Rozładowany akumulator (18) Naładuj akumulator (18) (patrz „Ładowanie“) W urządzeniu nie ma akumulatora (18) Włóż akumulator (18) (patrz „Obsługa“) Uszkodzony włącznik-wyłącznik ( A 2) Naprawa w Centrum serwisowym Uszkodzony silnik Przerywana praca urządzenia Silne wibracje Głośne odgłosy Zła jakość przycinania 108 Chwiejny styk w obwodzie elektrycznym Uszkodzony włącznik-wyłącznik ( A 2) Zaniec
CZ Obsah Úvod Úvod.....................................................109 Účel použití.........................................109 Obecný popis......................................110 Objem dodávky................................110 Přehled.............................................110 Popis funkce....................................110 Technická data ...................................110 Bezpečnostní pokyny........................111 Symboly a piktogramy ...................
CZ Obecný popis 12 distanční oblouk (ochrana rostlin) 13 řezací hlava se strunovou cívkou a řezacími strunami 14 ochranný kryt 15 řezač struny (zakryté) 16 pojistka pro přestavění úhlu sklonu 17 cívce 18 akumulátor 19 nabíjecí přístroj Obrázky týkající se ovládání přístroje najdete na straně 2-3. Objem dodávky Vybalte nástroj a zkontrolujte, je-li kompletní: Obsah dodávky u č. výr.
CZ Úroveň akustického výkonu (LWA) zaručená....................................96 dB(A) měřená........... 88,4 dB(A); KWA= 2,48 dB Vibrace (ah)................. 3,4 m/s2, K= 1,5 m/s2 Akumulátor (Li-Ion).................24LB2004 Jmenovité napětí............................ 24 V Kapacita...........................................2,0 Ah Doba nabíjení ................................ cca 8 h Nabíječka.................HYCHO132400500G Vstupní napětí / Input.............
CZ Před prováděním údržby vyjměte akumulátor. LWA dB Symboly v návodu Výstražné značky s údaji pro zabránění škodám na zdraví anebo věcným škodám. Údaj hladiny akustického tlaku LWA v dB Elektrické přístroje nepatří do domácího odpadu. Grafické značky na akumulátoru Nevyhazujte akumulátory do domácího odpadu, do ohně anebo do vody. Nevystavujte akumulátor / nástroj delší dobu silnému slunečnímu záření a neodkládejte tyto na vyhřívací tělesa. (max. 60°C).
CZ • • to nástroji. Přerušte práci, když se tyto zdržují v blízkosti. Používejte pracovní oděv a osobní ochrannou výstroj! Zásadně noste ochranné brýle anebo ochranu očí, ochranu sluchu, holiny anebo obuv s podrážkou odolnou proti skluzu a robustní, dlouhé kalhoty jakož i pracovní rukavice. Nepoužívejte tento nástroj, když jste bosi anebo když nosíte otevřené sandály. Ochranné zařízení a osobní ochranné výstroje chrání Vaše vlastní zdraví a zdraví ostatních a zabezpečují plynulý provoz tohoto nástroje.
CZ • • • Nepřekračujte s běžícím nástrojem žádné štěrkové ulice anebo stezky. Může dojít k odlétávání štěrku a poranění. Nepoužívejte tento nástroj v blízkosti zápalných tekutin anebo plynů. Při nedbání na toto, existuje nebezpečí požáru anebo exploze. Uložte tento nástroj na suchém místě a mimo dosahu dětí. Pozor! Takto se vyvarujete škodám na nástroji a případně z nich vyplývajícím zdravotním škodám: Pečujte o Váš nástroj: • Dbejte na to, aby nebyly větrací otvory nástroje ucpané.
CZ • • • činit minimálně 2,5 mm2. Před použitím odviňte celý kabel z navijáku. Zkontrolujte poškození kabelu. Se zapnutým přístrojem nikdy nepřecházejte přes prodlužovací kabel. Obsluhující osoba by měla síťový kabel ze zásady tahat za sebou. Prodlužovací kabel může být náhodně protnut. K uchycení prodlužovacího kabelu použijte k tomu určené zavěšení. Nenoste tento nástroj za kabel. Nepoužívejte kabel na to, aby se zástrčka vytáhla ze zásuvky. Chraňte kabel před horkem, olejem a ostrými hranami.
CZ • • • • • • • zenými fyzickými, smyslovými anebo duševními schopnostmi anebo osobami s nedostatkem zkušeností a/anebo znalostí; ledaže jsou pod dohledem anebo dostávají pokyny ohledně používání tohoto nástroje skrze osobu, která je za jejich bezpečnost zodpovědná. Děti by měly být pod dozorem, aby bylo zajištěno, že si nehrají s přístrojem. Pro nabíjení akumulátoru používejte výlučně spolu dodaný nabíjecí přístroj. Existuje nebezpečí požáru a exploze.
CZ Varování! Toto elektrické nářadí vytváří během provozu elektromagnetické pole. Toto pole může za určitých okolností omezovat aktivní nebo pasivní lékařské implantáty. Pro snížení nebezpečí vážného nebo smrtelného zranění doporučujeme osobám s lékařskými implantáty před obsluhou stroje konzultovat implantát se svým lékařem a výrobcem. Proces nabíjení Nevystavujte akumulátor extrémním podmínkám jako teplu a nárazům.
CZ 4. Po úspěšném nabití odpojte nabíječku (19) od sítě. 5. Stiskněte tlačítko odblokování (18a) na akumulátoru (18) a vytáhněte akumulátor z nabíječky (19). Indikátor stavu nabití (Akumulátor 24 V, 4 Ah) Stiskněte pravé tlačítko „Press“ na indikátoru stavu nabití, Tím zkontrolujete stav nabití baterie. Počet svítících kontrolek LED udává stav nabití baterie. 4 kontrolky signalizují plné nabití akumulátoru. 1 kontrolka signalizuje, že je akumulátor nutné nabít.
CZ Po vypnutí přístroje se řezací zařízení ještě po nějakou dobu otáčí. Nechejte řezací zařízení zcela zastavit. Nedotýkejte se pohybující se řezací destičky a nezabrzďujte ji. Nebezpečí poranění! F Nastavování na nástroji Nastavení přídavného madla: Přídavné madlo můžete nastavit do různých poloh. Nastavte rukojeť tak, aby při pracovním držení byla řezací hlava ( 13) lehce nakloněná dopředu. Povolte šroub madla (6) a nastavte přídavné madlo (5) do požadované polohy. Opět přišroubujte šroub madla.
CZ Pracovní pokyny Pozor nebezpečí poranění! • Nesekejte vlhkou nebo mokrou trávu. • Před zapnutím přístroje se přesvědčte, zda není řezací hlava v kontaktu s kameny, štěrkem nebo ostatními cizími tělesy. • Dříve než se přiblížíte k sekanému trávníku, přístroj zapněte. • Zabraňte nadměrnému zatěžování přístroje během práce. • Zabraňte kontaktu s pevnými překážkami (kameny, zdi, laťkové ploty atd.). Struna by se velmi rychle opotřebovala.
CZ Všeobecné údržbářské práce • Před každým použitím zkontrolujte, zda přístroj nevykazuje viditelné nedostatky, jako uvolněné, opotřebované nebo poškozené díly. Zkontrolujte pevné utažení šroubů v v řezacím kotouči. Zkontrolujte, zda kryty a ochranná zařízení nejsou poškozena a jsou správně usazena. V případě potřeby je vyměňte. • 6. Opět nasaďte kryt (21). Dbejte na to, aby přitom aretační tlačítka na krytu přesně souhlasily svybráními na řezací hlavě. Tyto pak slyšitelně zaklapnou. 7.
CZ • • • Akumulátor skladujte jen tehdy, je-li částečně nabitý. Stav nabití by měl během delší doby skladování činit 4060%. Během delší fáze skladování musíte každé 3 měsíce zkontrolovat stav nabití akumulátoru a v případě potřeby jej dobít. Akumulátor skladujte mezi 10°C až 25°C. Během skladování zabraňte extrémnímu chladu nebo teplu, aby nedošlo ke snížení výkonu akumulátoru.
CZ Záruka Opravy Služby • • • • • • Na tento přístroj poskytujeme záruku 24 měsíců. Tento přístroj není určený pro komerční využití. Při komerčním použití záruka zanikne. V případě oprávněného nároku na záruku se prosím spojte s naším servisním střediskem (tel. č., fax č., e-mailová adresa). Zde získáte další informace o vyřízení reklamace. Škody, které byly způsobeny přirozeným opotřebením, přetížením anebo neodbornou obsluhou, jsou ze záruky vyloučeny. (např.
CZ Vyhledávání závad Problém Přístroj nestartuje Možné příčiny Odstranění závad Vybitý akumulátor Nabijte akumulátor (viz „Proces nabíjení“) Akumulátor není vložený Vložte akumulátor (viz „Obsluha“) Poškozený spínač/vypínač Defektní motor Chod přístroje se *přerušuje Silné vibrace Silný hluk Špatný výsledek sekání 124 Interní uvolněný kontakt Poškozený spínač/vypínač Znečištěná cívka ( A Defektní cívka ( 17) A 17) Oprava servisním střediskem Oprava servisním střediskem Cívku vyčistěte (v
LT Turinys Įvadas..................................................125 Naudojimas pagal paskirtį.................125 Bendrasis aprašymas........................125 Pristatomas komplektas...................125 Apžvalga..........................................126 Veikimo aprašymas..........................126 Techniniai duomenys.........................126 Saugos nurodymai.............................127 Simboliai ir paveikslėliai...................127 Bendrieji saugos reikalavimai..........
LT Tiekiamas rinkinys, gam. Nr. 72035203 Prietaisas tiekiamas BE akumuliatoriaus - Akumuliatorinė vejapjovė - Apsauginis gaubtas su trimis varžtais - Papildoma rankena - Vertimas iš originalių eksploatavimo instrukcijoje Tiekiamas rinkinys, gam. Nr.
LT Kroviklis..................HYCHO132400500G Įėjimo įtampa / įvadas .... 100–240 V; ~ 50/60 Hz; 0,32 A Išėjimo įtampa / išvadas....... 24 V 0,5 A Apsaugos klasė.................................. II Apsaugos rūšis................................... IPX0 Simboliai ir paveikslėliai Paveikslėliai ant prietaiso Dėmesio! Atidžiai perskaitykite eksploatavimo instrukciją. Triukšmo ir vibracijos reikšmės buvo apskaičiuotos remiantis atitikties deklaracijoje nurodytais standartais ir nuostatomis.
LT Paveikslėliai ant akumuliatoriaus Akumuliatoriaus neišmeskite kartu su buitinėmis atliekomis, nemeskite į ugnį ar į vandenį. Akumuliatoriaus nelaikykite ilgai intensyviuose saulės spinduliuose ir nedėkite jo ant radiatorių (maks. 60 °C). Akumuliatorius nuvežkite į naudotų akumuliatorių surinkimo vietą, kur jis bus perduotas aplinką tausojančiai atliekų utilizavimo įstaigai. Paveikslėliai ant kroviklio Informacinis ženklas, kuriame pateikiama informacijos, kaip geriau naudoti prietaisą.
LT • • • Apsauginiai įrenginiai ir asmeninė saugos įranga saugo Jūsų ir kitų žmonių sveikatą, užtikrina nepriekaištingą prietaiso veikimą. Dėvėkite tinkamus apsauginius drabužius ir naudokite apsauginę įrangą! Užsidėkite apsauginius akinius arba veido apsaugą, klausos organų apsaugą, dėvėkite ilgaaulius batus arba batus neslystančiu padu, vilkėkite tvirtas, ilgas kelnes ir mūvėkite darbines pirštines. Niekada nenaudokite prietaiso neapsiavę batais arba apsiavę atvirais sandalais.
LT • • • klientų aptarnavimo centrų darbuotojai. Su savo prietaisu visada elkitės atsargiai. Visi įrankiai turi būti švarūs, kad būtų galima tinkamai ir saugiai dirbti. Atkreipkite dėmesį į techninės priežiūros potvarkius. Prietaiso apkrova negali būti per didelė. Dirbkite tik nurodytame galios diapazone. Sunkiems darbams nenaudokite mažos galios įrenginių. Prietaiso nenaudokite kitiems tikslams nei jis pritaikytas. Prieš kiekvieną naudojimą apžiūrėdami patikrinkite prietaisą.
LT monetų, raktų, vinių, varžtų ar kitų mažų metalinių daiktų, dėl kurių gali būti šuntuoti kontaktai. Įvykus trumpajam jungimui tarp akumuliatoriaus kontaktų galite nudegti arba jis gali užsidegti. d) Jei akumuliatorius naudojamas neteisingai, iš jo gali prasiskverbti skysčio. Stenkitės jo nepaliesti. Jei vis dėlto paliestumėte, kruopščiai nuplaukite vandeniu. Jei skysčio patektų į akis, kreipkitės pagalbos į gydytoją. Prasiskverbęs akumuliatoriaus skystis gali sudirginti arba nudeginti odą.
LT • • • • • • • • • Kroviklis visada turi būti švarus; jo negalima naudoti esant drėgmei ir lyjant lietui. Kroviklio niekada nenaudokite lauke. Nešvarumai ir prasiskverbęs vanduo padidina elektros šoko riziką. Krovikliu galima krauti tik jam numatytus originalius akumuliatorius. Bandant įkrauti kitokius akumuliatorius galima susižaloti ir gali kilti gaisras. Venkite mechaninių kroviklio pažeidimų. Dėl jų gali įvykti vidinis trumpasis jungimas.
LT Akumuliatorių kraukite tik sausose patalpose. Prieš prijungiant kroviklį, akumuliatoriaus paviršių reikia švariai nuvalyti ir nusausinti. Kyla pavojus susižaloti dėl elektros šoko. Įkraukite tik pristatytu originaliu krovikliu. Atkreipkite dėmesį, kad prietaiso negalima krauti be pertraukos ilgiau nei 8 valandas. Antraip gali sugesti akumuliatorius ir prietaisas, o ilgiau kraudami be reikalo eikvosite elektros energiją. Garantija nesuteikiama, jei žala padaroma per ilgai krovus prietaisą.
LT su prietaisu dėvėkite tinkamus drabužius, užsidėkite akių ir klausos organų apsaugas. Prieš kiekvieną naudojimą įsitikinkite, kad prietaisas veikia tinkamai. Draudžiama užfiksuoti įjungimo ir išjungimo jungiklį ir įjungimo blokatorių. Atleidus jie turi išjungti variklį. Draudžiama toliau dirbti prietaisu, jei vienas iš jungiklių pažeistas. 4 lemputės reiškia, kad akumuliatorius įkrautas iki galo. 1 lemputė rodo, kad akumuliatorių reikia įkrauti.
LT F Prietaiso nustatymai Papildomos rankenos reguliavimas: Papildomą rankeną galite nustatyti į skirtingas padėtis. Rankeną nustatykite taip, kad pjovimo galvutė ( 13) darbinėje padėtyje būtų šiek tiek palinkusi į priekį. Atlaisvinkite rankenos varžtą (6) ir nustatykite papildomą rankeną (5) į norimą padėtį. Vėl tvirtai priveržkite rankenos varžtą. Aukščio reguliavimas: Reguliuojant teleskopinį vamzdį galima nustatyti prietaisą pagal individualų ūgį. sraigtinę įvorę Atlaisvinkite (9).
LT Darbo nurodymai Dėmesio! Pavojus susižeisti! • Nepjaukite drėgnos arba šlapios žolės. • Prieš paleisdami prietaisą įsitikinkite, kad pjovimo galvutė nesiliečia prie akmenų, skaldos arba kitų daiktų. • Eidami link žolės, kurią pjausite, išjunkite prietaisą. • Stenkitės, kad dirbant prietaisas nebūtų per daug apkrautas. • Stenkitės nepaliesti tvirtų kliūčių (akmenų, mūro sienų, statinių tvorų ir pan.). Žolės pjovimas Pjaukite žolę prietaisą traukdami iš dešinės į kairę.
LT Valymas Nepurkškite ant prietaiso vandens ir nebandykite jo panardinti į vandenį. Kyla pavojus, kad ištiks elektros šokas. • • Pjovimo lyno ritės keitimas: I Prietaiso ventiliacijos anga ir variklio korpusas turi būti švarūs. Tam naudokite drėgną servetėlę arba šepetį. Nenaudokite jokių valymo priemonių ar tirpiklių. Jie gali negrįžtamai sugadinti prietaisą Po kiekvieno pjovimo nuo pjovimo įtaiso ir apsauginio daubto nuvalykite žoles ir žemes.
LT Laikymas • • • • • • • • Prieš padėdami nenaudojamą prietaisą jį išvalykite. Prietaisą laikykite sausoje vietoje, kurioje nesikaupia dulkės ir kur jo negali pasiekti vaikai. Prietaiso nedėkite ant apsauginio gaubto. Geriausia jį kabinti už viršutinės rankenos, kad apsauginis gaubtas neliestų jokių kitų daiktų. Kyla pavojus, kad apsauginis gaubtas deformuosis, todėl pasikeis jo matmenys ir tai turės įtakos saugos savybėms.
LT Atsarginės dalys Atsargines dalis ir priedus galite įsigyti interneto svetainėje www.grizzly-service.eu Jei neturite interneto, kreipkitės telefonu į aptarnavimo centrą (žr. „Grizzly ServiceCenter“). Pasiruoškite žemiau nurodytus užsakymo numerius. Atsarginė pjovimo lyno ritė.........91104379 Akumuliatorius, 24 V, 2 Ah..........80001190 Akumuliatorius, 24 V, 4 Ah..........80001191 Kroviklis..................................... 80001085 Spartusis įkroviklis......................
Klaidų paieška Problema Neužsiveda prietaisas Galimos priežastys Klaidos šalinimas Akumuliatorius (18) išsikrovė. Įkraukite akumuliatorių (18) (žr. „Krovimo procesas“). Akumuliatorius (18) neįstatytas. Įstatykite akumuliatorių (18) (žr. „Valdymas“). Sugedo įjungimo ir išjungimo jungiklis ( A 2) Variklio defektas Prietaiso veikimas nutrūksta Stiprios vibracijos Garsiai triukšmas Vidinis blogas sąlytis. Sugedo įjungimo ir išjungimo jungiklis ( A 2) Suremontuokite techninės priežiūros centre.
DE Original-EGKonformitätserklärung Hiermit bestätigen wir, dass der Akku-Rasentrimmer Baureihe ART 2420 Lion Baureihe ART 2420 Lion Set Seriennummer 201601000001 - 201601000330 201601000001 - 201601000500 GB Translation of the original EC declaration of conformity We hereby confirm that the Cordless Lawn Trimmer ART 2420 Lion ART 2420 Lion Set Serial number 201601000001 - 201601000330 201601000001 - 201601000500 folgenden einschlägigen EU-Richtlinien in conforms with the following applicable relihrer
NL Vertaling van de originele CE-conformiteitsverklaring FR Traduction de la déclaration de conformité CE originale Nous certifions par la présente Hiermede bevestigen wij dat de que le modèle Accu-gazontrimmer Coupe-bordure à accu bouwserie ART 2420 Lion de construction ART 2420 Lion bouwserie ART 2420 Lion Set de construction ART 2420 Lion Set Serienummer Numéro de série 201601000001 - 201601000330 201601000001 - 201601000330 201601000001 - 201601000500 201601000001 - 201601000500 is overeenkomstig me
IT Traduzione della dichiarazione di conformità CE originale Con la presente dichiariamo che Trimmer a batteria serie di costruzione ART 2420 Lion serie di costruzione ART 2420 Lion Set Numero di serie 201601000001 - 201601000330 201601000001 - 201601000500 corrisponde alle seguenti direttive UE in materia nella rispettiva versione valida: PL Tłumaczenie oryginalnej deklaracji zgodności WE Niniejszym oświadczamy, że konstrukcja Akumulatorowa przycinarka do trawników typu ART 2420 Lion typu ART 2420 Lio
CZ Překlad originálního prohlášení o shodě CE LT Vertimas iš originalių EB atitikties deklaracija Šiuo dokumentu mes patvirtiname, kad Tímto potvrzujeme, že Aku strunová sekačka konstrukční řady Akumuliatorinė vejapjovė Serija ART 2420 Lion ART 2420 Lion Serija ART 2420 Lion Set ART 2420 Lion Set Serijos Nr.
ART 2420 Lion Set Explosionszeichnung • Vue éclatée • Detalių brėžinys Explosietekening • Disegno esploso Exploded Drawing • Rozvinuté náčrtky Rysunek samorozszerzajce informativ • informatif • informatief • informativo • informativo • informační • pouczający 145
Grizzly Service-Center DE GB NL FR Grizzly Tools GmbH & Co. KG Kundenservice Stockstädter Straße 20 63762 Großostheim Tel.: 06026 9914 441 Fax: 06026 9914 499 e-mail: service-baumarkt@grizzly.biz Homepage: www.grizzly.biz Novo CSV Ltd. Unit 3, Beldray Park Beldray Road, Mount Pleasant Bilston, West Midlands WV14 7NH Tel.: 0845 683 2672 e-mail: care@novoserv.co.uk I.T.S. Winschoten bv Bezoekadres: Papierbaan 55 9672 BG Winschoten Postadres: Antwoordnummer 300 9670 WB Winschoten Tel.