MODEL H7760 COMBINATION 2" x 27" BELT SANDER & 6" GRINDER OWNER'S MANUAL COPYRIGHT © NOVEMBER, 2005 BY GRIZZLY INDUSTRIAL, INC. WARNING: NO PORTION OF THIS MANUAL MAY BE REPRODUCED IN ANY SHAPE OR FORM WITHOUT THE WRITTEN APPROVAL OF GRIZZLY INDUSTRIAL, INC.
Safety labels warn about machine hazards and ways to prevent injury. The owner of this machine MUST maintain the original location and readability of the labels on the machine. If any label is removed or becomes unreadable, REPLACE that label before using the machine again. Contact Grizzly at (800) 523-4777 or www.grizzly.com to order new labels.
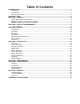
Table of Contents INTRODUCTION ............................................................................................................................... 2 Foreword .................................................................................................................................... 2 Contact Info ................................................................................................................................ 2 Machine Data Sheet............................................
INTRODUCTION Foreword Contact Info We are proud to offer the Model H7760 Combination 2" x 27" Belt Sander & 6" Grinder. This machine is part of a growing Grizzly family of fine machinery. When used according to the guidelines set forth in this manual, you can expect years of trouble-free, enjoyable operation and proof of Grizzly’s commitment to customer satisfaction.
MACHINE DATA SHEET Customer Service #: (570) 546-9663 • To Order Call: (800) 523-4777 • Fax #: (800) 438-5901 MODEL H7760 GRINDER/SANDER COMBO Design Type ......................................................................... Bench Model Overall Dimensions: Height (w/Work Light Extended)................................................... 193⁄4" Width ............................................................................................ 151⁄4" Depth .................................................
IDENTIFICATION To help you understand the Model H7760 set up and operation instructions, match the list below with the letters in Figures 1 & 2. A. B. C. D. E. F. G. H. I. J. K. L. M. N. Wheel Dressing Tool Work Light Eye Shield Grinding Wheel Grinding Wheel Tool Rest Coolant Tray ON/OFF Switch Sanding Belt Tool Rest Sanding Belt Dust Port Power Plug Sanding Belt Tension Knob Sanding Belt Tracking Knob Spark Guard B A I H C D G E F Figure 1. H7760 front view. L M N J K Figure 2. H7760 rear view.
SECTION 1: SAFETY For Your Own Safety, Read Instruction Manual Before Operating this Machine The purpose of safety symbols is to attract your attention to possible hazardous conditions. This manual uses a series of symbols and signal words which are intended to convey the level of importance of the safety messages. The progression of symbols is described below. Remember that safety messages by themselves do not eliminate danger and are not a substitute for proper accident prevention measures.
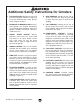
Safety Instructions for Machinery 7. ONLY ALLOW TRAINED AND PROPERLY SUPERVISED PERSONNEL TO OPERATE MACHINERY. Make sure operation instructions are safe and clearly understood. 8. KEEP CHILDREN AND VISITORS AWAY. Keep all children and visitors a safe distance from the work area. 9. MAKE WORKSHOP CHILD PROOF. Use padlocks, master switches, and remove start switch keys. 10. NEVER LEAVE WHEN MACHINE IS RUNNING.
Additional Safety Instructions for Grinders 1. EYE PROTECTION. Grinding causes small particles to become airborne at a high rate of speed. ALWAYS wear safety glasses when using this machine. 8. SIDE GRINDING. Grinding on the side of wheels can cause the them to break and fly apart unless the wheel is rated for side grinding. 2. MOUNTING TO BENCH/STAND. An unsecured grinder may become dangerously out of control during operation. Make sure grinder is FIRMLY secured to a bench or stand before use. 9.
Additional Safety Instructions for Sanders 1. RESPIRATOR AND SAFETY GLASSES. Always wear a respirator and safety glasses while operating the machine. Dust and chips are created when sanding. Some debris will be ejected, becoming hazards to the eyes and lungs. 2. DUST COLLECTION SYSTEM. Never operate the sander without an adequate dust collection system in place and running. 3. CLOTHING. DO NOT wear loose clothing while operating this machine. Roll up or button sleeves at the cuff. 4. HAND PROTECTION.
SECTION 2: CIRCUIT REQUIREMENTS 110V Operation Serious personal injury could occur if you connect the machine to the power source before you have completed the set up process. DO NOT connect the machine to the power source until instructed to do so. Figure 3. Typical type 5-15 plug & receptacle. Amperage Draw The Model H7760 motor draws the following amps under maximum load: Motor Draw ...........................................3.
SECTION 3: SET UP Unpacking Some metal parts may have sharp edges on them after they are formed. Please examine the edges of all metal parts before handling them. Failure to do so could result in injury. The Model H7760 is shipped from the manufacturer in a carefully packed carton. If you discover the machine is damaged after you have signed for delivery, please immediately call Customer Service at (570) 546-9663 for advice.
Items Needed for Set Up To mount the grinder: 1. —Pick a spot on the workbench that will allow enough room to move the size of an anticipated workpiece around the grinder. The operator (and possibly bystanders) should have enough room to stand out of the way. The following items are needed to complete the set up process, but are not included with your machine: Description Qty Wrench 8mm ..................................................... 1 Wrench 13mm ...................................................
Tool Rests The tool rest attaches to the inward side of the guard and provides a surface that must be used to support the workpiece during operation. Certain types of grinding/sanding may require jigs or accessories that will be used with the tool rests to assure the proper angle of the workpiece against the wheel. Failure to install and use the tool rest can lead to serious personal injury! Components and Hardware Required Qty Knob Bolt M5-0.8...............................................
Belt Tracking “Tracking” the sanding belt means to center the belt on its rollers, so that it runs balanced and does not make contact with the sides of the belt cover. To track the sanding belt: 1. DISCONNECT THE MACHINE FROM THE POWER SUPPLY! 2. Rotate the grinding wheel. 3. As you rotate the grinding wheel, watch how the sanding belt rides on the upper roller. If the belt is tracking properly, the sanding belt should be centered between the sides of the belt cover as shown in Figure 8. Figure 9.
SECTION 4: OPERATION Test Run Keep loose clothing rolled up and out of the way of machinery and keep hair pulled back. Disconnect power from the machine when performing any maintenance, assembly or adjustments. Failure to do this may result in serious personal injury. Once mounting is complete and adjustments are done to your satisfaction, you are ready to test the machine.
Before Grinding Operating Grinder The grinder is a safe tool when used properly. In addition to the safety instructions in this manual, the most important safety consideration is to use common sense at all times. What may be okay in one situation, may not be safe in another. The grinder is designed for use with hard metals only. Soft metals and wood products should only be used on the sanding belt, as they will quickly load the grinding wheel surface and ruin its abrasive qualities.
Wheel Care Wheel Dressing Your safety depends, on a large part, on the condition of the wheel during grinding. A wheel in poor condition presents the possibility of breaking apart during rotation, injuring the operator and possibly causing property damage. Dressing restores the grinding wheel with a likenew abrasive quality. Whenever the front surface of the wheel loses its abrasive qualities (loading or polishing), then the wheel should be dressed. A dressing tool is included for this purpose.
Wheel Selection Wheel Inspection The Model H7760 only accepts Type 1 wheels with a 1⁄2" bore. Before mounting a new grinding wheel, it must be inspected. DO NOT assume that a wheel is in sound condition just because it is new—often, damage can occur during shipping, with age, or with exposure to moisture. Aluminum oxide and silicon carbide wheels are marked in a somewhat uniform manner by all major manufacturers. Understanding these markings will help you understand the capabilities of various wheels.
4. An undamaged wheel will emit a clear metallic ring or “ping” sound in each of these spots. A damaged wheel will respond with a dull thud that has no clear tone. 5. If you determine from the ring test that the wheel is damaged, DO NOT use it! 5. Mount the new wheel in the reverse order or as shown in Figure 12. Always make certain there is are paper or fiber discs between the wheel flanges and the wheel itself. Tighten the nut snugly but DO NOT over-tighten. Over-tightening can crack the wheel.
Sanding 4. Grasp the workpiece tightly and properly support it on the tool rest. 5. Press the workpiece evenly against the sanding belt with light pressure (see Figures 14 and 15). DO NOT press hard—let the rotation of the belt do the work The 2" sanding belt on the Model H7760 works great for non-ferrous metals and wood products. A wide variety of belts are also available for many types of materials and stages of finishing.
Replacing Belts 4. Pull the sanding belt tension knob down with one hand and work the sanding belt off the rollers with the other hand as shown in Figure 18. Many belts are available with different grit sizes. To remove/replace a sanding belt: 1. DISCONNECT THE MACHINE FROM THE POWER SUPPLY! 2. Remove the star knob from the right-hand sanding belt cover as shown in Figure 16, and remove the cover. Figure 18. Removing sanding belt. 5.
SECTION 5: ACCESSORIES G7984—Face Shield H1298—Dust Sealed Safety Glasses H1300—UV Blocking, Clear Safety Glasses H2347—Uvex® Spitfire Safety Glasses H0736—Shop Fox® Safety Glasses Safety Glasses are essential to every shop. If you already have a pair, buy extras for visitors or employees.
SECTION 6: MAINTENANCE Grinding Wheels Disconnect power to the machine when performing any maintenance, assembly or adjustments. Failure to do this may result in serious personal injury. General Always be aware of the condition of your machine.
SECTION 7: SERVICE Review the troubleshooting and procedures in this section to fix your machine if a problem develops. If you need replacement parts or you are unsure of your repair skills, then feel free to call our Technical Support department at (570) 546-9663. Troubleshooting SYMPTOM Motor will not start. POSSIBLE CAUSE CORRECTIVE ACTION 1. Low voltage. 2. Open circuit in motor or loose connections. 1. Check power line voltage and correct if necessary. 2.
-24- � �� �� � �� �� � �� �� � �� �� �� � �� �� � � � � �� �� �� � � �� �� �� �� �� �� �� �� �� � �� �� �� �� �� �� �� �� �� �� �� �� �� �� �� �� �� �� �� �� �� �� �� �� �� �� �� �� �� �� �� �� �� �� � �� �� �� �� �� �� �� � �� �� �� �� �� � �� �� �� � ���� �� �� �� � �� �� �� �� �� �� �� �� �� �� �� �� �� �� �� �� �� � �� �� �� �� �� �� �� Parts Breakdown H7760 2" x 27" Belt Sander & 6" Grinder
Parts List REF PART # DESCRIPTION REF PART # 1 PS54M PHLP HD SCR M5-.8 X 45 43 PH7760043 CAPACITOR SUPPORT 2 PH7760002 LEFT WHEEL COVER 44 PLW02M 3 PN16M 45 PH7760045 WHEEL DRESSING TOOL 4 PH7760004 FLANGE 46 PH7760046 LAMP SUPPORT 5 PH7760005 GRINDING WHEEL A36N5V 47 PH7760047 MOTOR HOUSING 6 PS09M 48 PH7760048 CORD & PLUG 7 PH7760007 LEFT SAFE GUARD 49 PH7760049 CORD CLIP 8 PH7760008 SPARK BREAKER 50 PN14M HEX NUT M10-1.
WARRANTY AND RETURNS Grizzly Industrial, Inc. warrants every product it sells for a period of 1 year to the original purchaser from the date of purchase. This warranty does not apply to defects due directly or indirectly to misuse, abuse, negligence, accidents, repairs or alterations or lack of maintenance.
������������� ���������������������������������������������������������������������������������� � ������������������������������������������������������������������������������������ ����� ����������������������� ������������������������������� ���� ��������������������� ���������������������������� ������ ������������������������ ��������������������������� ���������������������������� ������������������������������� ��������������������������� �������������������������������������������������������������
���������������������� ����� ����� ���� ������������������������ ������������� �������������������������� ���������������������� ����������������������������������� ����������������������������������� ������������������������������������� �������������������������������������� ��������������������������������������
����������������������������������������������������������������������� ������������������������������������� ������������������������������������ ����������������� �������������������������������� ��������������������������������� ���� ��������������������� ������������������